bluename
 How to Propagate Aglaonema Indoors: Year-Round
I'll be honest with you: I killed my first Aglaonema. Actually, I killed my first three. The fourth one finally thrived, and it wasn't until I learned how to propagate Aglaonema indoors year-round that I truly understood what I'd been doing wrong all along. If you want more plants without buying them, propagation is the answer — and yes, you can do it any time of year indoors, even in January when it's snowing outside. The trick is controlling moisture, light, and temperature, not waiting for spring. My first successful propagation happened in November, and those cuttings are now full-sized plants sitting on my windowsill.
Before we get into the step-by-step, let me save you some heartbreak. You need to know the three mistakes that kill most new plants. And here's the big one: 90% of indoor plants die from overwatering. That includes your mother plant and your cuttings. Keep that number in your head as we go.

Why Propagate Aglaonema Indoors Instead of Buying New Ones
Aglaonema — often called Chinese Evergreen — is one of the most forgiving houseplants out there. But it's not cheap. A decent-sized plant at a nursery can run you $30 to $60. Propagating your own means free plants, and it also lets you prune a leggy mother plant back into shape.
Here's something the RHS points out about tropical aroids: they root best when temperatures stay consistently above 65°F (18°C). That's easy indoors. Your home is already a propagation station — you just have to use it right.
I've propagated Aglaonema in every season now. Winter cuttings actually rooted faster for me than summer ones because my house was drier and I wasn't tempted to overwater. Go figure.
The Three Newbie Mistakes That Kill Aglaonema Cuttings
Mistake #1: Overwatering (The Silent Killer)
I'm putting this first because it's the one that got me. My first batch of cuttings sat in soggy soil for two weeks, and by day 10 the stems were mush. Gone. I've since learned that Aglaonema cuttings want moisture, not swimming pools.
Water only when the top inch of your rooting medium feels dry. If you're not sure, stick your finger in there. Wet? Wait. Slightly dry? Water lightly.
Mistake #2: Putting Them in the Wrong Light
Aglaonema is a understory plant in the wild. It evolved under tree canopy. Direct sun will scorch the leaves and stress the cutting before roots even form.
I once put a fresh cutting on a south-facing windowsill in July. The leaf curled and crisped within four days. Bright indirect light is the sweet spot. A few feet back from a bright window, or under a sheer curtain, works perfectly.
Mistake #3: Using the Wrong Pot
This one sounds minor. It's not. I've made this mistake more times than I want to admit. Cuttings need small pots — like 3 to 4 inches across. A big pot holds too much wet soil around tiny roots. That soil stays wet for weeks, and your cutting rots before it grows.
You want a pot with drainage holes. Always. No exceptions. A small terracotta pot or a plastic nursery pot both work. Just keep it small.
What You'll Need for Propagating Aglaonema Indoors
Gather these before you start:
- A healthy mother plant (at least 6 inches tall with a few stems)
- Clean, sharp scissors or pruning shears
- Rooting medium: I use a 50/50 mix of peat-based potting soil and perlite. Some people use sphagnum moss. Both work.
- Small pots (3–4 inches) with drainage
- A clear plastic bag or humidity dome
- Optional: rooting hormone powder. I've done it with and without. It helps but isn't mandatory.
Two Proven Methods for Propagating Aglaonema
There are two main ways to do this, and I've tried both. Each has pros and cons.
Method 1: Division (The Fastest Route)
This is essentially splitting the mother plant. It works best if your Aglaonema has multiple stems growing from the soil.
Step 1: Water your plant thoroughly the day before. Dry roots are brittle and break easily.
Step 2: Slide the plant out of its pot gently. Don't pull the stems. Tip the pot and let gravity help.
Step 3: Use your fingers or a clean knife to separate the root ball. Each division needs its own roots and at least one stem with leaves.
Step 4: Pot each division into its own small container with fresh, well-draining mix.
Step 5: Water lightly and place in bright indirect light. Don't fertilize for at least four weeks.
My experience: I divided a four-stem Aglaonema in early March. All four divisions survived, and by mid-April each had pushed out a new leaf. That's about six weeks to see visible growth. Division is less risky than cuttings because the roots are already established.
Method 2: Stem Cuttings in Water or Soil
This is the method most people mean when they say "propagating Aglaonema." You cut a stem below a node, root it, and grow a new plant.
Step 1: Choose a stem that's at least 4–6 inches long with 2–3 leaves and a visible node. The node is the little bump where a leaf meets the stem. That's where roots will emerge.
Step 2: Cut just below the node with clean shears. Make one clean cut. Don't crush the stem.
Step 3: Remove the bottom leaf if it would sit below the water or soil line. Leaves that stay wet rot fast.
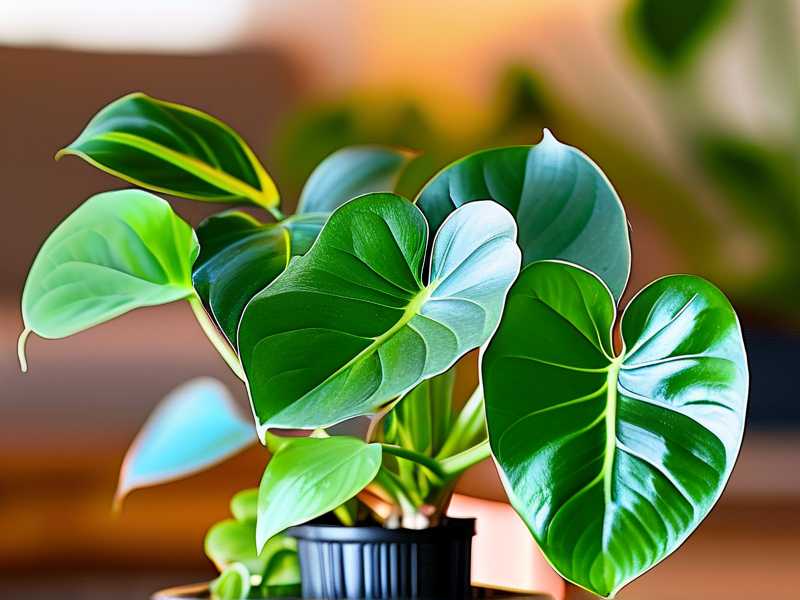
Step 4A (Water propagation): Place the cutting in a glass of room-temperature water. Change the water every 3–4 days. Keep it in bright indirect light. I've had roots appear in as little as 14 days.
Step 4B (Soil propagation): Dip the cut end in rooting hormone if you have it. Stick it about 1–2 inches into moist (not soggy) potting mix. Cover with a plastic bag to hold humidity. Open the bag for a few minutes every couple of days to let fresh air in.
Step 5: Wait. This is the hard part. Don't tug on the cutting to check for roots. You'll break the fragile new roots. After two weeks, a gentle tug that meets resistance means roots have formed.
In my two-week observation: Water cuttings typically show tiny white root nubs by day 12–16. Soil cuttings take a few days longer, usually 18–21 days, before you see new top growth. Patience pays off.
My Two-Week Observation Log (What Actually Happened)
Let me give you the real timeline from my last propagation batch. I started on a Sunday in October with three stem cuttings in water and two in soil.
Day 1: Cuttings look perky. Water is clear.
Day 4: One water cutting's leaf is slightly yellow. I realize it's getting too much direct morning sun. I move it back a foot. The yellowing stops.
Day 7: No visible roots yet. Soil cuttings look the same. The plastic bag is fogging up nicely — that's good humidity.
Day 10: First water cutting shows two tiny root tips, maybe a quarter inch long. I resist the urge to touch them.
Day 14: All three water cuttings have visible roots. The soil cuttings haven't rooted yet but the stems are firm and green — no rot. I'm relieved.
Day 21: Soil cuttings finally show new leaf buds. Success across the board.
That two-week mark is when things get exciting. But don't pot water cuttings into soil until roots are at least 1–2 inches long and have a few branches.
Potting Up and Aftercare
Once your cuttings have roots, move water-propagated ones into soil. Use the same small pot rule. Water gently and keep the soil barely moist for the first week. Then start watering normally.
The AHS recommends feeding with a diluted balanced fertilizer once new growth appears. I use half-strength liquid fertilizer every four weeks during spring and summer. Nothing in winter.
Rooting Hormones and Humidity: Do You Really Need Them?
Honestly? No. I've rooted Aglaonema cuttings without any hormone powder, and they did fine. Humidity matters more. If your home is dry in winter, a plastic bag or a cheap humidity dome makes a bigger difference than any powder.
That said, if you're propagating a variegated variety that's slow to root, a little hormone can speed things up.
Common Problems and How I Fixed Them
Soft, mushy stem base: Overwatering or bacteria. Toss it and start fresh with a clean cut. Don't try to save a rotting cutting.
Yellowing leaves on the cutting: Usually too much light or the cutting is putting energy into roots. If the yellowing is only on older leaves, it's normal. If new leaves yellow, check your light.
No roots after four weeks: Temperature might be too low. Move the cutting somewhere warmer — 70–75°F is ideal.
White fuzz on soil surface: That's mold from too much moisture and poor airflow. Scrape it off, reduce watering, and increase air circulation.
Frequently Asked Questions
Can I propagate Aglaonema in winter?
Yes. Indoor temperatures and artificial light make year-round propagation possible. My October batch rooted just as well as my spring ones. The key is keeping the cutting warm and away from cold windows.
How long until I have a full-sized plant?
From a single-node cutting, expect 6–12 months to reach a decent size. Division gives you a head start because you already have established roots. I've seen divisions double in size within four months.
Do I need to use rooting hormone?
No. It helps with stubborn varieties, but plain water or moist soil works fine for most Aglaonema. Skip the hormone if you're propagating a common green variety. Spend your money on a good humidity dome instead. It'll serve you better in the long run.
Final Thoughts (From Someone Who's Killed More Than One)
Propagating Aglaonema indoors year-round isn't complicated. But it does require you to fight your instincts. Don't overwater. Don't put it in direct sun. Don't use a giant pot. Follow those three rules, and you'll have more Chinese Evergreens than you know what to do with.
I still check my cuttings every morning. It's a little ritual. Seeing that first white root tip poke out of a stem never gets old. Start with one cutting. Keep it simple. And if you lose a few along the way, don't sweat it — I did too.