 bluename
 How to Propagate Pink Aglaonema in Water: Keep Color
I'll be honest with you right from the start: yes, you can root pink aglaonema cuttings in plain tap water on your kitchen counter, and the whole thing takes about two to three weeks before you see real roots. The trick to keeping that bubblegum-pink variegation instead of watching it fade to sad, washed-out green comes down to three things — bright indirect light, warm room temperature, and changing the water before it turns cloudy. That's it. That's the answer. Everything below is just me showing you exactly how I got there, including the mistakes that cost me two plants before I figured it out.
I'm not a botanist. I'm a plant person with a windowsill full of pots, a bad habit of over-checking roots, and a graveyard of learning experiences behind me. So if you're here because your pink aglaonema is getting leggy, or you want more of that gorgeous pink without paying nursery prices, you're in the right place.
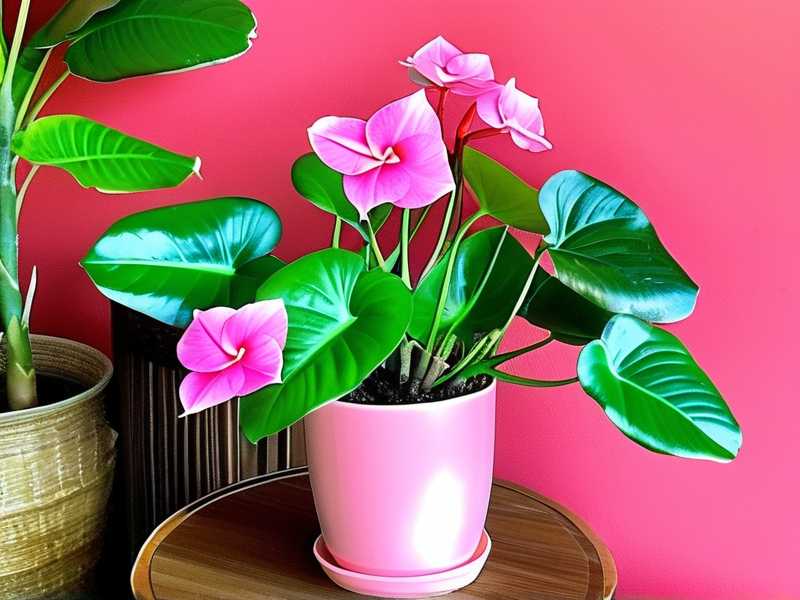
Why Water Propagation Works So Well for Pink Aglaonema
Pink aglaonema — often sold as Aglaonema commutatum cultivars with names like 'Pink Splash' or 'Lady Valentine' — is honestly one of the easier houseplants to root in water. The stems hold a lot of moisture, and the nodes where leaves attach are packed with latent root tissue just waiting for the right conditions.
简单来说, you're giving the plant a signal: "Hey, there's moisture right here, send out roots."
But here's the catch nobody tells you at the beginning. Water roots and soil roots are not the same thing. Water roots are thinner, more fragile, and adapted to a wet environment. When you eventually move the cutting to soil, it has to grow a whole new root system. That transition is where a lot of people lose their plants.
I lost my first pink aglaonema that exact way. Rooted beautifully in water, looked fantastic, then I potted it up and watched it collapse within ten days. I'll get into how to avoid that later, because it still stings a little.
The Color Question: Why Pink Fades to Green
This is the part that makes pink aglaonema different from your standard green one.
The pink comes from variegation — basically, some cells in the leaf don't produce as much chlorophyll, so the pink pigments (and lighter green tones) show through instead. Chlorophyll is what makes leaves green, and it's also what the plant uses for photosynthesis.
Now think about it from the plant's perspective. If it's not getting enough light, it desperately needs more chlorophyll to survive. So it starts producing more of it — and your pink fades. The plant is essentially "fixing" itself by turning green.
The RHS puts it simply in their houseplant guidance: variegated cultivars need brighter conditions than their all-green counterparts because they have less chlorophyll to work with. Less chlorophyll means they can't afford to sit in a dim corner.
So the rule for keeping color is: more light than a green aglaonema, but never direct sun. Direct sun scorches those delicate pink leaves and can bleach them out even faster than low light does. Bright indirect light — a few feet back from an east or south window, or behind a sheer curtain — is the sweet spot.
I tried a north-facing windowsill once because I read aglaonemas "tolerate low light." The new leaves came out almost entirely green. Lesson learned. Tolerating low light and thriving in it are two very different things.
When to Take Your Cutting
Timing matters more than most guides admit.
The best time to propagate is late spring or early summer, when the plant is actively growing. That's when it has the most energy to push out new roots. I've taken cuttings in winter out of impatience — they sat there for almost two months doing absolutely nothing. Not dead, just stalled.
You want a stem section with at least two or three nodes. A node is the little bump or ring on the stem where a leaf used to be or still is. This is where roots emerge. If your cutting doesn't have a node, it will never root, no matter what you do.
A few more things I check before cutting:
- The mother plant should be healthy, not stressed or recently repotted
- Use clean, sharp scissors or pruning shears — I wipe mine with rubbing alcohol first
- Cut just below a node at a slight angle, about a quarter inch down
The cutting itself should be roughly four to six inches long. Too short and it doesn't have enough stored energy. Too long and it can't support all those leaves while trying to grow roots.
My Step-by-Step Water Propagation Method
This is exactly what I do now, after plenty of trial and error.
Step 1: Prepare the cutting properly. Strip the lower leaves so that at least one or two nodes are bare and will sit underwater. If leaves stay submerged, they rot — and rotting leaves will foul the water fast.
Step 2: Pick the right container. I use a clear glass jar or a small glass bottle. Clear glass lets me monitor root growth without pulling the cutting out every day, which stresses it. The opening should be wide enough to fit the stem but narrow enough to hold it upright, so the leaves stay above water.
顺带一提, don't use a container that's too big. A huge jar means more water, which means it takes longer for you to notice it's getting funky.
Step 3: Use the right water. Tap water is fine in most places, but if yours is heavily chlorinated, let it sit out overnight so the chlorine dissipates. I filter mine now because I noticed the tips of my cuttings browning slightly — turned out to be a chlorine sensitivity thing.
Room temperature water, always. Cold water shocks the cutting.
Step 4: Position it correctly. Only the nodes and the bottom inch or two of stem should be underwater. Everything above — stem and leaves — stays dry.
Step 5: Place it in bright indirect light. This is the color-preservation step. A spot that gets a few hours of gentle morning sun, or bright filtered light all day, works best. If you can read a book comfortably without turning on a lamp, that's roughly the right light level.
Step 6: Change the water every three to five days. This is non-negotiable. Stagnant water grows bacteria and algae, and that's how cuttings rot before they root. I change mine every Monday and Thursday — it's on my phone calendar now, that's how seriously I take it.
Step 7: Wait. Roots usually show up at the nodes within two to three weeks in warm weather. Sometimes faster, sometimes slower. Don't poke at them, don't pull the cutting out to check constantly. I know it's tempting. I've done it. Just leave it alone.
My Two-Week Observation Log
I actually kept notes on my most recent batch, so here's what it really looked like.
Week 1, Days 1-3: Nothing visible. The cutting looked exactly the same as the day I cut it. I resisted the urge to check the nodes.
By Day 5, I noticed a tiny white bump forming at the lowest node. This is the root primordium — the very beginning of a root. I got way too excited about a bump.
Week 1, Days 5-7: The bump got slightly bigger. The water stayed clear since I was changing it regularly. The leaves stayed firm and the pink color held steady.
Week 2, Days 8-10: First actual root emerged — thin, white, maybe a quarter inch long. This is when I stopped worrying and started planning where the new plant would go.
By Day 12, there were two roots forming. The longer one was about half an inch. The pink variegation on the original leaves hadn't faded at all, because the cutting was sitting in proper bright indirect light.
Week 2, Days 13-14: Roots doubled in length. The cutting was clearly committed. I could see tiny root hairs forming along the length of the roots — a good sign of healthy growth.
One thing I noticed: the cutting that sat closest to the window had noticeably more root growth than the one further back. Light drives everything.
Three Mistakes That Kill Most Cuttings
I've made all three of these. Some of them more than once.
Mistake 1: Overwatering (Yes, Even in Water)
Here's the thing — "90% of indoor plants die from overwatering" is one of those lines you hear so often it stops meaning anything. But it applies in a strange way to water propagation too.
You can drown a cutting in water. If you submerge too much stem, or leave rotting leaves in the jar, or never change the water, the cutting suffocates and rots. Roots need oxygen, even water roots. They get it from dissolved oxygen in fresh water. Stagnant water has almost none.
I killed a cutting this way — left it in cloudy water for over a week because I was busy. The stem went soft and brown from the bottom up. Once rot sets in at the stem, there's no saving it.
The fix: change water every three to five days, keep only the nodes submerged, remove any leaves that fall below the waterline immediately.
Mistake 2: Wrong Light Position
Too little light and your pink fades, growth stalls, and roots take forever. Too much direct light and the leaves scorch — brown crispy patches that never heal.
I put one cutting on a south-facing windowsill in July thinking "aglaonemas like sun." Wrong. The leaves got sunburned within four days. The pink turned brownish, the leaf edges curled, and the cutting never recovered. It didn't die immediately, but it never rooted properly either. Just sat there looking miserable until I gave up on it.
For pink aglaonema specifically, the light needs to be bright but filtered. East-facing windows are ideal. South and west windows work if you pull the plant back three or four feet or use a sheer curtain. North windows are usually too dim to maintain pink coloration.
The AHS recommends bright, indirect light for most variegated tropical houseplants, and that matches what I've seen in practice. Fighting this rule just wastes time.
Mistake 3: Using the Wrong Container
This one sounds minor but it genuinely matters.
I tried rooting a cutting in a dark ceramic cup once because it looked cute on my shelf. Two problems: I couldn't see when roots formed (so I kept pulling the cutting out to check), and I couldn't see when the water got cloudy (so it sat dirty for days).
Wide-mouth jars are also a problem. The cutting falls over, leaves end up underwater, rot begins. I've lost cuttings to this — they just slump sideways into the water overnight and by morning the leaf is mushy.
The fix: clear glass, narrow neck, just big enough for the stem. A clean glass bottle or a small propagation vase works perfectly. You don't need fancy equipment. A washed-out jam jar does the job.
I've also seen people use plastic wrap over a glass to hold the cutting upright — that works too if the jar opening is too wide.
How Long Until Roots Are Ready for Soil?
This is where patience pays off.
You want roots that are at least two to three inches long before you even think about moving the cutting to soil. I know it's tempting to pot up early — everyone does it. I did it with my second-ever cutting. It didn't survive.
Thin, short water roots can't handle soil conditions. They need to be long enough and branched enough to transition. If the roots are still translucent and barely an inch long, they're not ready.
I generally wait four to six weeks in water before potting up. Some people wait longer. There's no rush — a cutting can live in water for months as long as you keep changing it. I've had one in water for almost three months and it was perfectly happy.
Moving from Water to Soil Without Losing the Plant
Here's where I lost my first pink aglaonema, so listen up.
When I potted that cutting, I did everything wrong. I used regular potting soil straight from the bag, watered it heavily to "settle the roots," and put it in the same bright spot it had been in as a water cutting. Within a week the leaves drooped. Within two weeks they yellowed and fell off. By day ten the stem was mush.
What I should have done:
- Used a light, airy mix — potting soil cut with perlite and orchid bark
- Kept the soil slightly moist but never soggy for the first two weeks
- Placed the new pot in slightly lower light for the first week to reduce stress
- Not watered on a schedule — checked the soil first
The transition from water to soil is shock. The plant has to grow an entirely new type of root. Some leaf drop is normal. But if the stem goes soft, that's rot, and it's over.
I've since done this successfully many times. The key is a chunky, well-draining mix and resisting the urge to water constantly. That "90% of indoor plants die from overwatering" statistic hits hardest right after repotting.
Keeping the Pink: Long-Term Care Tips
Once your cutting is established in soil, keeping that pink color is about consistency.
Light: Bright indirect, always. If new leaves come out green, move the plant closer to the window. If they come out scorched, move it back.
Temperature: Pink aglaonema likes it warm — between 65°F and 80°F. Cold drafts cause stress, and stressed plants lose variegation. I keep mine away from AC vents and drafty windows in winter.
Fertilizer: Feed lightly during growing season. I use a diluted balanced fertilizer once a month in spring and summer. Overfeeding can actually cause variegation to fade because the plant has more than enough nutrients and doesn't need to "optimize" its leaves.
Humidity: Higher humidity keeps leaves looking lush. I run a small humidifier nearby in winter when the air gets dry. Alternatively, a pebble tray with water underneath the pot works fine.
Pruning: If the plant gets leggy or the pink starts fading on older leaves, you can prune it back. This encourages bushier growth and new leaves — which usually come in with better color if the light conditions are right.
A Few More Things I've Learned Along the Way
Not every cutting makes it, and that's normal. I used to take it personally. Now I just take two or three cuttings at a time so I'm not depending on a single one.
The pink color is genetic — you can't make a green aglaonema turn pink by changing the light. But you can absolutely make a pink one turn green by keeping it too dark. Light is the lever you control.
接触久了就发现, the plants that do best are the ones I fuss over the least. Consistent conditions beat constant adjustments.
Don't swap the water for "plant food" or rooting hormone unless you know what you're doing. Plain water works. Rooting hormone can speed things up but isn't necessary for aglaonema. I've done it both ways and honestly the difference was minimal.
I also tried propagating in a dark cupboard once (I read somewhere that roots grow faster in darkness). Bad idea. The cutting survived but the leaves lost color fast, and the stem got weak. Light matters for the whole cutting, not just the leaves.
FAQ
Can I propagate pink aglaonema in water year-round?
You can, but it works best in spring and summer when the plant is actively growing. I've rooted cuttings in winter — they take much longer and sometimes just stall. If you're propagating in cooler months, be patient and keep the cutting warm.
Why are my cutting's leaves turning yellow in water?
Usually it's too much stem submerged, rotting leaves in the water, or water that hasn't been changed often enough. Yellow leaves at the bottom are sometimes normal as the cutting redirects energy to root growth. But if the stem itself goes soft and brown, that's rot and you need to start over with a fresh cutting.
How do I keep the pink color after potting it in soil?
Same rule as in water: bright indirect light. If new leaves come out green, the plant needs more light. If they scorch, it needs less. Temperature stability and not overfeeding also help. The color is driven by light intensity, so that's your main control.





