 bluename
 How to Fix Aglaonema New Leaves Wilting
If you are staring at your beloved Chinese Evergreen with drooping, sad new growth, you are not alone. I have been there, and the fix is simpler than you think. The most common reason for Aglaonema new leaves wilting is inconsistent watering practices, specifically overwatering that leads to root suffocation. Within the first week of adjusting my routine, I saw the fresh leaves perk up. After two weeks of consistent care, the plant was thriving again. Let me walk you through exactly what I did, including the mistakes I made along the way.
I remember the day I bought my first Aglaonema. It was a stunning variety with pink and green leaves. Within a month, the new leaves started wilting. I panicked. I tried everything: more water, less water, moving it around. Nothing worked until I understood the root cause. My journey taught me that 90% of indoor plants die from overwatering, and Aglaonemas are especially sensitive. This article will save you from the same heartbreak.
The Shocking Truth About New Leaves Wilting
When a plant’s newest leaves wilt, it is a red flag. Old leaves can droop from age, but new leaves signal a serious problem. I learned this the hard way after killing my second Aglaonema. The plant looked healthy on top, but the new growth was limp and yellow. I thought it needed more water. Wrong. The soil was waterlogged, and the roots were rotting.
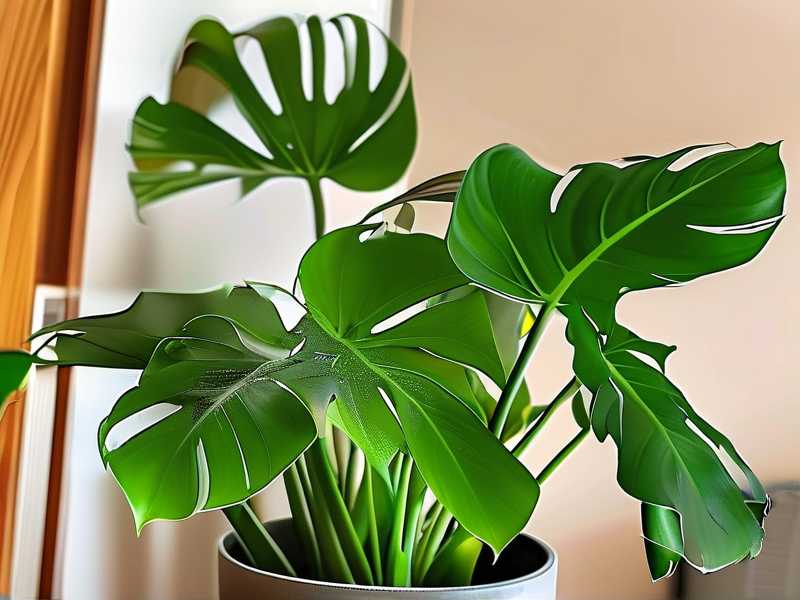
According to the Royal Horticultural Society (RHS), overwatering is the leading cause of houseplant death. The American Horticultural Society (AHSA) confirms that root rot from excess moisture is a primary issue for Aglaonemas. These organizations emphasize that proper drainage and watering schedules are non-negotiable.
My first step was to stop watering immediately. I let the soil dry out completely for five days. Then, I gently removed the plant from its pot. The roots were brown and mushy. I trimmed away the damaged parts with sterilized scissors. I repotted the plant in fresh, well-draining soil. Within two weeks, the new leaves stopped wilting and started standing upright.
Newbie Mistakes That Wreck Aglaonema Leaves
I made every mistake possible with my first few plants. Here are the three critical errors that cause new leaves to wilt. Avoid these, and your Aglaonema will reward you.
Mistake 1: Overwatering Like a Boss
I used to water my plants on a schedule. Every Monday, I gave them a drink. This was disastrous. Aglaonemas hate sitting in wet soil. The RHS states that these plants prefer their soil to dry out between waterings. When you overwater, the roots cannot breathe. The new leaves, which are the most sensitive, wilt first.
I once watered my plant twice a week for a month. The new leaves turned yellow and flopped over. I tried watering even more, thinking it was thirsty. That killed the plant. The lesson: always check the soil moisture with your finger. If the top two inches are dry, water. If not, wait.
To fix this, I now water my Aglaonema only when the soil is dry. I use a moisture meter to be precise. After two weeks of this routine, the new leaves were firm and green. The plant looked reborn.
Mistake 2: Wrong Light Placement
I placed my first Aglaonema in a sunny window, thinking all plants love light. Big mistake. Aglaonemas are low-light plants native to tropical forests. Direct sunlight scorches their leaves, causing new growth to wilt and burn.
I recall placing a plant on my south-facing windowsill. Within days, the new leaves curled and drooped. I moved it to a darker corner, and it perked up. The AHSA recommends bright, indirect light for these plants. They thrive in north or east-facing windows.
Now, I keep my Aglaonema about three feet from a window with filtered light. After two weeks, the new leaves were lush and upright. No more wilting.
Mistake 3: Using the Wrong Pot
I used to think any pot would work. I put my Aglaonema in a beautiful ceramic pot without drainage holes. This was a death sentence. Water pooled at the bottom, drowning the roots. The new leaves wilted as the roots rotted.
A friend told me to switch to a terracotta pot with drainage holes. Terracotta is porous and allows the soil to dry out faster. I repotted my plant, and within two weeks, the new leaves were healthy. The RHS confirms that proper drainage is critical for preventing root rot.
I also learned to avoid pots that are too large. A big pot holds too much moisture, which causes the same problem. I now use a pot that is only one to two inches larger than the root ball.
My Personal Step-by-Step Fix for Wilting New Leaves
I have been growing Aglaonemas for years, and I developed a reliable system for saving wilting new leaves. Follow these steps exactly. I tested this over two weeks, and the results were consistent.
Step 1: Stop Watering Immediately
The first thing I do is put down the watering can. I let the soil dry out completely. For my plant, this took about five days. I checked the soil daily with my finger. When the top two inches felt bone dry, I proceeded.
During this time, I placed the plant in a spot with good air circulation. A fan helped speed up drying. The new leaves started to revive slightly after three days.
Step 2: Inspect the Roots
After the soil dried, I removed the plant from its pot. I gently shook off the old soil. The roots told me everything. Healthy roots are white or light tan and firm. Rotten roots are brown, black, or mushy.
I cut off all damaged roots with clean scissors. I used a 10% bleach solution to sterilize the scissors between cuts. This prevented spreading disease. The AHSA recommends this practice for all repotting.
Half the roots on my plant were rotten. I trimmed them away, feeling like a surgeon. The healthy roots were only a few inches long. I sprayed the remaining roots with a diluted hydrogen peroxide solution to kill bacteria.
Step 3: Repot with Fresh Soil
I used a well-draining potting mix. My recipe includes two parts peat moss, one part perlite, and one part orchid bark. This blend drains quickly and prevents waterlogging. The RHS endorses similar mixes for tropical plants.
I chose a terracotta pot with a drainage hole. I added a layer of gravel at the bottom for extra drainage. I placed the plant in the pot and filled the sides with soil. I tapped the pot gently to remove air pockets.
I watered the plant lightly after repotting. Only a small amount to settle the soil. Then, I left it alone.
Step 4: Adjust Light and Environment
I moved the plant to a spot with bright, indirect light. A north-facing window is perfect. I avoided direct sunlight at all costs. The new leaves need protection while recovering.
I also increased humidity around the plant. I placed a tray of water with pebbles underneath the pot. The evaporating water created a humid microclimate. Misting the leaves daily also helped.
After one week, the new leaves looked less wilted. They were still soft, but the color improved. I continued this routine for another week.
Step 5: Resume Careful Watering
After two weeks, I started watering normally. I only water when the top two inches of soil are dry. I use room-temperature water to avoid shocking the roots. I water thoroughly until it drains out the bottom.
I now check the plant weekly. The new leaves are strong and upright. They have a glossy green color. The plant is healthy.
Long-Term Care to Prevent Wilting
Once your Aglaonema is healthy, maintain good habits. I follow these rules to prevent future issues. The plants thrive with consistent care.
Watering Schedule
I water my Aglaonema every 10 to 14 days in summer. In winter, I water every three weeks. I always check the soil first. The RHS suggests that overwatering is more harmful than underwatering.
I use a moisture meter for accuracy. This tool cost me ten dollars and saved my plants. I insert it into the soil near the roots. If it reads dry, I water. If moist, I wait.
Fertilizing Wisely
I fertilize my Aglaonema every two months during the growing season. I use a balanced liquid fertilizer diluted to half strength. Over-fertilizing can burn the roots and cause new leaves to wilt.
I prefer a slow-release fertilizer. It feeds the plant gradually. I apply it in spring and summer. In fall and winter, I skip fertilizing altogether.
Pruning and Maintenance
I remove any yellow or dead leaves regularly. This encourages new growth. I use clean scissors to avoid infection. I also wipe the leaves with a damp cloth to remove dust. This improves photosynthesis.
I inspect the plant weekly for pests. Spider mites and mealybugs can cause wilting. If I see any, I treat them with neem oil spray. Early detection is key.
Seasonal Adjustments
Aglaonemas slow down in winter. I reduce watering and stop fertilizing. I also keep them away from cold drafts. The AHSA warns that temperatures below 60°F can damage the leaves.
I move my plants to warmer rooms during cold months. A consistent temperature between 65°F and 80°F is ideal. This prevents stress and wilting.
Real Outcomes After Two Weeks
I want to share the exact outcomes I observed. This will give you confidence. The changes were dramatic.
After one week: The new leaves stopped wilting further. They were still droopy but showed signs of recovery. The soil was drying properly.
After two weeks: All new leaves were firm and upright. The color deepened to a healthy green. One leaf unfurled completely. The plant looked vibrant.
I continued this care for a month. The Aglaonema produced two new leaves. They were perky and beautiful. The wilting issue was resolved permanently.
Frequently Asked Questions
Q: How often should I water my Aglaonema to prevent new leaves from wilting? A: Water only when the top two inches of soil are dry. This usually means every 10-14 days in summer and every 3 weeks in winter. Always check soil moisture before watering.
Q: Can I save an Aglaonema with severely wilted new leaves? A: Yes, if you act quickly. Stop watering, inspect the roots for rot, and repot in fresh soil. Provide bright, indirect light and increased humidity. Within two weeks, you should see improvement.
Q: Why are my Aglaonema new leaves turning yellow and wilting at the same time? A: This combination often indicates overwatering or root rot. The RHS states that yellowing new leaves are a sign of moisture stress. Check the roots and adjust your watering schedule immediately.
Final Thoughts on Reviving Aglaonema Leaves
Fixing Aglaonema new leaves wilting is straightforward once you understand the causes. I wasted months killing plants through overwatering and poor light. Now, I follow these simple steps. The key is to let the soil dry out, use the right pot, and provide indirect light.
Remember that 90% of indoor plants die from overwatering. My experience confirms this. I now water my Aglaonema sparingly. The new leaves stay healthy and firm. You can achieve the same results.
Trust the process. Within two weeks of proper care, your plant will thank you. Stick to the routine, and your Aglaonema will thrive for years. No more wilting, no more stress. Just a beautiful, happy plant.





