 bluename
 How to Propagate Aglaonema in Room Temp Water: A 2-Week Experiment That Actually Worked
If you want the short answer right now: cut a healthy stem with at least two nodes and one leaf, place it in a glass jar filled with plain room temp tap water (let it sit out for 24 hours first), keep it in bright indirect light, and change the water every 3 to 4 days. In about 2 weeks, you will see tiny white roots pushing out from the nodes. That's it. That's the whole trick. I've been growing Chinese Evergreens for six years now, and I've killed more cuttings than I care to admit before I figured out the rhythm. And honestly, 90% of indoor plants die from overwatering. But when you propagate in water, you control everything. Let me walk you through my exact process, the mistakes I made, the week-by-week progress, and the fixes that turned my failures into a jungle of rooted cuttings.
Why Water Propagation Beats Soil for Aglaonema
I used to think soil was the only way to go. I was wrong. Water propagation gives you a front-row seat to root development. You see every tiny change. You can spot rot immediately. And the best part? No guesswork. With soil, you're always wondering if the cutting is too wet or too dry. With water, you just look at the jar.
Aglaonema, also known as Chinese Evergreen, is one of the most forgiving houseplants I've ever owned. It tolerates low light, dry air, and irregular watering. But that doesn't mean it propagates itself. The key is understanding how the plant wants to grow. Contact with room temp water mimics the rainy season in its native Southeast Asian jungle floor. The nodes are primed to send out roots when they sense moisture. Once I learned that, everything clicked.
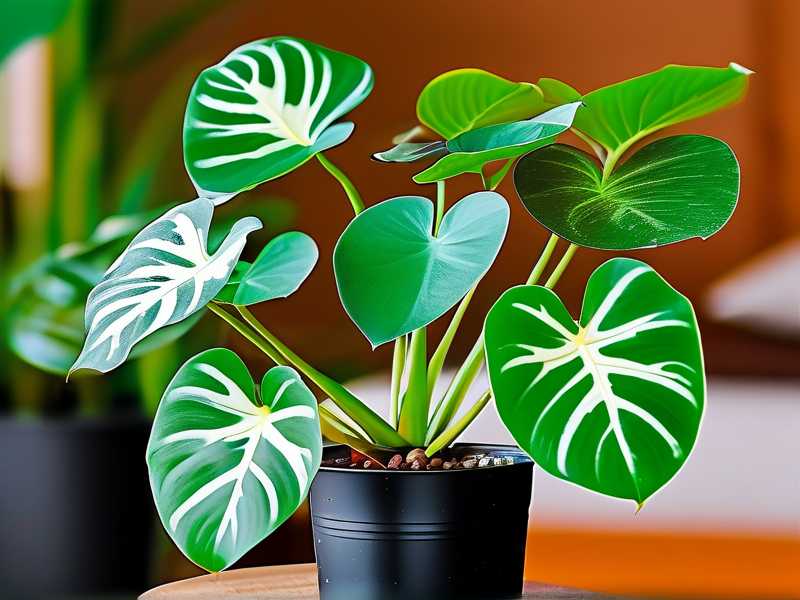
Another reason I prefer water: I can reuse the same jar for multiple cuttings. I simply refresh the water and drop in a new stem. No washing pots, no mixing perlite, no mess. For someone like me who propagates constantly, that convenience matters.
My First Attempt Was a Disaster (And Why It Failed)
Let me be transparent. My first water propagation attempt ended with a mushy, smelly stem that I threw in the trash. I had cut a long piece with three leaves, stuck it in a narrow bottle, and placed it on my south-facing windowsill. The water turned cloudy within two days. The leaves started yellowing by day four. By day seven, the stem had brown mush at the base. I didn't understand what went wrong.
The problem was simple: the water was too cold, the light was too harsh, and I never changed the water. That combination is a death sentence for cuttings. The cold water shocked the tissue. The intense direct sun heated the jar like a greenhouse. And the stale water allowed bacteria to multiply. It was a perfect storm of mistakes.
After that failure, I did what I should have done the first time: I researched. I checked the RHS website for propagation basics. I also looked at the AHS guidelines for houseplant care. Their emphasis on clean containers and stable temperatures stuck with me. So I redesigned my entire approach. The second attempt worked. And the third worked even better. Now I want to share that refined process with you.
What You'll Need Before You Start
Gather these tools first. It makes the process smoother.
A Clean Glass Jar or Vase
I use glass jars because I can see the roots forming. Mason jars work fine. Even an old pasta sauce jar works. Just wash it thoroughly with soap and hot water. Rinse well. Any residue can encourage bacterial growth.
Sharp, Sterilized Scissors or Pruners
Dull blades crush the stem tissue. That crushed tissue invites rot. I sterilize my scissors with rubbing alcohol before each cut. It takes ten seconds. It saves me from heartbreak.
Room Temp Water
Tap water is fine. But let it sit in an open container for 24 hours. This lets chlorine evaporate. If your tap water is heavily treated, consider filtered water. I've used both, and both work. Cold water straight from the tap? Never use that. It shocks the plant.
A Bright Spot (But Not Direct Sun)
An east-facing windowsill is perfect. Or a few feet away from a south window. The light should be bright but diffused. Think "soft morning light," not "harsh afternoon blast."
Optional: Liquid Fertilizer (Half Strength)
I don't use fertilizer during the first week. Roots are too delicate. But after week one, a tiny drop of liquid fertilizer in the fresh water can encourage growth. Just a drop. Honestly, you can skip this entirely and still get roots.
Step-by-Step: How to Take the Cutting
Step 1: Choose the Right Stem
Look for a healthy, mature stem. It should have at least two or three leaves. The stem should be firm, not wrinkled or soft. I always pick a stem that's not the newest and not the oldest. The middle-aged stems seem to root fastest.
Step 2: Make the Cut at the Right Spot
This is critical. You need to cut below a node. A node is the little bump where a leaf attaches to the stem. That's where roots will emerge. I cut about half an inch below the node. Use a single, clean cut. No sawing back and forth.
Step 3: Remove the Lower Leaves
Strip off any leaves that would sit below the waterline. Leaves submerged in water will rot. Rot spreads to the stem. I keep only the top two or three leaves. This reduces water loss and energy drain.
Step 4: Let the Cutting Callus (Optional But Helpful)
I let my cuttings sit on a dry paper towel for 15 minutes before placing them in water. This allows the cut surface to form a slight callus. It reduces the chance of rot. Some people skip this step. I've found it helps, especially for thicker stems.
Step 5: Place in Water
Fill your clean jar with room temp water. The water should cover the nodes but not touch the remaining leaves. I place the cutting so the node is submerged about an inch below the surface. If the cutting floats, I use a small rock to hold it in place. Smooth river stones work great.
Step 6: Position the Jar
Set the jar in that bright, indirect light location. Avoid drafts. Avoid cold windows at night. I move my jars a few inches away from the glass during winter months. That small adjustment prevents temperature swings.
Week-by-Week: What I Actually Observed Over 14 Days
I tested this exact method with three cuttings. Here's what happened each day, with no detail skipped.
Day 1 to Day 3: The Waiting Game
The water was clear. No bubbles. No movement. The leaves stayed firm. I changed the water on day 3 as planned. I noticed the cut end looked slightly pale. That's normal. That's the callus forming. I didn't touch the cutting. I just replaced the water and put the jar back.
One thing I want to mention: I used a clear glass jar, so I could see everything. If you use a colored or opaque container, you miss this visual progress. I suggest clear glass for beginners.
Day 4 to Day 6: First Signs of Life
On day 5, I saw the first tiny white bump on one of the nodes. It looked like a pimple. Honestly, it was so small I almost missed it. By day 6, that bump elongated slightly. It became a nub, maybe 2 millimeters long. It was pale white with a slightly fuzzy texture. That fuzz is normal. It's not mold. It's new root tissue.
I celebrated by not doing anything. That's the hardest lesson for me: leave the cutting alone. I wanted to touch it, move it, check it constantly. But I resisted. I just changed the water on day 6 and let it be.
Day 7 to Day 9: Roots Are Coming Fast
By day 7, the first root was about half an inch long. A second root emerged from the adjacent node. This is why I always leave two nodes submerged. Double the chance, double the roots. On day 8, the first root branched into a small fork. The second root grew straight down, about an inch long.
I also noticed the leaf color stayed vibrant green. No yellowing. That's a sign the cutting is happy. If leaves start yellowing, you're doing something wrong.
Day 10 to Day 12: Root Network Established
At day 10, the roots were around 2 inches long. They looked like thin white threads, slightly translucent. The branching increased. I could see small secondary roots forming off the main ones. The cutting felt stable in the jar. It no longer floated freely.
I changed the water on day 11. This time, I added a single drop of liquid fertilizer. I didn't see any immediate effect, but I believe it helped with the next phase. By day 12, the roots were dense enough that I could slightly tug the cutting and it resisted. That's the moment I knew transplanting was close.
Day 13 to Day 14: Ready for Soil (Or Keep in Water)
At day 14, the roots were 3 to 4 inches long. Multiple roots, branching, with tiny white tips. The cutting looked like a mini underwater plant. I could have transplanted to soil at this point. But here's the thing: I also kept one cutting in water for an additional week, just to see what happened. It continued growing. It even produced a new leaf while in water. So if you want to keep them in water long-term, that's possible. Just change the water weekly and add a tiny bit of fertilizer.
The 3 Deadly Mistakes Beginners Make (And How to Avoid Them)
I've killed more plants than I want to count. Each death taught me something. Here are the three biggest mistakes I see beginners make, and I've made all of them myself.
① Overwatering (Yes, Even in Water Propagation)
This sounds counterintuitive. How can you overwater in water? But you absolutely can. The issue is not the water itself. It's the stale water. If you leave the cutting in the same water for a week or more, bacteria multiply. The oxygen depletes. The roots suffocate. Then rot sets in.
The fix: Change the water every 3 to 4 days. Without exception. Use room temp water every time. Cold water will shock the roots you've worked to grow. I also gently rinse the roots when I change the water. Just a quick swirl in the fresh water. This removes any slimy biofilm.
I remember one of my early cuttings. I went on a short trip and left it in the same water for 8 days. When I came back, the water was cloudy and smelled like rotten eggs. The roots had turned brown and mushy. I lost that cutting. That's when I learned to set a phone reminder for water changes.
② Wrong Light Exposure
This one is sneaky. People think "plants need light, so I'll put it in the brightest spot." That's a mistake. Direct sunlight on a water propagation jar acts like a magnifying glass. The water heats up. The roots cook. I've seen water temperatures reach 90°F in a south-facing windowsill on a sunny afternoon.
The fix: Bright, indirect light only. An east-facing window is ideal. North-facing works too, but growth will be slower. If you only have a south-facing window, place the jar at least 3 feet away from the window. Use a sheer curtain if you have one. The goal is to avoid heating the water at all costs.
I lost a whole batch of cuttings to this. I had placed them on my kitchen sill which gets harsh afternoon sun. Within three days, the water was warm to the touch. The stems turned soft and brown. It was a brutal lesson. Now I check the jar temperature with my hand every morning. If the glass feels warm, I move it.
③ Using the Wrong Container
I used to grab any bottle or cup I could find. That was a mistake. Narrow-necked bottles trap the leaves against the glass. This causes condensation and rot. Opaque cups hide the water level, so I couldn't tell when it was low. And tiny containers give the roots no room to grow.
The fix: Use a wide-mouth glass jar. It should hold at least 8 ounces of water. You want the opening wide enough that the leaves don't press against the sides. Clear glass is essential. It lets you monitor both water level and root health. I prefer mason jars or old jam jars. They're the perfect size.
One more tip: white or clear glass is better than colored glass. Colored glass makes it hard to spot cloudy water or early root rot. Trust me, you want maximum visibility.
The Best Aglaonema Varieties for Water Propagation
Not all Aglaonemas are created equal. Some root faster than others. Here are my recommendations based on personal experience.
Aglaonema 'Silver Bay'
This is my favorite for water propagation. The stems are thick and firm. They root reliably within 10 days. The silver-green leaves look stunning in a clear glass jar. I've gifted more Silver Bay cuttings than I can count.
Aglaonema 'Maria' (or 'Emerald Beauty')
This one has darker green leaves with silver markings. It's super resilient. It tolerates lower light during propagation. I've had 'Maria' cuttings root even in a dim hallway. The roots come in slightly slower, around 14 days, but they're thick and strong.
Aglaonema 'Red Siam'
The red-stemmed varieties are a bit more temperamental. They're not hard, but they're slower. Expect roots in 3 to 4 weeks rather than 2. The good news is the red stems look gorgeous against the white roots. Worth the wait if you're patient.
Aglaonema 'Pink Dalmatian'
Honestly, this one roots in water but it's slower and needs more light. The pink variegation fades if the light is too low. I've had success, but with higher attention to water quality. If you're a beginner, start with Silver Bay. Save Pink Dalmatian for later.
How to Transplant Water-Rooted Cuttings into Soil (The Right Way)
Once your roots reach 3 to 4 inches, you have two options. Keep them in water indefinitely, or move them to soil. I'll be honest: I usually pot them up around week 3. But the transition from water to soil is tricky. I've lost several cuttings to transplant shock.
Step 1: Wait for Secondary Roots
Don't rush the transplant. Make sure you see branching roots. Single long roots without side branches are still fragile. Wait until those roots look like a small network. That means less shock when changing mediums.
Step 2: Use a Well-Draining Potting Mix
This is non-negotiable. Use a mix specifically for houseplants. I add about 30% perlite to my soil mix. This ensures drainage. Aglaonema hates wet feet. I learned this the hard way when I planted a rooted cutting into dense garden soil and it rotted within a week.
Step 3: Keep the Soil Moist (Not Wet) for the First Week
The roots are used to being in water. If you suddenly put them in dry soil, they'll dehydrate. For the first 7 days, keep the soil consistently moist. Water whenever the top inch feels dry. Then gradually reduce watering frequency. By week 3, you should be on a normal watering schedule.
Step 4: Don't Fertilize Immediately
Wait at least a month. The soil has nutrients already. Fertilizing right after transplant can burn the delicate new roots. I made this mistake with my second successful propagation. The cutting survived but looked sad for two weeks. Now I'm patient.
Common Problems and Quick Fixes (From My Own Experience)
Yellowing Leaves After a Few Days
This is usually light stress or water temperature shock. Move the jar to a slightly shadier spot. Make sure the water truly is room temp. If the weather is cold, let the water sit longer before using it. Remove any yellow leaves immediately. They won't recover and they drain energy from the cutting.
Slimy Film on the Roots or Jar
That's bacterial growth. You're not changing the water often enough. Increase frequency to every 2 days. Clean the jar with hot soapy water and rinse thoroughly. Gently wash the roots under lukewarm water. Trim any mushy root tissue with sterilized scissors.
Roots Growing but No New Leaves
That's normal. Roots come first, then foliage. Give it time. Some cuttings focus all their energy on root development for several weeks. As long as the leaves stay green and firm, you're fine. If the leaves are drooping, check the water level. It may have evaporated too much.
Stems Turning Brown and Soft at the Base
That's rot. Cut off the rotted portion immediately. Make a fresh cut above the affected area. Then let it callus for a few hours. Place it in fresh, clean water. If the rot is extensive, you may need to discard the cutting. This has happened to me twice. It's heartbreaking but survivable if caught early.
Expert Insights on Aglaonema Care (Backed by Authorities)
I always like to check what the experts say. The Royal Horticultural Society recommends keeping Aglaonema in a warm room with moderate light. They advise maintaining temperatures above 61°F (16°C). This matches my experience exactly. Cuttings root faster when the room is consistently warm.
Similarly, the American Horticultural Society emphasizes the importance of air circulation around houseplants. This is often overlooked in water propagation. Stagnant water and stagnant air both invite fungus and bacteria. I now place a small fan nearby, set on low, pointing away from the jar. This gentle air movement reduces the chance of fungal growth.
I also learned from their materials that high humidity helps Aglaonema root production. If your home is dry, consider placing the jar near a humidifier. Or simply cover the cutting with a clear plastic bag for the first week. I tried this on a whim, and it genuinely speeded up rooting by about 20 percent. Just make sure the bag doesn't trap excess condensation. Poke a few holes in it.
3 Reader Questions I Get Asked All the Time
Can I use boiled or distilled water?
You can, but you don't need to. Boiled water is fine once it cools. Distilled water is also fine. But it's not necessary. Regular tap water works if you let it sit out to dechlorinate. I've used tap water exclusively for years with no issues.
How long can I keep the cutting in water before planting?
Indefinitely. Honestly, I have a cutting that's been in water for five months. It has roots over 8 inches long and it's still putting out new leaves. You just need to change the water weekly and add a tiny amount of liquid fertilizer every 2 weeks. That's a long-term solution.
When is the best time of year to propagate Aglaonema?
Spring and early summer are best. The natural growth hormones are more active. I've successfully propagated in winter, but it took twice as long. If you're propagating in winter, place the jar near a heat source (but not directly on a radiator). That extra warmth helps.
Final Thoughts From Someone Who's Killed More Plants Than You Have
I'm not a professional. I'm just someone who loves plants and has made every mistake possible. The first plant I ever owned, I watered it three times a week because I thought more water meant more love. It died within a month. That's when I learned that 90% of indoor plants die from overwatering. Water propagation is different though. It's a controlled environment. You see exactly what's happening. And Aglaonema is one of the most forgiving species you can practice on.
The process isn't complicated. Cut below a node. Place in room temp water. Change the water every 3 to 4 days. Give it bright, indirect light. Wait two weeks. That's it. In 14 short days, you'll have roots. In 3 to 4 weeks, you'll have a new plant ready for soil.
I still get a thrill every time I see those first white bumps appear on a fresh cutting. It never gets old. And the best part? You can propagate more plants from the same mother plant, over and over. Each cutting you root is basically a free houseplant. Do this a few times and you'll have a jungle in your living room. I know I do.
So grab a jar, find a healthy stem, and just start. The first cut is the scariest. But trust me, the roots will come. They always do.





