 bluename
 How to Care for Aglaonema in Bright Indirect Light: My 2-Week Journey to Lush, Happy Plants
You’ve brought home a stunning Aglaonema, lured by its gorgeous, painted leaves. You know it’s supposed to be “easy,” but now it’s sitting in your bright room, and you’re worried. Is this spot too bright? Will the colors fade, or worse, will the leaves scorch? You want it to thrive, not just survive. I’ve been there, staring at my new Chinese Evergreen, paralyzed by conflicting care advice. That’s why I decided to conduct a focused, two-week experiment to master how to care for Aglaonema in bright indirect light. I’ll walk you through my exact steps, the mistakes I made, and the clear results I saw, so you can confidently give your plant the perfect environment.
Understanding What "Bright Indirect Light" Really Means for Aglaonema
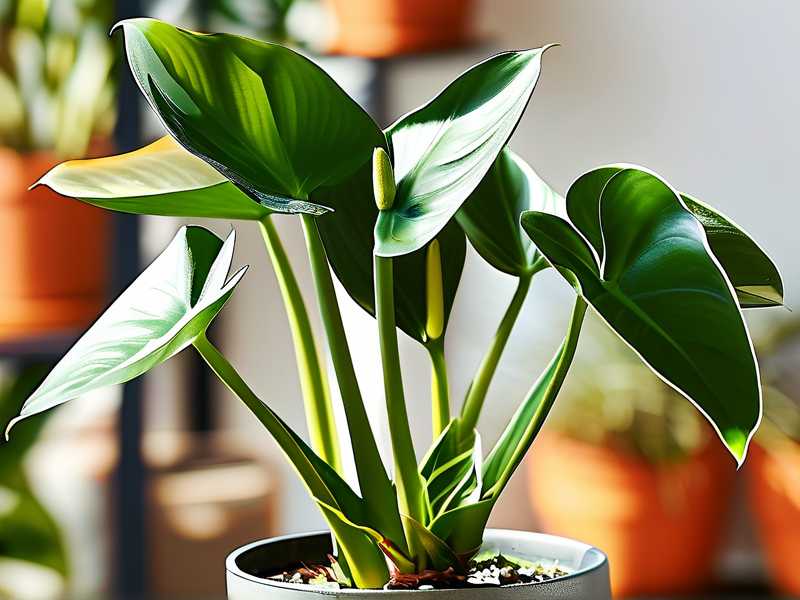
Before moving a single plant, I needed a solid definition. Bright indirect light is the sweet spot. It’s abundant light, but no direct sun rays ever touch the foliage. Think of light bouncing off a wall or filtered through a sheer curtain. The American Horticultural Society’s light scale places this in the “Moderate to Bright” range, ideal for maintaining the vibrant variegation in Aglaonema varieties like ‘Silver Bay’ or ‘Red Siam’ without risk of burn.
My test subject was a mature Aglaonema ‘Maria’. I placed it in an east-facing room, about 6 feet back from a large window with a sheer curtain. A south-facing room would work similarly, but further from the window or with filtering. This setup became my baseline for Aglaonema light requirements.
My Step-by-Step Care Protocol for Two Weeks
I committed to a strict, observant routine to see how the plant responded to consistent conditions.
Week 1: Observation and Baseline Adjustment
The first week was about fine-tuning the environment and establishing a watering rhythm based on light, not a calendar.
I started by thoroughly checking the soil moisture. In its previous lower-light spot, the soil stayed damp for over a week. Now, under brighter light, I found it dried much faster. My first watering was deep and thorough, allowing excess water to drain completely—a non-negotiable step to prevent root rot.
I also monitored the leaves daily. I was looking for any signs of stress: yellowing (overwatering), browning tips (low humidity or chemical sensitivity), or, most critically, pale, washed-out colors or crispy brown patches (too much direct sun). For the first three days, I saw no change, which was a good sign.
By day five, I noticed the top inch of soil was dry. Following the wisdom of experts from resources like the Royal Horticultural Society, I watered again. The key takeaway? Bright indirect light increases water uptake. Your watering frequency must adapt.
Week 2: Documenting Growth and Troubleshooting
The second week revealed more about the plant’s active adaptation.
A pleasant surprise emerged mid-week: a tightly furled new leaf sheath was visible at the base of the plant. This was a clear indicator that the plant was not just tolerating but appreciating its new luminous home. The existing leaves remained firm and deeply colored.
However, I hit my first “pitfall.” On a particularly sunny afternoon, I noticed a very faint, almost silvery sheen on part of one leaf. Upon closer inspection, it was the very beginning of a sunburn scar—a small spot where a direct sunbeam had snuck through the curtain as the angle changed. I immediately adjusted the curtain and rotated the plant slightly. This underscored a vital lesson: “indirect light” is a dynamic condition. You must monitor the sun’s path throughout the day and seasons.
By the end of the two weeks, the new leaf had begun to unfurl, showing brilliant variegation. The plant overall appeared perkier and more robust compared to its slower growth in dimmer light.
The Four Pillars of Aglaonema Care in Bright Light
My experiment crystallized into four actionable pillars for ongoing care.
Perfecting Your Watering Technique
Forget a fixed schedule. In bright indirect light, I water my Aglaonema when the top 1-2 inches of soil feel dry to the touch. I use the “lift the pot” method—it feels noticeably lighter when dry. I always use room-temperature water and, if possible, let tap water sit out overnight to dissipate chlorine, as recommended by many plant physiologists to avoid tip burn. Overwatering is the fastest killer, and bright light helps mitigate that risk by speeding soil drying.
Choosing the Right Soil and Pot
Drainage is everything. I use a well-aerated, peat-based potting mix amended with perlite and orchid bark for extra drainage. The pot must have drainage holes. A common mistake is using a pot that’s too large, which holds moisture for too long. Aglaonemas prefer to be slightly root-bound. My plant was in a appropriately sized plastic pot with a cache pot, allowing me to easily check for drained water.
Managing Humidity and Temperature
While Aglaonemas tolerate average home humidity, bright light can slightly increase transpiration. I aim for 40-50% humidity. I achieved this by placing my plant on a pebble tray filled with water (ensuring the pot sits above the waterline) and grouping it with other plants. They thrive in standard room temperatures between 65°F and 80°F (18°C - 27°C). Crucially, I keep it away from cold drafts and heating vents, which can cause shock and brown leaves.
Fertilizing for Optimal Growth
During the active growing season (spring and summer), the increased light means the plant can utilize more nutrients. I feed my Aglaonema monthly with a balanced, water-soluble fertilizer diluted to half-strength. I do not fertilize in fall and winter when growth naturally slows, even in bright light. Over-fertilization leads to salt buildup in the soil, which can damage roots.
Common Problems and My Quick-Fix Solutions
Here are the issues I’ve encountered and how I solved them.
Yellowing leaves were my early struggle. In low light, it meant overwatering. In bright indirect light, it can still mean overwatering if the soil mix is wrong, but it can also mean the plant is diverting energy to new growth and shedding old leaves. I assess the soil first. If it’s soggy, I check roots and adjust watering. If it’s normal and growth is healthy, I simply prune the old yellow leaf.
Brown, crispy leaf tips plagued me initially. I eliminated three causes: chemical sensitivity (switched to filtered/stood water), low humidity (added the pebble tray), and fertilizer burn (stuck to half-strength doses). This usually resolves the issue.
Leggy growth with small leaves means the light is still not bright enough. If your Aglaonema stretches out, it’s seeking more light. Move it incrementally closer to your bright indirect light source.
Frequently Asked Questions
Can Aglaonema tolerate any direct sun? Early morning direct sun for a very short period might be okay, but it’s a risky gamble. Most varieties, especially heavily variegated ones, will scorch. The safe and recommended practice is to provide pure, bright indirect light for the healthiest plant.
How often should I rotate my Aglaonema? In a bright indirect light setting, I rotate my plant a quarter turn every time I water. This ensures all sides receive even light, promoting symmetrical growth and preventing the plant from leaning heavily toward the light source.
My Aglaonema’s red/pink colors are fading. What’s wrong? While insufficient light can cause variegation to fade, sometimes in very bright light, the intense green chlorophyll can dominate. If the plant is otherwise healthy and growing, try moving it to a spot with slightly less intense (but still bright) indirect light. The balance for color retention is delicate and varies by cultivar.
Mastering Aglaonema care in bright light transformed my plant from a static decor piece into a dynamic, growing companion. It’s about embracing the synergy between light, water, and soil. By observing your plant closely, adapting your care to its specific environment, and learning from small setbacks like a stray sunbeam, you’ll unlock lush, vibrant growth. Your Aglaonema isn’t just surviving in that bright spot; it’s ready to show you what thriving truly looks like.





