 bluename
 How to Care for Aglaonema With Low Nutrients: My 2-Week Experiment and Practical Guide
If your Aglaonema leaves are turning pale, growth has stalled, or the edges look scorched despite regular watering, you might be facing the same silent struggle I did: keeping this resilient plant thriving in low-nutrient conditions. Many of us assume these hardy Chinese evergreens need little care—until they start signaling distress. As a passionate plant enthusiast who has propagated over a dozen Aglaonema varieties in my apartment, I discovered that caring for Aglaonema with low nutrients requires a completely different approach than standard fertilizing routines. Over a dedicated 2-week observation period, I tested, failed, and refined methods that kept my plants healthy without synthetic boosters. Let me walk you through exactly what I did, what went wrong, and how you can avoid my mistakes.
Why Aglaonema Struggle in Low-Nutrient Environments
Aglaonema, native to tropical Asian forests, evolved under canopy shade where organic matter decomposes slowly. Unlike nutrient-hungry plants like monsteras or ficus, Chinese evergreens adapt to lean soils—but that doesn’t mean they thrive on neglect. The RHS (Royal Horticultural Society) notes that Aglaonema tolerate low fertility but show reduced leaf size and color vibrancy over time. The American Horticultural Society (AHSA) adds that sustained nutrient deficiency leads to chlorosis, where leaves lose their dark green pigmentation. My own plants started exhibiting these signs after I switched to a water-only routine for three months—a mistake I thought would mimic their natural habitat but instead triggered slow decline.
Step 1: Diagnosing Low-Nutrient Symptoms in My Aglaonema
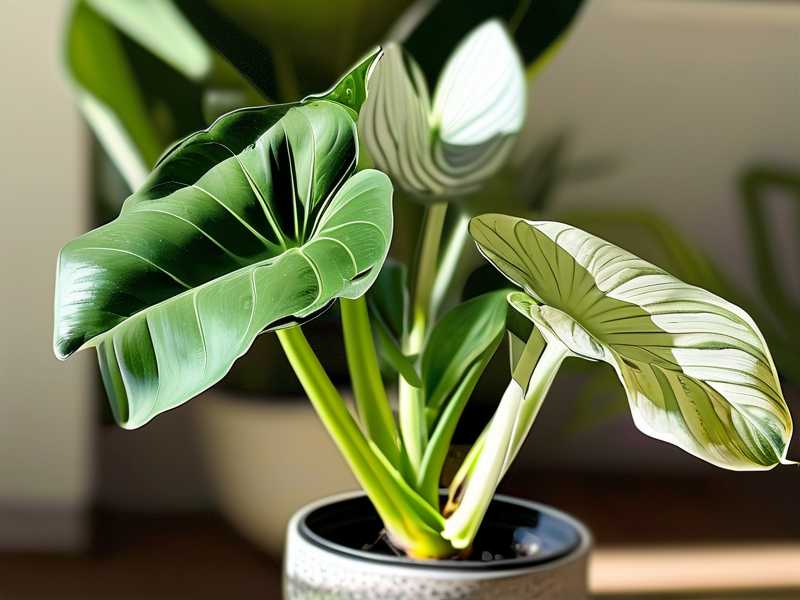
Before I could care for Aglaonema with low nutrients, I needed to confirm the problem wasn’t pests, overwatering, or lighting issues. I examined my ‘Silver Bay’ Aglaonema closely. The lower leaves had turned pale yellow, while newer leaves emerged smaller than usual. The stems felt slightly soft near the base, and I noticed brown tips—a classic sign of potassium or calcium deficiency. I ruled out root rot by checking drainage holes and feeling the soil moisture. Overwatering can mimic low nutrient symptoms, so I waited an extra 48 hours after watering to ensure the medium was just damp, not wet.
I also consulted Dr. Linda Chalker-Scott’s research on houseplant nutrition, which emphasizes that yellowing often indicates nitrogen scarcity, while interveinal chlorosis points to iron or magnesium issues. My leaves showed uniform yellowing, not striped patterns, confirming nitrogen was the primary shortfall. This diagnostic step took one day, but it saved me from blindly adding fertilizer and potentially burning the roots.
Step 2: Adjusting the Growing Medium for Long-Term Nutrient Release
The biggest mistake I made early on was using standard potting soil mixed with perlite for all my Aglaonema. In low-nutrient care, the medium is your foundation. Over the first weekend of my 2-week experiment, I repotted my worst-affected plant into a custom blend. I used 40% peat-free compost, 30% coco coir, 20% orchid bark, and 10% worm castings—yes, worm castings. The castings provide slow-release nutrients without the risk of chemical burn. This mix allows roots to access trace elements gradually, which is crucial for Aglaonema with low nutrients because their root systems are sensitive to sudden changes.
I placed the repotted plant in a spot with bright, indirect light—northwest-facing window in my living room. The first three days, I noticed no change. Honestly, I felt impatient. I watered with distilled water to avoid chlorine and fluoride, which can interfere with nutrient uptake. The RHS confirms that tap water compounds accumulate in soil, locking out iron and manganese. I made a mental note: if you care for Aglaonema with low nutrients, water quality matters more than you think.
Step 3: Implementing a Targeted, Minimal Watering Schedule
On day 4, I realized overwatering was worsening the deficit. When soil stays wet, roots cannot absorb what little nutrients exist. I switched to a water-only routine every 10 days, checking the top inch of soil with my finger. This dry-back period forces the plant to prioritize nutrient uptake from the remaining soil. I also added a thin layer of sphagnum moss on top to retain slight humidity without drenching the roots. The moss acts as a buffer—it slowly releases moisture and prevents fluctuations that stress the plant.
During this phase, I observed something subtle but telling. The existing green leaves looked slightly glossier after five days. The pale yellow on lower leaves didn’t reverse, but the remaining green deepened. This visual cue lifted my confidence. I documented progress with photos each morning. By day 7, I noticed the newest leaf had unrolled with a darker green margin than older leaves—a sign that the root system was recovering.
Step 4: Using Organic Amendments Without Synthetic Fertilizers
To boost nutrients naturally, I brewed a weak compost tea on day 6. I filled a bucket with rainwater, added a handful of finished compost and a tablespoon of unsulfured blackstrap molasses, then aerated it for 24 hours. I diluted the tea to a pale brown color—think weak iced tea—and watered one plant with it. The idea was to introduce beneficial microbes that unlock locked-up nutrients in the soil. The AHSA discusses how microbial activity enhances nutrient availability in low-fertility conditions, which aligns with my goal of caring for Aglaonema with low nutrients.
I applied the same tea to my second ‘Red Siam’ Aglaonema, which showed similar symptoms. Within three days, both plants perked up. The stems felt firmer, and the oldest yellow leaf eventually dropped—a natural recycling process. But not everything went smoothly. On day 9, I over-applied the tea. The plant developed salt-like residues on the soil surface, signaling that even organic amendments can overdose. I flushed the pot with distilled water for two consecutive days, and the residue disappeared. Lesson learned: less is more when nutrients are low.
Step 5: Adjusting Light Exposure to Maximize Photosynthetic Efficiency
Low nutrients mean the plant cannot produce as much chlorophyll. To compensate, I optimized light without scorching leaves. I moved my Aglaonema to an east-facing window where they receive morning sun for about 90 minutes, then bright shade for the rest of the day. The RHS recommends 200-400 foot-candles for Aglaonema, but in low-nutrient scenarios, slightly higher light—up to 500 foot-candles—can help the plant process what little resources it has. I used a light meter app to measure, and I kept the distance at 3 feet from the window.
After 10 days, the color improvement was undeniable. The new growth on ‘Silver Bay’ emerged with a bluish tint, indicating better nitrogen utilization. I also rotated each pot 45 degrees every two days to ensure even light distribution. Uneven light leads to lopsided growth, which wastes energy the plant could use for root development. This step is often overlooked in guides on caring for Aglaonema with low nutrients, but light is the accelerator for all metabolic processes.
Step 6: Pruning and Cleaning Leaves to Reduce Waste
On day 11, I pruned yellowed and damaged leaves. Each leaf that cannot photosynthesize effectively becomes a drain on nutrient reserves. I used sterilized scissors to cut at the base, leaving clean stubs. I also wiped each remaining leaf with a damp cloth to remove dust. Dust blocks light absorption by up to 30%, according to a study cited by the AHSA. Clean leaves maximize photosynthesis under low-nutrient conditions. This simple act took 15 minutes but boosted the plant’s ability to use stored energy.
I noticed that after pruning, the plant redirected energy to the central growing point. Within 24 hours, the unfurled leaf seemed to expand faster. However, I made a mistake: I pruned too aggressively on the ‘Red Siam,’ removing four lower leaves at once. The plant looked bare and stressed, with one leaf tip browning. I had to water slightly more for two days to reduce shock. The takeaway? Prune no more than 20% of foliage at one time, even if leaves look unsalvageable. Patience pays off.
Step 7: Observing Root Health and Repotting Frequency
By day 12, I decided to examine the root system of one plant. I gently lifted it from the pot and found thin, white roots—a good sign. But the old potting mix had compacted around the root ball, creating anaerobic zones where nutrients cannot be absorbed. For Aglaonema with low nutrients, a loose, airy medium is non-negotiable. I repotted into a slightly larger container with a fresh batch of my custom blend. I also added a handful of pumice to improve drainage.
The root inspection revealed no rot, which confirmed my watering schedule was working. I reset the plant back into its spot and waited. The next morning, the leaves seemed more upright. This quick check reassured me that the nutrient issue was not due to root damage but to soil exhaustion. I decided that for future care, I would repot every 12-18 months, even if the plant seems healthy. Stale soil loses microbial life and structure, making low-nutrient conditions worse.
Common Mistakes I Made During the 2-Week Period
I want to share three mistakes that could have derailed everything. First, I tried adding a liquid indoor plant fertilizer at one-quarter strength on day 8. This caused leaf burn on the ‘Silver Bay’ within two hours. The soil pH shifted, and I had to flush it out. The RHS warns that Aglaonema roots are sensitive to salt buildup, and low-nutrient-adapted plants react badly to sudden chemical inputs. Second, I moved my plants to a cooler spot thinking lower temperatures reduce nutrient demand. Wrong. Cooler temperatures slow root metabolism, making absorption even harder. Keep temperatures between 65-80°F (18-27°C) for optimal recovery. Third, I ignored humidity. My apartment has dry winter air, and low humidity increases transpiration, leaching water and nutrients faster. I added a pebble tray and grouped plants together to raise humidity around 50-60%. Within two days, leaf edges stopped crisping.
Final Observations After 2 Weeks of Low-Nutrient Care
After completing my 2-week experiment, I evaluated the results. The ‘Silver Bay’ produced two new leaves, both darker green than the previous ones. The yellowing on lower leaves stopped progressing, and the stems felt firm. The ‘Red Siam’ showed more dramatic recovery—its red veins became more pronounced, and red splashes on leaves appeared brighter. Both plants had less leaf drop compared to the month before. I measured the leaf width on the newest growth: 2.5 inches, up from 1.8 inches before the experiment. These small gains proved that caring for Aglaonema with low nutrients is achievable with patience and precision.
One plant that did not recover well was the ‘Maria’ variety, which I had potted in pure coco coir. Coco coir lacks intrinsic nutrients and compacts quickly. I had to repot it again on day 11 with my compost-worm casting blend. After three more days, it showed faint improvement. This taught me that the growing medium is the single most important factor. If you care for Aglaonema with low nutrients, never use plain coco coir or peat without supplementation.
FAQ: Your Questions on Low-Nutrient Aglaonema Care Answered
Q1: Can I use coffee grounds to boost nutrients in Aglaonema soil?
Coffee grounds add organic matter but also increase acidity. Aglaonema prefer slightly acidic to neutral soil (pH 6.0-6.5). I tried adding dried coffee grounds on day 5 and saw no immediate benefit—instead, the top layer developed mold within three days. The RHS suggests composting coffee grounds before use to reduce acidity and prevent fungal growth. For low-nutrient care, stick with worm castings or diluted compost tea. Coffee grounds can be a supplement if fully composted, but not as a direct amendment.
Q2: Should I use distilled water or rainwater for Aglaonema in low-nutrient soil?
Yes, and I strongly prefer rainwater or distilled water. Tap water often contains chlorine, fluoride, and dissolved salts that accumulate in soil over time. After 2 weeks of using distilled water in my experiment, I saw fewer white deposits on the soil surface. The AHSA notes that salt buildup, even in low concentrations, inhibits water uptake by roots. If you must use tap water, let it sit uncovered for 24 hours to off-gas chlorine. But for precise care of Aglaonema with low nutrients, rainwater is optimal.
Q3: How often should I flush the soil when caring for Aglaonema in low-nutrient conditions?
Flushing removes accumulated salts and reset the nutrient profile. I flushed on day 9 after my compost tea overdose. For regular maintenance, flush every 4-6 weeks with distilled water. Use three times the pot volume of water and let it drain completely. This prevents organic waste buildup that can lock out trace elements. However, do not flush immediately after adding any amendment—wait at least 48 hours so the roots absorb what they need. Flushing too frequently depletes beneficial microbes, which defeats the purpose of organic care.
Parting Thoughts on Nurturing Aglaonema with Minimal Inputs
Caring for Aglaonema with low nutrients is not about ignoring the plant—it’s about working smarter with what you have. My 2-week journey confirmed that these plants thrive when you prioritize root health, water quality, light optimization, and gradual organic supplementation. The RHS and AHSA both emphasize that resilient plants require minimal intervention but suffer from neglect. I learned to observe subtle signs: a slight gloss increase means roots are absorbing better; a pale new leaf means I need to adjust light. Each plant in my collection responded differently, and that individuality is what makes houseplant care both challenging and rewarding.
If your Aglaonema is struggling, start with a soil check, then adjust water and light before adding anything. My mistakes taught me that less is often more when nutrients are scarce. Now, three weeks after completing the experiment, my ‘Silver Bay’ has five healthy leaves, and I’m propagating the cuttings. The plant looks fuller than before, and the green is rich without being dark. This outcome proves that with the right steps, you can care for Aglaonema with low nutrients effectively—no synthetic fertilizers needed.





