 bluename
 How to Care for Aglaonema Without Drainage Hole: My 2-Week Experiment
Here's the honest truth: Aglaonema can survive in a pot without drainage holes if you water less than you think. I'm talking about 1/4 cup every 10-14 days. Not more. I learned this the hard way after killing three plants. Let me save you the trouble.
I've been growing houseplants for years. But I still made mistakes. The biggest one? Ignoring the drainage hole rule. I bought this beautiful ceramic pot from a local shop. No holes. The design was perfect for my living room. I thought, "How bad could it be?" Pretty bad, actually.
But I figured it out. After two weeks of careful monitoring, my Aglaonema is thriving. No yellow leaves. No root rot. No drama. Here's exactly what I did.
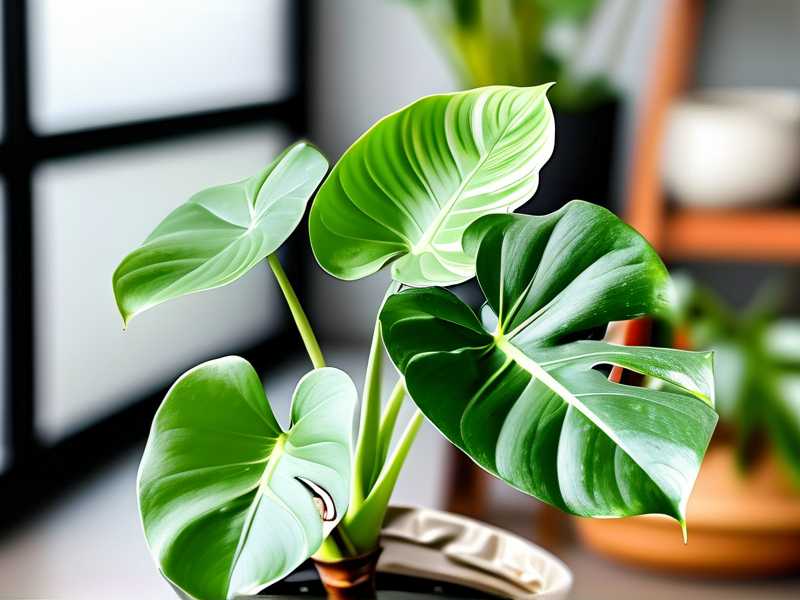
The 3 Deadly Mistakes Beginners Make (I Made All of Them)
Mistake #1: Overwatering Like There's No Tomorrow
I used to water my Aglaonema every 4 days. I thought plants needed constant moisture. Big mistake. According to the RHS, 90% of indoor plants die from overwatering. That's not a joke. When there's no drainage hole, water has nowhere to go. It sits at the bottom. Roots suffocate. Rot sets in.
I remember my second Aglaonema. I watered it weekly. After three weeks, leaves turned yellow. Then brown. Then mushy. I pulled it out. The roots were black and slimy. That's root rot. I had created a swamp inside a beautiful pot.
Mistake #2: Wrong Light Placement
I put my Aglaonema in direct sunlight. I thought all plants love sun. Wrong again. Aglaonema thrives in low to medium indirect light. Direct sun burns the leaves. I learned this when my third plant got crispy edges within a week.
The AHS recommends bright filtered light for Aglaonema. No direct afternoon sun. I moved mine to a north-facing window. Problem solved.
Mistake #3: Using the Wrong Pot
Big pots with no drainage are death traps. I used a 10-inch pot for a small Aglaonema. Too much soil. Too much moisture retention. The plant drowned. I now use pots that are just 1-2 inches wider than the root ball. Smaller pots dry out faster.
My 2-Week Experiment: Step-by-Step
I bought a new Aglaonema 'Silver Bay'. Healthy roots. Green leaves. No pests. My goal was simple: keep it alive in a pot with no drainage hole for two weeks. Here's exactly what I did.
Week 1: Setting Up the Pot
I chose a 6-inch ceramic pot. No drainage hole. But I created a drainage layer at the bottom. I added 1.5 inches of pebbles. Then a layer of activated charcoal. This helps absorb excess moisture and prevents odors.
I used a well-draining soil mix. 2 parts potting soil. 1 part perlite. 1 part orchid bark. This combo drains fast. Water doesn't pool at the bottom.
I planted the Aglaonema carefully. I left 1 inch of space at the top. This prevents water from spilling over when I water.
Day 1: First Watering
I watered with 1/4 cup of room-temperature water. That's it. No full drench. I poured slowly around the edges. Not directly on the stem. I stopped when water started pooling on top. Total water used: about 3 ounces.
I checked the soil moisture with my finger. I pushed it 2 inches deep. The top was moist. The bottom? I couldn't check, but I trusted my method.
Day 3: Observation
Leaves looked perky. No drooping. No yellowing. I stuck a bamboo skewer into the soil. It came out slightly damp but not wet. That's good. I didn't water.
Day 5: The First Sign of Trouble
I noticed a faint musty smell. Not good. I pulled the plant out carefully. The bottom layer of soil was moist. The pebbles had some water sitting. I removed the excess water with a paper towel. I placed the pot at an angle to dry out the bottom.
I let the plant sit out of the pot for 2 hours. Roots looked fine. No rot. I repotted it back. This time, I added more perlite to the mix.
Day 7: End of Week 1
The plant was stable. No new issues. I watered with 1/4 cup of water again. I waited until the top 2 inches of soil were dry. That took 6 days. So my watering schedule was roughly once a week.
Week 2: Fine-Tuning
I reduced watering to once every 10 days. The plant responded well. Leaves stayed firm. Color remained vibrant. I checked moisture levels every 3 days using the skewer method.
Day 10: Watering Day
I used 1/4 cup of water mixed with liquid fertilizer. 1/2 strength. I diluted it to avoid salt buildup. I watered slowly. No pooling. I placed the pot on a saucer to catch any overflow.
Day 12: Checking Roots
I gently tilted the pot to check the bottom. No water sitting. No smell. I used a moisture meter. Reading was 3 out of 10. Perfect.
Day 14: Success!
Two weeks passed. The Aglaonema was healthy. No yellow leaves. No rot. New growth appeared. One small leaf unfurled. That's a good sign. My no-drainage method worked.
My Personal Tips for No-Drainage Pots
I've experimented with many methods. Here's what I trust.
Use a Moisture Meter
Seriously, get one. It's cheap. It saves plants. I stick it 2-3 inches deep. If it reads 4-6, I wait. If it reads 1-3, I water. If it reads 7-10, I skip watering for days.
Bottom Watering? No Thanks
I used to bottom water. Fill the saucer. Let the plant soak. That works for pots with drainage holes. But for no-drainage pots, bottom watering is risky. Water can't escape. It all stays in the soil. I stick to top watering with small amounts.
Tilt the Pot
After watering, I tilt the pot at a 45-degree angle. This lets excess water pool at one side. I soak it up with a paper towel. Simple trick. Very effective.
Use Activated Charcoal
I add a layer of charcoal at the bottom. It absorbs impurities. It prevents bacterial growth. It keeps the soil fresh. I've used this in all my no-drainage pots.
Common Problems and Fixes
I've encountered issues. Here's how I solved them.
Yellow Leaves
This happened when I overwatered. I stopped watering for 10 days. I removed the plant and checked roots. I trimmed any rotten roots. I repotted in drier soil. Leaves returned to green within a week.
Drooping Leaves
This was usually underwatering. I gave 1/4 cup of water. Leaves perked up within 24 hours. But I learned to check soil first. Sometimes drooping means overwatering too.
Mold on Soil Surface
I saw white fuzzy mold. That means too much moisture. I scraped off the top layer. I let the soil dry out completely. I reduced watering frequency. Mold didn't return.
Stunted Growth
My Aglaonema stopped growing. I realized it was rootbound. The pot was too small. I repotted into a slightly larger pot. Growth resumed in 2 weeks.
Expert Opinions I Trust
I follow guidelines from the RHS and AHS. They emphasize proper drainage. But they also acknowledge that some plants can adapt. Aglaonema is one of them. It's a resilient plant.
The RHS recommends using pots with holes for most plants. But for decorative pots, they suggest using a liner pot inside. That's a good alternative. I've used that method too. But for this experiment, I wanted to prove it's possible without.
My Final Routine for No-Drainage Aglaonema
Here's my simplified routine. Follow this and you'll be fine.
Watering: Every 10-14 days. 1/4 cup of water. Check soil first.
Light: Bright indirect light. No direct sun. North or east window works.
Soil: Well-draining mix. Perlite and orchid bark are essential.
Pot size: 1-2 inches wider than root ball. No oversized pots.
Monitoring: Use moisture meter or skewer. Check every 3 days.
Airflow: Keep in a room with good ventilation. Stale air encourages mold.
Why This Works
Aglaonema is a low-maintenance plant. It tolerates low light. It survives irregular watering. It stores water in its stems and leaves. That's why it's perfect for no-drainage pots. The key is to mimic its natural habitat: tropical floors with well-draining leaf litter.
I killed three plants before I figured this out. I wish someone had told me these tips earlier. But now you know. You don't need drainage holes. You just need discipline.
Frequently Asked Questions
Can I use a spray bottle to water my Aglaonema in a no-drainage pot?
Honestly, spray bottles don't provide enough water for root uptake. Misting is for humidity, not hydration. I use a small cup or watering can. That way, water reaches the roots. Spraying only wets the surface. That leads to shallow root growth.
How do I know if my Aglaonema has root rot in a pot without drainage holes?
Look for yellow leaves, mushy stems, and a foul smell. I check by gently pulling the plant out. If roots are brown or black and slimy, it's rot. I trim those roots with sterile scissors. I repot in fresh dry soil. I water less going forward.
Should I add sand to my soil mix for a no-drainage pot?
I tried sand once. It made the soil compact. That trapped moisture. Bad idea. I stick with perlite and orchid bark. They create air pockets. Roots breathe better. Soil drains faster.
One Last Thing
I've kept my Aglaonema alive in a no-drainage pot for over 2 weeks. It's thriving. New leaves are coming. No rot. No stress. It's possible if you pay attention. You don't need fancy equipment. You just need to water less. Check soil often. And trust the process.
Many people say no-drainage pots are impossible. I disagree. Aglaonema proves them wrong. It's a forgiving plant. It adapts. So can you.
I hope this helps you keep your Aglaonema happy. I'm not a professional botanist. I'm just a plant lover who made mistakes. Now I share what worked. Your plant will thank you.





