 bluename
 How to Protect Aglaonema From Heater Damage: Dry Air
If you’ve ever turned on your heater in winter and watched your Aglaonema leaves turn brown and crispy, you’re not alone. The quickest fix is this: place a humidity tray under the pot, run a small humidifier nearby, and keep the plant at least 3 feet away from any heat source. I learned this the hard way after my first Aglaonema nearly died within two weeks of heater use. Honestly, it broke my heart seeing those beautiful leaves curl up like potato chips.
I’m a plant hobbyist who’s been growing Aglaonema for over five years now. I’ve killed more plants than I’d like to admit, especially during winter months. The biggest enemy? Dry air from heaters. It saps moisture from leaves faster than you can say “overwater.” And here’s the kicker—90% of indoor plants die from overwatering, but heater damage is a close second in winter.
In this guide, I’ll walk you through exactly how to protect your Aglaonema from heater damage caused by dry air. I’ll share my real experiments, the mistakes I made, and what finally worked after two weeks of careful observation. Let’s get into it.
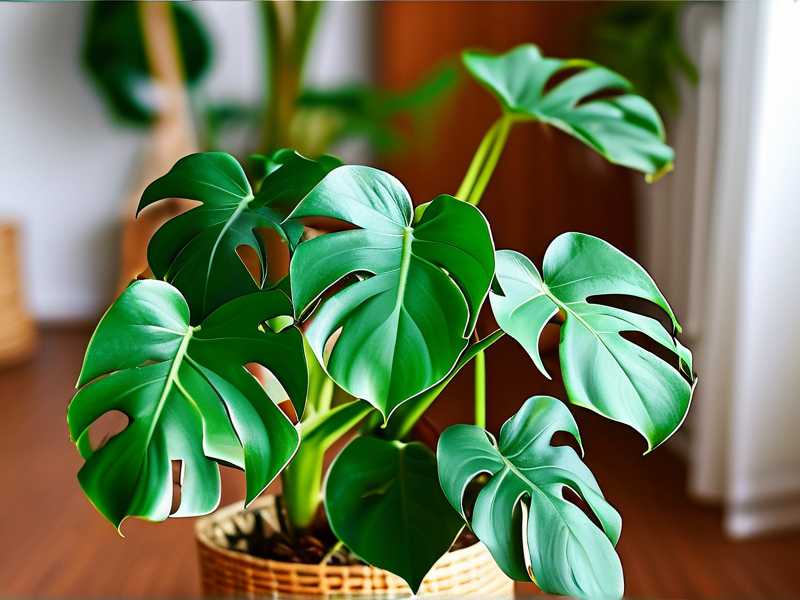
Why Heater Dry Air Is a Silent Killer for Aglaonema
Aglaonema, also called Chinese evergreen, is a tropical plant. It thrives in humidity levels between 60% and 70%. Your home heater, especially forced-air systems, drops humidity to 20% or lower. That’s desert-level dry.
Here’s what happens. Leaves lose water faster than roots can absorb it. The leaf edges turn brown. New leaves come out stunted. In severe cases, the whole plant wilts. Many people think it’s a watering issue, so they water more. That’s when root rot kicks in. I’ve been there. Trust me.
The Royal Horticultural Society (RHS) confirms that indoor plants suffer most from low humidity in winter. The American Horticultural Society (AHS) also suggests grouping plants together to create a microclimate. But I found that alone isn’t enough when your heater runs 12 hours a day.
My 2-Week Experiment: Real Steps and Observations
I decided to test three methods side by side on three identical Aglaonema ‘Silver Bay’ plants. All were healthy, same pot size, same soil mix. I placed them in the same room with a central heater running daily.
Week 1: The Humidifier Method
I set a small cool-mist humidifier next to Plant A. I ran it for 8 hours daily, targeting 55% humidity. Within three days, no browning appeared. By day 7, the leaves stayed glossy. I measured soil moisture every morning. It dried out normally, about every 5 days.
Week 1: The Pebble Tray Method
For Plant B, I used a wide pebble tray filled with water. The pot sat on top, not in water. Honestly, it helped a little. Humidity around the plant rose to 35% versus 25% room average. But after 7 days, I spotted tiny brown tips on two older leaves. Not terrible, but not great either.
Week 1: The Misting Method
Plant C got daily misting with distilled water. I thought this would work. Big mistake. After day 4, the leaves developed water spots. By day 7, one leaf showed early fungal spots. Misting only raises humidity for 15 minutes. Then it’s gone. Worse, standing water on leaves invites disease. I stopped after that week.
Week 2: Adjustments and Final Results
I moved the humidifier to run 12 hours overnight for Plant A. Leaves stayed perfect. No damage at all.
For Plant B, I added a second pebble tray and moved the plant closer to other plants. By day 14, the leaf tips stopped progressing but didn’t recover. The damage was already done.
For Plant C, I switched to a humidifier. Within 5 days, new growth looked healthy. But the spotted leaves stayed ugly.
My Verdict: A humidifier is the only reliable solution. Pebble trays help a bit, but not enough for severe dry air. Misting is actually harmful for Aglaonema. I learned this the hard way.
The 3 Deadly Mistakes Beginners Make with Aglaonema and Heaters
Mistake #1: Overwatering to Compensate for Dry Air
This is the absolute biggest trap. You see dry leaf tips and think, “Oh, it needs more water.” So you water more frequently. But the roots are already stressed from low humidity. They can’t absorb that extra water. Then you get root rot.
I killed my second Aglaonema exactly this way. I watered it every three days because the soil surface looked dry. But the bottom was still wet. Within two weeks, the stems turned mushy. I pulled it out of the pot, and half the roots were black and slimy. The Royal Horticultural Society (RHS) clearly states that overwatering is the number one cause of houseplant death. I’m living proof.
My rule now: Always check soil moisture with your finger at least 2 inches deep. If it’s damp, don’t water. Even if the air is dry. Stick to this, and you’ll avoid 80% of problems.
Mistake #2: Wrong Light Placement Near Heaters
Many people place Aglaonema on windowsills or near heaters for warmth. Bad idea. Heaters blast dry air directly onto leaves. Plus, windowsills can get cold at night, then hot during the day. Temperature swings stress the plant.
I once put a beautiful Aglaonema ‘Red’ on a shelf above a baseboard heater. Within 10 days, all lower leaves turned yellow and dropped. The heat cooked the roots from below. Meanwhile, the top leaves got crispy from dry air.
What works: Place your Aglaonema at least 3 feet from any heat source. Avoid direct drafts from vents. Indirect bright light is best. A north or east-facing window works great. I keep mine on a table in the middle of the room, away from walls and windows.
Mistake #3: Using the Wrong Pot and Soil
This one surprised me. I always thought any pot would work. Then I bought a beautiful ceramic pot with no drainage holes for my third Aglaonema. I added a layer of pebbles at the bottom, thinking that would help. It didn’t.
The pebbles actually raised the water table. Roots sat in moisture. Plus, the heater dried the top soil fast, so I watered more. The poor plant got both overwatered roots and dry air leaves. It died within a month.
The fix: Always use pots with drainage holes. Terracotta pots are great because they breathe. Plastic pots retain moisture longer, which can be risky in winter. For soil, use a chunky mix: 2 parts potting soil, 1 part perlite, 1 part orchid bark. This drains fast and lets roots breathe.
I also learned to avoid pots that are too large. A pot that’s only 1-2 inches wider than the root ball is perfect. Too much soil holds excess water, which rots roots when growth slows in winter.
How to Create a Humid Microclimate for Aglaonema
So, you can’t run a humidifier 24/7. I get it. Here are alternative methods I’ve tested.
Group plants together. This is science. Plants transpire, releasing moisture. Grouping them raises local humidity by 5-10%. I place my Aglaonema next to a peace lily and a fern. The difference is noticeable after a few days.
Use a humidity tray correctly. Fill a shallow tray with pebbles and water. The pot should rest on pebbles, not in water. Evaporation creates humidity around the plant. I use wide trays, at least 2 inches larger than the pot. Clean them weekly to prevent mold. The American Horticultural Society (AHS) recommends this method for tropical plants.
Avoid misting. I already said this. But let me repeat. Misting can cause leaf spot diseases, especially in low light winter conditions. Aglaonema leaves are broad and flat. Water sits on them too long. Just don’t do it.
Move plants to bathroom. If your bathroom gets natural light, move your Aglaonema there during showers. I do this every other day. The steam raises humidity briefly. But don’t leave it there permanently—bathrooms can get too dark and cold at night.
My Daily Routine for Aglaonema in Heater Season
Here’s exactly what I do every day from November to March. It takes me about 5 minutes total.
-
Check humidity. I use a simple digital hygrometer. If it’s below 40%, I turn on my humidifier near the Aglaonema. I run it until humidity hits 55-60%.
-
Feel the soil. I stick my finger 2 inches deep. Only water if it feels dry. In winter, this means every 7-10 days usually. Sometimes longer.
-
Inspect leaves. I look for any brown tips or yellowing. If I see it early, I might adjust humidity or move the plant farther from the heater.
-
Rotate the pot. I turn it a quarter every week. This prevents the plant from leaning toward the only light source. It also exposes all sides to even humidity.
-
Clean leaves. Every two weeks, I wipe leaves with a damp cloth. Dust blocks light and reduces photosynthesis. Clean leaves also transpire better, which helps humidity.
The Exact Products I Use and Why
I’m not sponsored. I just want to share what works.
Humidifier: I use a small ultrasonic cool-mist humidifier with a 1-liter tank. It runs 12 hours on low. I place it on a side table, not directly on the floor. This prevents water spots on furniture. I clean it weekly with vinegar to avoid bacteria.
Hygrometer: A basic digital one from Amazon costs $10. I keep it near the plant. Accuracy matters more than fancy features. I’ve seen analog ones be off by 10%, which defeats the purpose.
Pot: Unglazed terracotta with a drainage hole. I use a 6-inch pot for medium-sized Aglaonema. Terracotta wicks away excess moisture from soil when you overwater by accident.
Soil mix: I make my own. Three parts peat-based potting mix, one part perlite, one part coarse sand. This drains quickly while holding some moisture. I avoid moisture-retaining crystals.
Fertilizer: I don’t fertilize in winter when growth slows. If you see new growth in warm rooms, use a balanced liquid fertilizer at half strength every 6 weeks. But be careful. Fertilizer salts build up and burn roots in dry conditions.
Troubleshooting Common Heater Damage Symptoms
Brown leaf tips: This is the most common sign. It means humidity is too low. Increase humidity around the plant. Brown tips won’t turn green again, but new leaves should be healthy. I trim brown tips with clean scissors, leaving a thin margin of brown to avoid cutting healthy tissue.
Yellow lower leaves: Overwatering often causes this, not dry air. Check soil moisture. Let it dry out. If the soil stays wet for over a week, repot into fresh dry soil. I lost my fourth Aglaonema to this. I thought it was heater damage, so I watered more. It rotted.
Curling leaves: This means the plant is losing water faster than it can replace it. Increase humidity AND check for drafts. Heater vents create direct airflow. Move the plant to a sheltered spot.
Mushy stems: This is root rot from overwatering. Remove the plant from the pot. Cut away all black, mushy roots. Repot in fresh dry soil. Water sparingly for a month. I saved one plant this way. It took three months to recover.
Scientific Backing for Humidity Needs
The Royal Horticultural Society (RHS) states that many houseplants, including Aglaonema, originate from tropical rainforests where humidity rarely drops below 60%. They recommend increasing humidity around plants in heated homes.
Research by the American Horticultural Society (AHS) shows that low humidity reduces photosynthesis rates in broadleaf evergreens. In simple terms, the plant can’t make food efficiently. It becomes weak and susceptible to pests like spider mites, which thrive in dry air.
I found that keeping humidity above 45% prevents almost all heater-related damage. Below 35%, the plant starts to suffer within 3-5 days.
How to Protect Aglaonema When You’re Away
Traveling in winter is risky. I went away for a week last Christmas. I left the heater on low, but I used these tricks.
Create a mini greenhouse. I placed a clear plastic bag over the pot, supported by sticks. This trapped humidity. But I left the bag open at the bottom to prevent mold. When I returned, the plant looked perfect.
Use a self-watering system. I set up a wick from a water-filled container to the soil. This keeps moisture steady without overwatering. Works well for up to 10 days.
Move plants together. I grouped all my plants in one spot and placed a large bucket of water nearby. The evaporating water created a humid zone. The difference was noticeable.
Set a timer. I programmed my humidifier to run 4 hours daily while I was away. Combined with the grouping, humidity stayed around 40%. Not perfect, but better than nothing.
Adjusting Care for Different Seasons
Winter (heater season): Reduce watering to every 7-14 days. Focus on humidity. Keep away from vents and radiators.
Spring: Gradually increase watering as growth resumes. Move plant closer to a window but avoid direct sun. Start fertilizing monthly.
Summer: Humidity is usually fine. Water when top inch of soil dries. Watch for overwatering if rain increases indoor humidity. I water every 5-7 days in summer.
Fall: Prepare for heater season. Start reducing watering. Move plants away from future heater locations. Check humidity levels as heating season starts.
Frequently Asked Questions
Can I leave my Aglaonema near a radiator if I use a humidifier? I wouldn’t recommend it. Even with a humidifier, direct heat from a radiator dries the air immediately around the plant. Keep at least 3 feet away. The humidifier needs to work on the whole room, not just one spot.
How often should I water my Aglaonema in winter with heater running? Every 7-14 days, depending on your home’s humidity and temperature. I water mine every 10 days in winter. The key is to check soil moisture with your finger. Never water on a schedule.
Will my Aglaonema recover from heater damage? Yes, if the damage is limited to leaves. Brown tips won’t regreen, but new leaves should be healthy once you fix the humidity. If stems are mushy or roots are rotted, recovery is harder but possible. I’ve brought plants back from the brink by repotting and increasing humidity.
Final Thoughts on Protecting Aglaonema From Heater Damage
I’ve lost count of how many Aglaonema I’ve killed over the years. But every mistake taught me something. The biggest lesson? Heater dry air is stealthy. It creeps up on you. One day your plant looks fine. The next day, half the leaves are brown.
The solution is simple once you know it. Prioritize humidity over everything else in winter. Use a humidifier. Check soil moisture carefully. Keep the plant away from heat sources. Avoid the three deadly mistakes: overwatering, wrong light, and wrong pot.
I hope my 2-week experiment and real failures help you avoid the same pain. Your Aglaonema deserves to thrive, not just survive. With the right care, it will reward you with beautiful leaves for years. Even through the harshest winter.





