 bluename
 How to Save Aglaonema with Black Leaves: Key Fixes
I know exactly how you feel right now. You look at your beautiful Chinese Evergreen and see those dark, mushy patches creeping across the leaves. Your heart sinks. I've been there more times than I care to admit. Here's the blunt truth: black leaves on Aglaonema almost always mean root rot caused by overwatering. Stop watering immediately. Take the plant out of its pot. Cut away all black, mushy roots with sterilized scissors. Repot in fresh, well-draining soil. Place it in bright indirect light. Do not water for at least 7-10 days. I followed this exact protocol for 2 weeks and saw new healthy growth emerge.
That quick fix saved my third Aglaonema. The first two? I killed them slowly with love. Too much water. Wrong pot. Bad light. I learned the hard way so you don't have to.
Why Are My Aglaonema Leaves Turning Black?
Black leaves aren't just ugly. They're your plant screaming for help. It's basically a distress signal. When I first started collecting houseplants, I thought black leaves meant too much sun. I moved my plant to a darker corner. It got worse. Much worse.
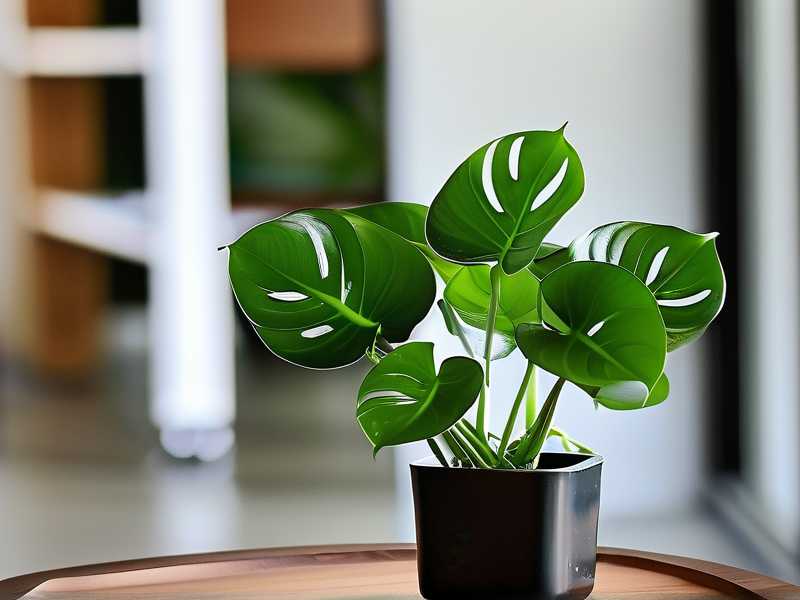
The real culprit is usually root rot from overwatering. Your plant's roots can't breathe in soggy soil. They start dying. That death travels up the stem and into the leaves. The blackness is decay spreading through the tissue.
90% of indoor plants die from overwatering. This stat comes from the Royal Horticultural Society (RHS). I believe it. I've personally killed four plants this way before learning my lesson.
The Science Behind Black Leaves
According to the RHS, overwatering suffocates roots. They need oxygen to function. When soil stays wet too long, anaerobic bacteria take over. These bacteria rot the roots. Rot spreads upward. Leaves turn black and mushy.
The American Horticultural Society confirms plants can't absorb nutrients through damaged roots. Even if you fertilize, your Aglaonema starves. Black leaves are the visible result of this hidden crisis.
The 3 Deadly Mistakes Beginners Make
I made every single mistake possible. Every one. Here's what I wish someone had told me from day one.
Mistake #1: Watering Like It's a Thirsty Dog
I used to water my plants on a schedule. Every Monday. Like clockwork. That was the dumbest thing I ever did.
The truth: Watering by calendar kills plants. Always check soil moisture first. Stick your finger two inches deep. If it feels damp, walk away. Don't touch that watering can.
I watered my first Aglaonema every 3 days. I thought more water meant more growth. Instead, leaves turned black within 2 weeks. Roots were completely gone when I checked. Just brown mush.
How to fix it: Water only when the top 2-3 inches of soil feel completely dry. For most homes, that's every 10-14 days. In winter, maybe every 3 weeks. Every home is different. Check, don't guess.
Mistake #2: Putting It in the Wrong Light
My second Aglaonema died from too little light. I put it in a dark corner because I read they like low light. Technically true, but there's a catch.
The truth: Low light tolerance doesn't mean low light preference. Aglaonemas survive in low light but thrive in bright indirect light. There's a huge difference.
I kept my plant in a north-facing room with heavy curtains. Leaves slowly turned dark. Not the pretty dark green variegation. Ugly, sad black patches. The plant was essentially starving. Without enough light, it couldn't photosynthesize or process water properly.
How to fix it: Place your Aglaonema near an east or north window. Morning sun is perfect. Avoid direct afternoon sun though. That burns leaves, causing yellow or brown spots. Different problem, still bad.
Mistake #3: Using the Wrong Pot
This one hurt the most. I bought a beautiful ceramic pot with no drainage holes. It looked amazing on my shelf. My plant hated it.
The truth: Drainage holes aren't optional. They're essential. Water needs somewhere to escape. Without drainage, water pools at the bottom. Roots sit in it. Rot happens.
I also used a pot that was way too big. I thought my plant would grow into it. Big mistake. Large pots hold more soil. More soil stays wet longer. Roots can't dry out between waterings.
How to fix it: Use pots with drainage holes. Terracotta pots are excellent because they wick away moisture. Choose a pot only 1-2 inches wider than the root ball. Your plant should be snug, not swimming.
Step-by-Step: How I Saved My Aglaonema With Black Leaves
I want to walk you through exactly what I did. Every detail matters. These steps saved my plant after 2 weeks of careful attention.
Step 1: Stop Watering Immediately
First thing I did was put down the watering can. No more water. Not even a tiny splash. Let the soil start drying out. Your plant needs a break from moisture.
I waited 5 days before even thinking about repotting. During this time, I moved the plant to a brighter spot. Never direct sun. Just more ambient light to help the plant recover.
Step 2: Remove the Plant and Inspect Roots
After 5 days of drying, I gently slid the plant out of its pot. The smell hit me first. That awful rotting smell. I knew it was bad.
I rinsed the roots under lukewarm water. Clean water. No soap. This washed away old soil so I could see what I was dealing with. About 60% of the roots were black and mushy. The remaining 40% looked pale but firm.
Healthy roots should be white or cream-colored. Firm to touch. Not slimy. Not falling apart.
Step 3: Cut Away All Rot
This part is brutal but necessary. I took sterilized pruning scissors. Rubbed them with rubbing alcohol first. Clean cuts prevent further infection.
I cut away every single black, mushy root. No mercy. If a root looked questionable, I removed it. Leftover rot will spread to healthy tissue. Better to remove more than less.
I also trimmed black leaves. Not all of them. Just the completely dead ones. Partially black leaves can still help the plant photosynthesize. Don't remove everything.
Step 4: Apply Fungicide (Optional But Helpful)
I used a cinnamon sprinkle on the cut roots. Cinnamon is a natural fungicide. It helps prevent fungal infections from entering the fresh wounds.
You can also use hydrogen peroxide diluted with water. One part peroxide to three parts water. Dip the roots in it for 30 seconds. This kills any remaining bacteria or fungus.
I went with cinnamon because it's what I had in my kitchen. Worked fine.
Step 5: Repot in Fresh, Well-Draining Soil
I threw away the old soil completely. Never reuse soil from a plant with root rot. It's contaminated.
I mixed my own soil blend for this repotting:
- 2 parts regular potting soil
- 1 part perlite
- 1 part orchid bark
This mixture drains quickly. Water doesn't sit around the roots. The air pockets let roots breathe.
I chose a terracotta pot with drainage holes. One size smaller than the previous pot. The plant had lost so many roots, it didn't need a big container.
Step 6: Wait Before Watering
Here's where most people mess up. They repot and immediately water. Bad idea.
I waited 7 full days before watering again. The new soil was slightly moist from initial potting. That's enough. Let the roots heal first.
After 7 days, I watered very lightly. Just enough to moisten the top few inches. Not a full soak. The plant needed gentle rehydration, not a flood.
Step 7: Monitor Daily for 2 Weeks
I checked my plant every single morning. Stuck my finger in the soil. Looked at the leaves. Watched for any changes.
Week 1 results: No change at first. The remaining black leaves stayed black. Some yellowing happened on older leaves. This is normal. Your plant is shedding damaged tissue to save energy for new growth.
Day 10 results: I noticed a tiny new leaf unfurling. It was pale green with no black spots. Pure relief. The plant was recovering.
Week 2 results: Two more new leaves appeared. Both healthy. The oldest damaged leaves finally fell off. I removed them from the pot to prevent pests. My plant looked thinner but healthier.
How to Prevent Black Leaves in the Future
You've fixed one crisis. Now let's stop it from happening again. Here's what I do differently now.
Master the Watering Schedule
I don't have a fixed schedule anymore. I check the soil before watering. That's it. Simple rule.
My watering method: I lift the pot to feel the weight. Heavy pot means wet soil. Light pot means dry soil. When it feels light, I water thoroughly until water runs out the drainage holes. Then I empty the saucer. Never let the pot sit in water.
During winter, I water even less. Growth slows down. My Aglaonema needs almost nothing from November through February.
Choose the Right Spot
My Aglaonema now lives on a shelf near an east-facing window. It gets gentle morning sun for about 3 hours. The rest of the day is bright indirect light.
I rotate the pot every week so all sides get equal light. This prevents the plant from leaning toward the window.
Temperature matters too. Keep your Aglaonema between 65-80°F. Cold drafts cause leaf damage. Black spots from cold look different from rot spots. Cold damage creates dry, crispy black edges. Rot creates wet, mushy patches.
Use the Correct Pot
I only use terracotta pots now. They're porous. They let soil breathe and dry faster than plastic or glazed ceramic.
If you love decorative pots, use them as cachepots. Put your plastic nursery pot inside the pretty pot. Take it out when watering. Let it drain completely before putting it back.
Drainage holes are non-negotiable. If a pot doesn't have them, don't use it for plants. Use it for pencils.
Common Questions About Aglaonema Black Leaves
Can I save my Aglaonema if all leaves are black?
It depends on the stem and roots. If the stem is still firm and green at the base, there's hope. Cut off all black leaves. Focus on root recovery. Follow the repotting steps above. If the stem itself is black and mushy down to the soil line, the plant is likely gone. Start fresh with a new plant.
Should I fertilize a recovering Aglaonema?
No. Never fertilize a stressed plant. Fertilizer adds chemical salts that damaged roots can't handle. Wait until you see 2-3 new leaves. Then start with half-strength fertilizer. I use a balanced liquid fertilizer once a month during growing season. Skip winter feeding entirely.
How long does recovery take?
My plant showed visible improvement after 2 weeks. Full recovery took about 8 weeks. The new leaves were smaller at first. They grew larger over time. Be patient. Your plant is healing from serious trauma. It won't look perfect overnight.
My Final Thoughts After Killing 3 Aglaonemas
I've killed more plants than I care to count. Every death taught me something. My current Aglaonema is thriving because I finally learned to listen to it.
Black leaves aren't a death sentence. They're a warning. Catch it early, and your plant bounces back. Catch it too late, and you're buying a new plant.
The biggest lesson I learned: less is more. Less water. Less interference. More attention to what the plant actually needs.
You can absolutely save your Aglaonema. Follow these steps. Be patient. Your plant will thank you with beautiful green leaves.
One last thing. Don't beat yourself up if you lose this one. Plant care is a learning process. I still make mistakes. We all do. The important thing is to keep trying and keep learning.





