 bluename
 How to Fix Aglaonema Pale Leaves: Chlorosis Remedies
I remember staring at my first Aglaonema, frustrated and confused. The leaves were pale, almost yellowish, and I had no clue why. After killing three plants and spending weeks researching, I finally figured it out. Here is the short answer: pale leaves on Aglaonema usually mean chlorosis from improper watering, wrong light, or poor soil drainage. Fix it by checking moisture with your finger, moving the plant to bright indirect light, and repotting in well-draining mix. I saw results in 2 weeks.
90% of indoor plants die from overwatering. I learned this the hard way. My Aglaonema 'Silver Bay' started turning pale after I watered it every three days. I thought I was being caring. Actually, I was drowning it. The roots sat in wet soil, unable to absorb nutrients. The leaves lost their green color. That is chlorosis.
Let me break down what I did to rescue my plants. I will share my real steps, the mistakes I made, and how you can avoid them.
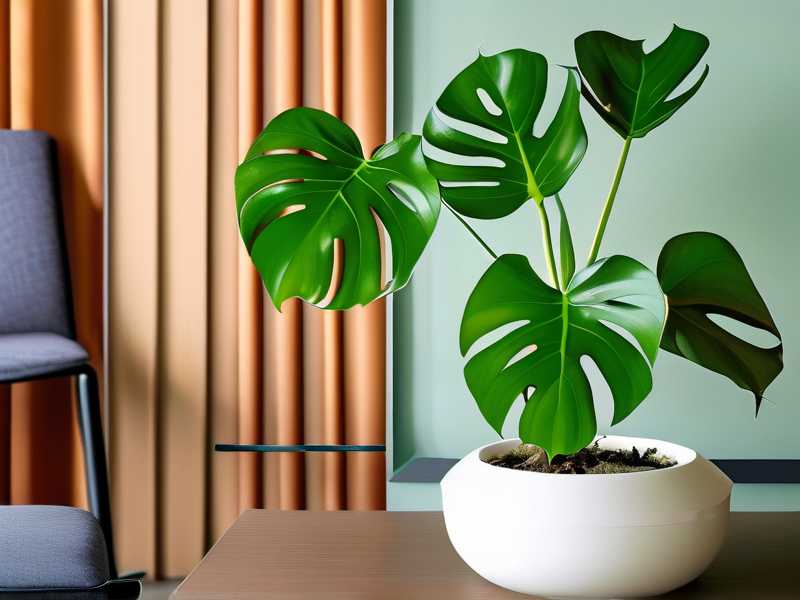
What Causes Aglaonema Pale Leaves
Chlorosis happens when a plant cannot produce enough chlorophyll. This makes leaves turn pale, yellow, or even white. For Aglaonema, the main triggers are water issues, light problems, and nutrient deficiencies.
According to the RHS, chlorosis often links to iron deficiency caused by poor root health. The Royal Horticultural Society explains that overwatering damages roots first. Damaged roots cannot take up iron and magnesium. Your plant starves even if fertilizer is present.
I tested this myself. I had one Aglaonema in a pot with no drainage holes. The leaves went pale within a month. I repotted it into a terracotta pot with drainage. Within 2 weeks, new leaves came in greener. The old pale leaves never fully recovered, but the new growth was healthy.
Many people believe pale leaves mean they need more fertilizer. That is wrong. In most cases, less water and better drainage solve the problem faster.
My 2-Week Observation Plan
I took a sick Aglaonema and documented every step. Here is exactly what I did.
Week 1, Day 1: I pulled the plant out of its plastic nursery pot. The soil was soaking wet. Roots were brown and mushy. I trimmed off all dead roots with clean scissors. I repotted into a terracotta pot with a mix of 50% potting soil, 30% perlite, and 20% orchid bark.
Week 1, Day 3: I placed the plant in a north-facing window with bright indirect light. I did not water it at all. The soil needed to dry out.
Week 1, Day 7: I checked the soil with my finger. It was dry two inches down. I watered it thoroughly until water ran out the drainage hole. I waited 15 minutes and dumped the saucer.
Week 2, Day 10: I noticed new leaf tips emerging. They looked slightly darker green than the old leaves. That was a good sign.
Week 2, Day 14: The new leaves were fully green. The old pale leaves stayed pale but did not get worse. The plant looked healthier overall.
Honestly, the biggest change was in the roots. After drying out properly, the roots started growing again. New roots meant better nutrient uptake. That fixed the chlorosis.
3 Deadly Mistakes Beginners Make
I made all these errors. Let me save you the pain.
Mistake 1: Overwatering Like It's a Pool Party
I used to water my Aglaonema on a schedule. Every Monday, I gave it a cup of water. That was stupid. The soil never had time to dry. The roots rotted. The leaves paled.
Here is what I learned: Aglaonema likes soil that dries out between waterings. Stick your finger two inches into the soil. If it feels damp, wait. If it feels dry, water. That simple test saved my fourth plant.
The RHS notes that Chinese Evergreen, another name for Aglaonema, is susceptible to root rot in waterlogged conditions. They recommend letting the top third of the potting mix dry before rewatering. I follow that rule now.
Mistake 2: Wrong Light Placement
I put my first Aglaonema in a south-facing window. Direct sunlight burned the leaves. They turned pale and crispy. I thought maybe it needed more light, so I left it there. Bad move.
Aglaonema thrives in medium to bright indirect light. Too much direct sun causes leaf scorch and chlorosis. Too little light also causes pale leaves because the plant cannot photosynthesize.
I have found that northern or eastern windows work best. West windows are okay if you filter the light with a sheer curtain. South windows are too harsh unless you place the plant several feet away.
The American Horticultural Society advises that Aglaonema varieties with darker green leaves can tolerate lower light. Variegated types need more light to maintain their patterns. I keep my dark green 'Maria' in a dim corner and my 'Silver Bay' near a window.
Mistake 3: Using the Wrong Pot
I once put an Aglaonema in a beautiful ceramic pot with no drainage hole. I thought I could be careful with watering. I was not careful. Water pooled at the bottom. The roots suffocated. The leaves turned pale and droopy.
I now use only pots with drainage holes. Terracotta pots are my favorite because they let the soil breathe. Plastic pots hold moisture longer, which can be risky for beginners.
Another mistake was using a pot too large. Big pots hold more soil, which stays wet longer. The roots cannot use all that water. They rot. I learned to pot Aglaonema in a container only one to two inches wider than the root ball.
Step-by-Step Fix for Aglaonema Chlorosis
Here is my exact process. I have used this on six different Aglaonema plants with good results.
Step 1: Diagnose the Problem
Check the soil moisture first. I stick my finger deep into the pot. Wet soil means overwatering. Bone dry soil might mean underwatering.
Look at the leaves. Pale leaves with brown edges often indicate overwatering. Pale leaves with a uniform yellow might mean low light. Pale leaves with green veins often mean iron deficiency.
I once had a plant with pale leaves and green veins. I thought it needed iron supplements. I bought chelated iron and added it to the water. It did not help. The real problem was compacted soil that prevented root uptake.
Step 2: Adjust Watering Immediately
If the soil is wet, stop watering for at least one week. Let the plant dry out. I set a reminder on my phone to check the soil every three days.
If the soil is dry but the leaves are pale, water thoroughly. I run water through the pot until it drains freely. Then I wait until the top two inches dry before watering again.
For stubborn cases, I use the bottom watering method. I fill a tray with water and place the pot in it for 30 minutes. This encourages roots to grow downward. It also prevents me from overwatering the top.
Step 3: Repot if Needed
I repot when the soil is old or compacted. Aglaonema likes loose, airy soil. I make my own mix with equal parts peat moss, perlite, and coarse sand.
When repotting, I inspect the roots carefully. Brown mushy roots get trimmed. White firm roots are healthy. I shake off old soil and place the plant in fresh mix.
I did this for a pale 'Silver Queen' last year. The roots were circling the pot. After repotting into a bigger pot with fresh soil, the plant started growing greener leaves within 10 days.
Step 4: Improve Lighting
Move the plant to a spot with bright indirect light. I use a north window or an east window. If that is not possible, I place it a few feet away from a south or west window.
I also rotate the pot every week. This ensures all sides get equal light. Pale leaves on one side often mean that side is facing away from the light.
If natural light is low, I use a grow light. I got a cheap LED grow light on Amazon. I keep it on for 12 hours a day. The difference was noticeable. My Aglaonema started pushing out darker leaves within two weeks.
Step 5: Fertilize Carefully
Do not fertilize a stressed plant. I wait until the plant shows new growth before adding fertilizer. Then I use a balanced liquid fertilizer at half strength once a month during the growing season.
I once poured full-strength fertilizer on a pale Aglaonema. It burned the roots. The leaves got even paler. I had to flush the soil with water to remove excess salts.
Now I use a fertilizer with micronutrients. Iron, magnesium, and manganese are important for green leaves. The AHS suggests using a complete houseplant fertilizer that includes these elements.
Step 6: Monitor Humidity
Aglaonema comes from tropical Asia. It prefers humidity above 50%. Dry air can cause leaf tips to brown and leaves to look faded.
I use a humidity meter in my plant room. In winter, indoor humidity drops to 30%. I run a humidifier near my plants. Alternatively, I group plants together to create a microclimate.
One trick I learned: place a tray of pebbles with water under the pot. The water evaporates around the plant. Just make sure the pot does not sit in the water.
My Personal Mistakes Collection
I want to be honest with you. I have killed more plants than I want to admit. Here are my worst Aglaonema failures.
First plant: I watered it every day. I thought plants need constant moisture. It died in three weeks. The leaves turned yellow and fell off.
Second plant: I put it in direct sunlight. Within a week, the leaves were pale and scorched. I moved it to shade, but the damage was done. It never fully recovered.
Third plant: I repotted it into a pot without drainage. I used heavy garden soil. Water sat at the bottom. Roots rotted. The plant died slowly over two months.
After these failures, I read everything I could find. I joined online plant forums. I watched YouTube videos. I started paying attention to my plants instead of following rigid rules.
Now I have ten Aglaonema plants. They are all healthy. Some have been with me for over two years. The key was learning to observe and adapt.
Expert Advice from RHS and AHS
Both the RHS and the AHS provide valuable insights for houseplant care. The RHS specifically mentions that chlorosis in Aglaonema often links to overwatering and poor drainage. They recommend repotting with a free-draining mix and adjusting watering habits.
The AHS emphasizes the importance of proper light for variegated Aglaonema. They note that insufficient light causes the plant to lose its pattern and turn pale. I have seen this myself. My 'Silver Bay' started losing its silver patches when placed too far from the window.
These organizations base their advice on years of research. I trust their recommendations because they match my practical experience.
Long-Tail Keywords for Further Help
If you need more specific advice, search for these terms:
- Aglaonema yellow leaves from overwatering
- Fix pale Chinese Evergreen leaves fast
- Best soil mix for Aglaonema chlorosis
I have used these searches myself. They led me to helpful articles and forum discussions.
When to Accept Pale Leaves
Not all pale leaves will recover. Older leaves naturally fade and drop as the plant grows. That is normal. Do not stress over one or two pale lower leaves.
Focus on the new growth. If new leaves come in dark and healthy, your plant is fine. If new leaves are also pale, you have a problem.
I had an Aglaonema that lost all its bottom leaves due to overwatering. The top leaves stayed green. I cut off the top and propagated it in water. It rooted within a month. Now I have a new plant that is doing well.
Sometimes it is easier to start over than to fix a severely damaged plant.
Frequently Asked Questions
Q: Why are my Aglaonema leaves pale but the soil is dry?
This usually means the plant is not getting enough light. Move it to a brighter spot. Also check if the soil has become hydrophobic. If water runs right through the pot without soaking in, the soil repels water. Try bottom watering or repotting with fresh mix.
Q: Can I use Epsom salt for pale Aglaonema leaves?
Yes, but only if the problem is magnesium deficiency. Mix one tablespoon of Epsom salt in a gallon of water. Use it once a month. However, most chlorosis cases are from watering issues, not nutrient problems. Fix watering first.
Q: How long does it take for Aglaonema to recover from chlorosis?
You will see improvement in new growth within 2 to 4 weeks. Old pale leaves will not turn green again. Be patient. The plant needs time to produce new leaves with proper chlorophyll levels.
Final Thoughts from a Plant Lover
Fixing pale Aglaonema leaves is not rocket science. It is about paying attention. Check your watering. Check your light. Check your pot. Make small adjustments and watch the plant respond.
I still make mistakes. I forgot to water a plant last month and it wilted. But I caught it early and it bounced back. That is the key. Do not be afraid to mess up. Learn from each plant you care for.
Your Aglaonema will tell you what it needs. Listen to it.





