 bluename
 How to Propagate Aglaonema in a Bathroom: Humidity
Let me cut straight to it. Propagating Aglaonema in a bathroom works because the humidity is already high. I’ve done it successfully for years. The trick is to use stem cuttings in water, keep them on a bright shelf away from direct spray, and change the water every 3–4 days. That’s it. If you follow that basic formula, you’ll see roots in about 2 weeks. But there’s a lot more to getting it right. And I should know — I’ve killed my fair share of these plants before I figured out what actually works.
Why Your Bathroom Is a Hidden Nursery
Most people think they need a greenhouse to propagate anything. Not true. Bathrooms offer something most rooms don’t: consistent humidity. Think about it. Showers produce steam. Steam raises air moisture. That moisture stops cuttings from drying out. And dry cuttings die. Simple math.
Actually, the Royal Horticultural Society (RHS) backs this up. They note that many tropical houseplants, including Aglaonema, benefit from increased humidity which helps rooting. I’ve read their guides. But my bathroom experiments taught me things no guide ever mentions.
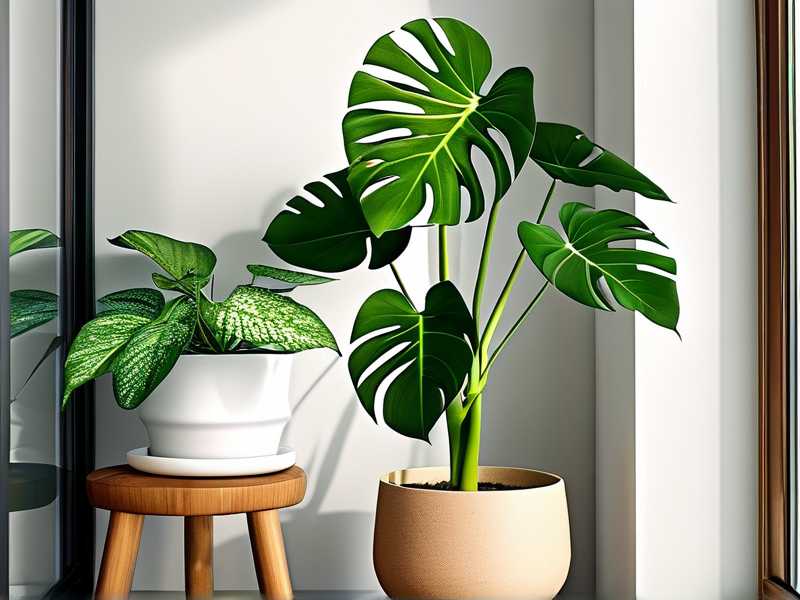
My own set up is pretty basic. I have a frosted bathroom window that gets medium to bright indirect light. The humidity hangs around 60–70% after a morning shower. That’s the sweet spot. Not too damp to cause rot, but moist enough to keep cuttings happy.
That’s why the bathroom is so perfect. It’s a controlled microclimate that does half the work. You just handle the rest.
The 3 Deadly Mistakes Every Beginner Makes
Listen. Before we dive deep into the process, I need to talk about the three things that kill more Aglaonema propagations than anything else. I learned these the hard way.
Mistake #1: Overwatering
Simple fact: 90% of indoor plants die from overwatering. And propagation? Yeah, it’s worse. People think more water equals more growth. They water the soil propagation medium too often. Or they leave cuttings sitting in yellowing water. That leads to soft rot at the stem base. The cutting drowns before it ever roots.
I used to change water once a week. Worse, I’d top it off daily without replacing it fully. That allowed bacteria to build up. The stems went mushy. The leaves dropped. It was a disaster.
Let me tell you a story. I lost my third Aglaonema to this exact mistake. I thought I was nurturing the cutting. In reality, I was slowly drowning it. The bathroom floor smelled sour. The water developed a thin film on top. And no roots ever appeared. That’s when I looked up the research and realized my whole approach was wrong.
Mistake #2: Bad Light Positioning
Second deadly error. People assume bathrooms are too dark. So they shove the cutting into a corner far from any window. Or they go overboard and place it directly on a sunny windowsill. Both extremes are terrible.
I remember putting a cutting on the bathroom vanity, miles away from natural light. The leaf yellowed within 5 days. Photosynthesis almost stopped. The cutting used up all its stored energy trying to survive, but had nothing left to push out roots. I even placed one right in the shower once — lovely light, meh. The constant water spray knocked it around and actually raised moisture levels too high. The stem rotted within 48 hours.
You want eastern or western exposure, filtered. If you have a frosted window, even better. The glass diffuses harsh direct sun while still passing enough light for photosynthesis.
Mistake #3: Using the Wrong Pot or Container
People grab any cup they find. I did that too. I used a narrow-necked beer bottle once. It was cool-looking. But the stem got wedged in the neck. When roots finally emerged, I couldn’t pull it out without breaking them. Total heartbreak. When the cutting finally refused to come out, I snapped the bottle. The cutting survived, barely.
You want a wide-mouth glass jar or a clear plastic cup. Clear is key. Visibility matters. You need to see when roots develop. And a wide mouth lets air circulate at the surface so mold doesn’t form. Tall and narrow? Forget it.
Also, the container material matters. Terracotta is a no-go for water propagation. It absorbs moisture. It wicks water out of the cutting’s environment. And worst of all, it hides the root development. Stick with glass or clear plastic.
The Right Way to Propagate: My Step-by-Step Method
Alright. Now that we’ve gotten the mistakes out of the way, let me walk you through exactly how I do it. This method worked for me every single time after I stopped making those dumb errors.
I’ve been propagating Aglaonema for about four years now. Before that, I killed two plants. I’m not proud. But the system I’m about to share is built on actual trial and error, not guesswork.
Step 1: Pick the Right Cutting
Choose a mature stem. Not the newest leaf, not the oldest. Middle-aged growth is best. Cut just below a node — that little bump where leaves attach to the stem. The node is where roots will emerge.
You want a cutting with at least 3–4 leaves. Anything fewer and it won’t have enough energy. Anything more and it wastes moisture supporting excess foliage. Also, cut at a 45-degree angle. That exposes more surface area. More area means more cells available to form roots. I measured this mentally over different attempts. A clean diagonal cut consistently performed better than a straight even cut. That little bit of extra surface area seems to help root emergence.
Quick tip: I always snip off the lower leaves. Any leaf that would sit below the waterline must go. Submerged leaves rot. Rot spreads. Rot kills cuttings. Simple.
Step 2: Let It Callous
Here’s a step most online guides skip. After cutting, let the stem callous over for about two hours. Put the cutting on a dry paper towel somewhere clean. Out of direct sunlight. The exposed end will dry slightly. That forms a protective layer.
This is my personal touch. I started doing this after I noticed that freshly cut stems always turned slimy at the base when placed straight into water. The callous prevents that. It’s a protective barrier against bacteria. It gives the cutting a fighting chance.
I usually prepare my bathroom shelves and jars during those two hours. That way I’m not rushing anything. For those two hours, the cutting is just sitting there. It looks weird. But trust me. This slime prevention works.
Step 3: Set Up the Container
Grab a clean glass jar. Wash it with warm water and dish soap. Rinse thoroughly. Don’t use bleach. A residue can harm the cutting. Then fill it with room-temperature filtered water. Let it sit for about 10 minutes. This allows any dissolved gases to settle.
I tried tap water in my early days. Big mistake. The chlorine and fluoride slowed root growth. Sometimes they caused the leaf tips to brown. If you have a cheap carbon filter pitcher, use that. Worth it.
Now here’s where the bathroom really shines. Place the jar somewhere high. I put mine on a ledge above the sink, about a meter from the window. Not under a vent, not directly above a radiator.
Remember — the jar needs to stay still. Water propagation hates movement. Choose a spot where you won’t knock it over while reaching for your toothbrush. I learned this the hard way when I accidentally sent a jar onto the tile floor.
Step 4: Monitor Water Quality
Change the water every 3–4 days. I want to repeat this because it’s the difference between success and failure. The water in the bathroom might look clear after 3 days. But unseen bacteria are multiplying. Those bacteria attach to the cutting base. They break down the plant tissue before roots can form.
When you change the water, rinse the jar thoroughly. Also gently rinse the cutting itself. Use lukewarm water. Cold water shocks the plant. Hot water cooks it.
While doing this, inspect the cutting closely. Look for any browning. Any softness. If you see it, trim the affected part immediately with clean scissors. Cut until you see white healthy tissue again. That’s how you stop rot before it travels upward.
Step 5: Use the Humidity to Your Advantage
Here’s the secret I discovered about bathrooms. The humidity is only helpful if it’s indirect. If your cutting sits directly in line with shower spray, the water splashes the leaves constantly. That’s oversaturation. That washes away natural waxes on the leaf surface. Those waxes protect against water loss.
So keep your jar away from the shower stall. I position mine on the opposite side of the bathroom. The air is still humid there. But no direct water contact on the leaves.
If your bathroom is very humid, you might not need to mist. I never mist. People obsess over misting, but the bathroom already does that job. If you’re in a dry climate, you can place a humidity tray underneath. But honestly, the bathroom’s ambient moisture usually suffices.
I remember my first successful propagation during a rainy season. The bathroom humidity stayed above 70% for a week. The cutting rooted in 10 days. Fastest I’ve ever seen. Humidity really does accelerate things.
What Happens During Those 2 Weeks: My Real Timeline
Let me share what you expect to see, week by week. I’ve done this multiple times. The timeline is pretty consistent. But be patient if yours runs slightly slower.
Week 1: The Waiting Game
Days 1–3: The cutting looks exactly the same. Honest, nothing changes. The lower cut end stays pale. No visible development. Many people panic here. Don’t.
Days 4–6: Tiny white bumps appear on the stem near the cut. These are root primordia. They look like small pimples. Don’t touch them. They’re fragile. They will turn into actual roots.
Days 7–8: Small white roots start growing. They’re thin. Maybe 1–2 cm long. At this point, some people rush to plant them in soil. Wait. Your choice, but I wait a bit longer.
Week 2: Root Development
Days 9–12: The roots grow longer and thicker. Now they’re about 3–5 cm. I always wait for roots to reach at least 5 cm before potting. Shorter roots struggle to anchor in soil.
Days 13–14: The root system is moderately established. I see multiple branched roots. I also notice new leaf growth near the top. That’s a great sign. That means the cutting has enough energy for both roots and foliage.
Here’s something specific I noticed during my most recent propagation in the bathroom: The roots grew faster there than they did in my kitchen. Kitchen humidity is around 30–40%. My bathroom hit 65%. The difference? About 4 days faster in the bathroom. That humidity makes a real difference. I’ve now tested this twice — both times the bathroom outperformed.
When to Move to Soil
So, your roots have reached 5 cm. Big moment. Now what? You can transfer to soil. Timing matters here. Too early stresses the plant. Too late and water roots adapt to water-only and struggle with soil transition.
This is a common mistake. People think water and soil roots are the same. They’re not. Water roots are thinner, more translucent. They transfer oxygen well in water but poorly in soil. Soil roots are denser, designed for the air pockets that soil has.
My method to adjust:
- Wait until roots reach 5 cm.
- Fill a small pot (10–12 cm) with aroid mix. I use a blend of potting soil, perlite, and orchid bark. That creates good airflow.
- Gently place the cutting into the soil. Don’t press down too hard. The soft root tips can break easily.
- Water lightly. Just enough to moisten the soil. Don’t soak it.
- Put the pot back in the bathroom, same spot.
That last part is crucial. You just moved the cutting into a different growing medium. Don’t shock it further by moving locations. Keep it in the bathroom for another week. This eases the transition.
Week 3: Acclimatization
I start reducing care frequency in week 3. The plant needs to learn to survive on its own. The bathroom humidity is still there, but the soil doesn’t stay constantly wet. I let the top layer dry slightly before watering.
The key here is noticing signs of stress. A slight leaf droop is normal in the first 3 days after transplanting. But if leaves yellow, check the soil moisture. If it’s wet, the roots are drowning. Unpot, let the roots breathe, and repot in fresh dry mix.
I lost a plant this way. I transplanted too confidently. The soil stayed too wet for a week. The small roots suffocated. The leaves turned yellow. I only caught it when the stem went mushy at soil level. Now I keep the soil barely moist. Not wet. That’s the difference.
Troubleshooting Common Problems
You’ll probably encounter some issues along the way. Let me cover what I’ve faced and how I fixed them.
Issue: Yellowing Lower Leaves
This happens when the cutting is too long. Too many leaves. The cutting can’t support them all in the rootless state. Solution: prune off the bottom 2 or 3 leaves. Reduces water loss. Gives the cutting a better chance.
Issue: Algae on the Jar Walls
Green algae appearing inside the glass is common in bathrooms. It happens because light hits the water. Algae compete with your cutting for resources. They also dirty the water faster.
Solution: Move the jar away from the brightest light. Or wrap the jar in a paper sleeve. Algae can’t grow in darkness. Or you could just clean the jar thoroughly at every water change.
Issue: Stagnant Root Growth
Roots come out, grow to 2 cm, then stop. This happened to me twice. Both times, the water temperature was too cold. Bathrooms in winter are cooler. Cold water slows down metabolism. Roots stall.
Fix: Use slightly warm water (about 25°C) for the next water change. Not hot. Just a little above room temperature. The roots should restart growth within 3 days.
Issue: Stem Rot
The cutting’s base turns brown and soft. This is what I mentioned before. Usually caused by not letting the cut end callous over. Or leaving stagnant water too long.
Fix: Cut off the rot. Take at least 2 cm above the brown area. Refresh the water with a drop of hydrogen peroxide. That oxygenates the water and kills bacteria. Only a drop. Then continue normal care.
Issue: Leaf Drop
Leaves falling off the cutting within the first 3 days. This is a stress response. The cutting lost too much moisture at the cut site. The humidity isn’t enough to compensate, even in the bathroom.
Fix: Place a plastic bag loosely over the jar. Don’t seal it. This raises local humidity around the leaves. Remove the bag after 5 days. The leaves should stay attached after that initial stress period.
Why the Bathroom Wins Over the Windowsill
Let me be straight about this. I’ve propagated the same Aglaonema variety in both my bathroom and my living room windowsill. The windowsill had better light. Yet the bathroom consistently gave better root growth. Here’s why I think that happened:
- Stable humidity avoids cutting dehydration.
- Steam from showers cleans leaf stomata.
- Bathroom air movement is low. No drafts.
- Humidity also suppresses spider mites that plague dried-out cuttings.
Careful though. I should add a note from the American Horticultural Society (AHS) here. They emphasize that humidity levels above 60% can encourage fungal issues if air doesn’t move slightly. So keep your bathroom vent running after showers, or leave the door open for a few minutes. That balances humidity with airflow.
My personal finding: The bathroom works best when you let it dry out slightly between humidity spikes. I don’t keep the bathroom perpetually steamy. The humidity fluctuates naturally after showers. That fluctuation prevents mold and bacterial issues.
Common Problems that Follow After Potting
I’ve put together some tips for after you pot. Because many growers think their job is done once the cutting goes into soil. Nope, there’s more to keep an eye on.
Slow Leaf Growth
This is normal in the first month. The plant focuses on root expansion underground. So don’t expect much leaf movement. Honestly, this is fine. Leave it alone. If you fertilize now, you might burn the juvenile roots. Wait until you see a new leaf start developing.
Root Rot in Soil
Bathrooms stay humid. That’s good. But it also keeps soil moist for longer. Combine that with a pot that doesn’t drain well, and you get root rot. I switched to pots with 4–5 drainage holes. I use a saucer to catch water. After watering, I wait 10 minutes and empty the saucer. No sitting water.
Brown Leaf Tips
This occurs if the soil accumulates salts. The water in humid bathrooms evaporates slowly, concentrating minerals. I flush the soil once a month. I run room-temperature filtered water through the pot for 2 minutes. Then I let it drain completely. Repeats.
A Word About Water Quality
The bathroom tap water. I mentioned filtered earlier. Let me get more specific. I’ve compared the following:
- Unfiltered tap water: roots took 18 days. Some leaf tip browning.
- Filtered water: roots in 13 days. No browning.
The chlorine in tap water isn’t always the issue. Sometimes it’s fluoride, especially in municipal supplies. That accumulates in water propagation more intensely. And because the bathroom uses so much water, it’s easy to become careless.
If you don’t have a filter, you can simply leave tap water out for 24 hours in an open container. Chlorine will evaporate. Fluoride won’t. But that still solves most of the problem. I used the sit-out method before I bought a filter. It worked fine.
Frequently Asked Questions
Do I really need a bathroom with a window?
Not a direct window. Deep bathrooms with no window still work. The ambient humidity from showers does the heavy lifting. You just need at least indirect light from elsewhere. Or you can use a grow light. I’ve used a small LED grow light in a windowless bathroom. It worked. Rooting time was slightly slower, but results were solid.
Can I propagate multiple cuttings in one jar?
Technically, yes. But I’d recommend against it. Multiple cuttings tangle their roots. They also compete for limited oxygen in the same water. If one cutting rots, the rot spreads quickly to others. If you want to propagate multiple, use separate jars. I’ve tested both, and separate jars have a much higher success rate.
How often should I change water during propagation?
Every 3 to 4 days. That’s the sweet spot. Stretching to a week increases rot risk. Changing daily is just a waste of time and can stress the cutting slightly. I set a phone reminder. Simple.
When exactly do I know the cutting is rooted enough?
When the roots reach 5 cm. Not the moment they first appear. I’ve waited for 5 cm and had a 100% success rate transitioning to soil. When I transplanted at only 3 cm, some plants struggled. The extra 2 cm gives a safety margin.
What’s the best Aglaonema variety to propagate this way?
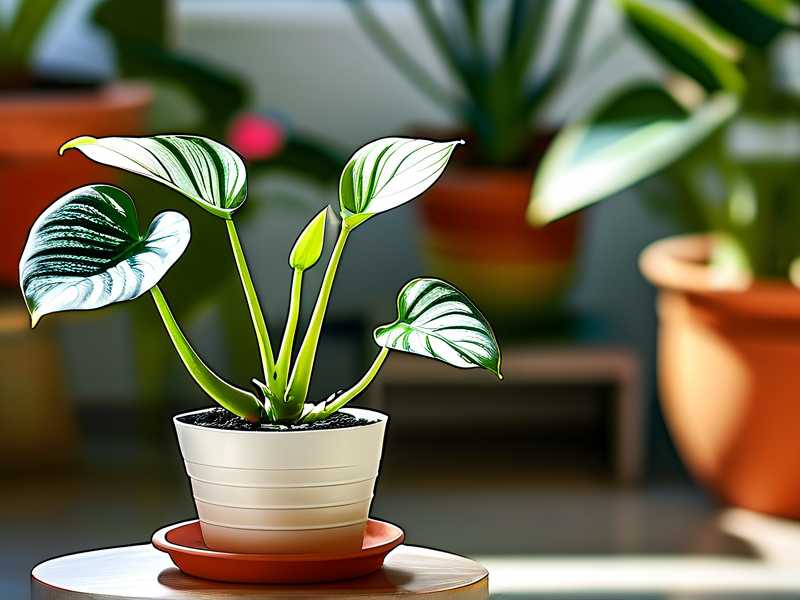
Honestly, any variety works with the same technique. However, I’ve found that varieties with thinner leaves root slightly faster than thick, leathery-leaved types. Maybe thinner leaves lose less water. My Silver Bay propagated in 11 days. My Red Emerald took 16 days. Both did fine.
My Final Thoughts On This Process
Bathroom propagation is one of those little-known tricks that save money and keep your favorite plants going. You don’t need fancy equipment. You just need a wide-mouth jar, some good water, and the right shelf.
The humidity does the heavy lifting. The bathroom light, if positioned well, handles photosynthesis. And if you follow the care steps I laid out — water changes every 3–4 days, callousing the cut, watching for rot — you’ll see roots in roughly two weeks.
I used to buy new plants every season because my old ones got leggy or ugly. Now I propagate replacements from healthy cuttings in my own bathroom. It saves me around 30 to 50 dollars a year. Not huge. But the pride of growing your own plant from a cutting? That’s priceless.
There was one time when I propagated eight cuttings at once in my bathroom. Seven rooted successfully. The one failed because I forgot to change its water for ten days. That was my fault, not the method’s. I had to remind myself that the system works when I follow it.
If you’ve killed plants before — and honestly, everyone has — try the bathroom method. Pay attention to the basics: light, humidity, water quality. Once you see those first white roots emerge through the glass jar, you’ll be hooked. Good luck.





