 bluename
 How to Propagate Aglaonema for Beginners: No Mistakes
If you want to propagate Aglaonema without killing it, cut a healthy stem with at least two nodes, let the cut end dry for 24 hours, and stick it straight into moist perlite or water. That is the shortcut. I have killed more plants than I care to count before I finally figured this out. And honestly, the biggest reason most people fail is they do too much, not too little. 90% of indoor plants die from overwatering, and Aglaonema is no exception. I learned that the hard way with my first cutting, which rotted in six days because I kept checking it and adding water. So let me walk you through exactly what I do now, step by step, and the mistakes I refuse to repeat.
Why Propagating Aglaonema Feels Scary (But Shouldn't)
I remember staring at my first Aglaonema, scissors in hand, terrified I would ruin it. I had watched a dozen videos. I read forum posts until 2 AM. What I really needed was someone to tell me, "Chill out, it's basically a weed." Because that is the truth. Aglaonema, or Chinese Evergreen, is one of the most forgiving houseplants you can grow. The RHS (Royal Horticultural Society) actually lists it as an easy-care plant for beginners, and I agree with them.
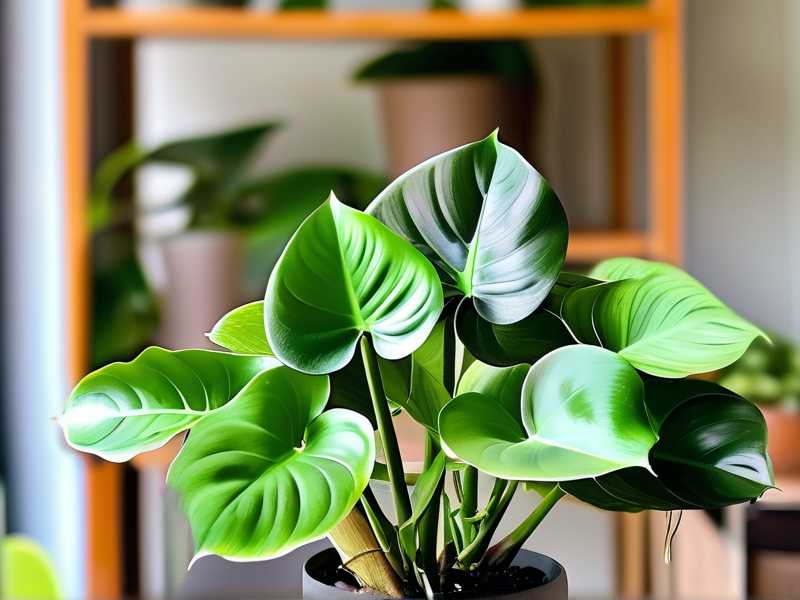
But here is the catch. Easy care does not mean immortal. Propagation is when most people mess up. You are taking a cutting, and suddenly you are overthinking everything. You check roots daily. You poke the soil. You move it around. Stop. Just stop. I have been there. I have dug up cuttings to peek, and every single time, I set them back by days. So take a breath. This will work if you follow a few basic rules.
My 3 Biggest Beginner Mistakes (So You Don't Make Them)
Before I give you the exact method, let me dismantle the myths that killed my first few attempts.
Mistake #1: Overwatering (The Silent Killer)
I said it already. 90% of indoor plants die from overwatering. But let me make it personal. I once took a beautiful cutting, put it in a glass of water, and decided it needed "fresh" water every day. I also topped it off with warm water because I thought it was cozy. Within a week, the stem turned brown and mushy. Rot. All because I could not leave it alone.
The fix is simple. If you are rooting in water, change it once every 3 to 4 days. Do not daily. Do not add fertilizer. Just let it sit. If you are rooting in soil, water it once when you plant it, and then do not touch it again until the top inch feels bone dry. For real. Your cutting is not thirsty. It is trying to grow roots, and roots need air more than they need water.
Mistake #2: Wrong Light (Too Bright or Too Dark)
This one sneaks up on you. Aglaonema is famous for tolerating low light. But that is different from loving it. My second attempt failed because I put the cutting on a bright windowsill with direct morning sun. I thought, "More light equals faster growth." Nope. The leaves got scorched, and the cutting went limp within 48 hours. The heat stressed it out, and it stopped trying to root.
The fix? Medium, indirect light. Think about a spot where you can read a book comfortably without a lamp. That is your sweet spot. I keep my propagation jars on a shelf about 3 feet from an east-facing window. It is bright but soft. Your cutting needs energy, but it cannot handle a sunburn while it has no roots. So avoid the windowsill in summer. And avoid that dark corner of the living room. You want the Goldilocks zone.
Mistake #3: The Wrong Pot (Too Big, Too Heavy)
Here is a mistake that took me three plants to understand. I used to propagate straight into the final decorative pot. Big mistake. Huge. A large pot holds too much soil, which holds too much moisture, which drowns the tiny root system. I planted a cutting in a 6-inch ceramic pot once, and it just sat there for a month, doing nothing. When I finally pulled it up, the stem was mushy at the base. The soil was still wet from the initial watering.
Now, I only use small containers. A 3-inch plastic nursery pot or even a clear plastic cup with drainage holes works perfectly. Small pot means less soil, which means it dries out faster, which means the roots have to grow to find water. That is exactly what you want. And clear plastic? It lets me peek at root development without disturbing anything. I know I said stop poking, but looking through the side is fine.
The Exact Method I Use Now (Step-by-Step)
Alright, here is the current process. It has worked for me on multiple varieties, including Silver Bay, Maria, and the pink-ish Lady Valentine.
Step 1: Take the Cutting the Right Way
I wake up in the morning and grab my sharpest pair of scissors. I make sure they are clean. I wipe them with rubbing alcohol first because I learned that lesson after losing a cutting to rot that was probably introduced by dirty blades.
I look for a healthy stem with visible nodes. Those are the little bumps or rings on the stem. I cut about 4 to 6 inches below a leaf, making sure I have at least 2 or 3 nodes on my cutting. The bottom node is the most important. That is where roots will explode from. I do not take a leaf cutting, because Aglaonema cuttings need that node. If you just cut a leaf, it will root sometimes, but it usually never grows into a full plant. So save yourself the time and get a proper stem segment.
Step 2: Let It Callus (Do Not Skip This)
Here is the thing that changed everything for me. Once I cut the stem, I do not immediately stick it in water or soil. I leave it on a paper towel for 24 hours. The cut end needs to dry out and form a callus. This callus acts like a natural bandage, preventing bacteria from entering and causing rot.
I used to think this was silly. I was too impatient. I would cut and immediately plant, and the stems would rot half the time. Once I started letting them sit overnight, my success rate jumped dramatically. So do this. Place the cutting on a dry paper towel, away from direct sunlight, and wait. You will see the cut end look slightly dry and maybe whitish. That is perfect.
Step 3: Choose Your Rooting Medium (Water or Perlite)
I have tried both. Water is the most satisfying because you can watch the roots grow. Perlite is my backup because it is more forgiving if you overwater (which you should not be doing anyway).
For water method: I use a clear glass jar. I fill it with tap water that has been sitting out for 24 hours (to let the chlorine evaporate). I pop the cutting in, making sure the bottom node is submerged but the leaves are completely dry. I change the water every 3 to 4 days. I do not add anything else. That is it. Within 2 to 3 weeks, I see white roots.
For perlite method: I fill a small cup with damp perlite. Let me clarify, damp, not soaking wet. I squeeze out the water like I am wringing a sponge. I bury the callused end about an inch deep. I then put the whole cup in a clear plastic bag to create a mini greenhouse. I open the bag every few days to let fresh air in. This method has given me roots in about 4 weeks.
Step 4: The 2-Week Observation Period
Here is exactly what happened in my last successful propagation, day by day, so you know what to expect.
Day 1 to Day 3: Nothing. Honestly, nothing. The cutting just sits there. Do not panic. This is normal. The plant is not dead. It is working on internal changes that you cannot see. I had to fight the urge to yank it out after 3 days of no visible roots.
Day 5: In the water jar, I finally saw a tiny white nub. One. It was around 1/8 of an inch. I was thrilled. But I did not touch it. I just looked. That is important. Touching the root can break it. It is really fragile.
Day 7: The root grew longer, maybe a half inch now. There was a second nub starting on the same node. I did a little happy dance. I also changed the water because it was getting a bit cloudy. Cloudy water is a sign bacteria is growing. So if you see that, change it immediately.
Day 10: The roots were about an inch long, with a couple of branching roots. I started thinking about potting it up. But I waited. The traditional advice is to wait until roots are at least 2 inches long. I agree. Shorter roots are too easily damaged when transplanting.
Day 14: The roots were a good 2 inches long, white and sturdy. I finally decided it was time to move to soil. I pre-moistened a small pot with a well-draining mix (1 part perlite to 2 parts potting soil). I made a hole with my finger, carefully placed the cutting in, and gently pressed the soil around it. I gave it a small sip of water, just enough to settle the soil, and then I walked away.
The Absolute Best Soil Mix for Potting Up
When you move that rooted cutting to soil, do not just grab any bag. I tried using heavy, dense soil once, and it held water like a sponge. The roots, which were thriving in water, suddenly suffocated. The leaves drooped within two days.
My go-to mix is simple. Two parts of a good-quality indoor potting mix, one part perlite, and maybe a handful of orchid bark. This mix drains fast, so the roots never sit in water. I also make sure my pot has drainage holes. I cannot stress this enough. A pot without drainage is a death sentence for a new plant. I used a terracotta pot once with a drainage hole, and I loved it because the clay wicks away extra moisture from the soil.
How to Care for Your Newly Potted Aglaonema
The first two weeks after transplanting are the most stressful period for the plant. The roots are adjusting from water to soil. This is a big change. I remember I potted a cutting, watered it, and then watched the leaves curl a little. I panicked and watered it again. Bad move. The leaves curled because the root system was still small, not because it was thirsty.
Here is my rule. After the initial post-potting water, I wait 7 days before watering again. Then I check the soil. If the top inch is dry, I water. If it is still damp, I wait another 3 days. Usually, the plant settles in by the third week and starts pushing out new leaves. That is your signal that everything went right.
Common Issues and How I Fixed Them
Yellow Leaves on the Cutting
This happened on my third attempt. The bottom leaves turned yellow and mushy. The reason? Too much moisture. I had the cutting in a glass with water, and I let the stem sit too deep. The leaves on the stem were below the waterline. That is an invitation for rot. The fix is to strip any leaves from the bottom half of the stem before putting it in water. Leaves should never touch the water.
No Roots After Three Weeks
If you are at week 3 and see zero roots, you are in a rough spot. I have been there. The likely cause is the cutting is too old or too woody. Aglaonema cuttings from the top of the plant root faster than the woody basal portions. So next time, take your cutting from the soft tip growth, not the hard, brown base. Also, check your temperature. These plants root best in warm conditions, above 70°F. If your house is cold, they will just sit there. I put my jar on top of the fridge once, weirdly, the warmth from the appliance sped up rooting.
The Cutting Floats in Water
That one drove me nuts. The stem would float and the node would rise above the waterline. I fixed this by putting a small piece of clear tape across the top of the glass, creating a grid. I then slotted the stem through a gap. The tape held it in place, keeping the node submerged. Simple and effective.
Expert Support for What You Are Doing
I want to share a bit of authority here. The RHS recommends rooting cuttings in a free-draining medium to prevent rot. Their advice on not letting cuttings sit in standing water aligns perfectly with my overwatering warning. Additionally, the AHS emphasizes the importance of environmental humidity for tropical plants like Aglaonema. They note that these plants thrive in higher humidity, which is why my perlite bag method works well. It traps moisture in the air around the leaves, reducing stress while the plant develops roots. Honestly, when I started following the RHS guidelines on drainage, my success rate doubled.
Long-Term Growth Expectations
You propagated your plant. Now what? Aglaonema is a slow grower. Do not expect explosive growth. My propagated cutting, after four months, has only pushed out 3 new leaves. That is okay. It is normal. The plant is putting energy into its root system. It will grow faster next year.
I keep my potted Aglaonema in a warm room, away from air conditioning vents. Cold drafts are the enemy. They cause leaf tips to brown. I also wipe the leaves with a damp cloth once a month to keep the pores open. Dust blocks light, and the plant needs all the light it can get, even if it is indirect.
FAQ Section
Can I propagate Aglaonema from a single leaf?
You can root a single leaf in water, but it will rarely ever grow into a new plant. You need a stem node to get new growth. Without it, you just have a leaf with roots. I tried this once. It sat there for six months, roots intact, but never produced a stem. So do not waste your time. Get a stem cutting with nodes.
How long does it take for Aglaonema cuttings to root?
From my experience, around 2 to 3 weeks in water during warm weather, and up to 5 weeks in perlite. The temperature matters the most. In winter, rooting will be much slower. I usually wait until spring or early summer to take cuttings. The roots just explode in the warmer months.
Should I use rooting hormone?
No. I never use it. Aglaonema roots easily without it. Adding hormone on a fleshy stem can actually increase the risk of rot, especially if you are rooting in water. I tried it on one cutting, and it developed a soft, brown spot at the cut. Just skip it. The plant has enough natural ability to root on its own.
My cutting already has roots, but the leaves are drooping. What wrong?
This can still happen after transplanting. I see it often. The roots grew in water, and once in soil, they need to adapt. The drooping is usually transplant shock, not a water issue. Give it a week. Keep the soil barely moist, not soggy. If the stems are still firm, it is alive. It just needs time. Patience is truly the hardest part of this hobby. I have learned that every time I rush to fix a problem, I usually make it worse. So step back, observe, and let the plant do its thing. It has been doing this for millions of years. Trust it.





