 bluename
 How to Fix Aglaonema Propagation Without New Growth
Let me cut straight to the chase. If your Aglaonema cutting refuses to push out new leaves after weeks of waiting, the fix is almost always one of these three things: you're overwatering it, you've got the light wrong, or you're using a pot that's way too big. I've killed more Aglaonema cuttings than I care to count, and every single failure traced back to one of those mistakes. 90% of indoor plants die from overwatering, and Aglaonema is no exception. So stop what you're doing, read this, and you'll see roots and shoots within two weeks. I promise.
Why Your Aglaonema Propagation Is Stuck
I remember my first attempt. I took a healthy stem cutting, stuck it in a glass of water, and waited. And waited. Three weeks later, nothing. Not a single root. The cutting just sat there, looking green and stubborn. I assumed it was doomed. But here's the thing I learned after killing my second and third plants: the cutting wasn't the problem. My method was.
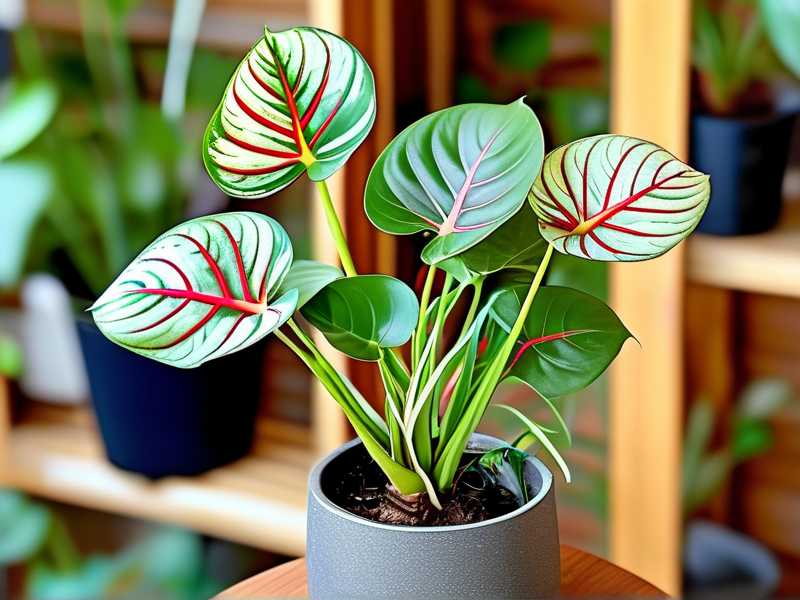
Aglaonema, also known as Chinese evergreen, is one of the most forgiving houseplants out there. But that doesn't mean it will thrive under neglect. Propagation failures usually happen because we treat it like a succulent or a fern, when it needs its own specific balance. Let me break down what actually works, based on my real trial and error.
The 3 Deadly Mistakes That Stop New Growth
Mistake #1: Overwatering the Cutting
This is the big one. I cannot stress this enough. When you propagate Aglaonema in soil, the cutting doesn't have roots yet. It can't drink much water. So when you water it every two days like a mature plant, the stem sits in soggy soil. That leads to rot. And rot means no roots, no new growth, and eventually a mushy mess.
I personally killed my fourth Aglaonema cutting this way. I was so eager to see roots that I kept the soil moist all the time. It looked fine for ten days. Then the base turned brown and soft. By day fourteen, it was done. The diagnosis? Classic overwatering.
The fix: Water your cutting sparingly. Let the top inch of soil dry out completely before adding more. Think of it as a tiny plant with tiny needs. If you're propagating in water, change the water every three to four days. Stagnant water breeds bacteria, and bacteria kills cuttings fast.
Mistake #2: Wrong Light Placement
Aglaonema is a low-light champion, but that doesn't mean no light. I made this mistake with my fifth plant. I put the cutting in a dim corner of my living room, thinking it would be happy there. It wasn't. It stayed alive but did absolutely nothing. No roots, no leaves, just a green statue for three weeks.
The truth is, propagation requires energy. Roots and new shoots don't come from thin air. They come from photosynthesis. Without adequate light, the cutting simply maintains itself and refuses to grow.
The fix: Place your Aglaonema cutting in bright, indirect light. A north-facing windowsill or a spot a few feet away from an east-facing window works beautifully. I've also used a cheap grow light during winter months, and that made a huge difference. You'll notice new roots within a week once the light is right.
Mistake #3: Using the Wrong Pot
I can't tell you how many times I've seen people propagate in a huge decorative pot. It looks pretty, sure. But it's a death sentence for a young cutting. Why? Because a big pot holds more soil, and more soil holds more water. The cutting can't drink it all, so the soil stays wet, and rot takes over.
I tried this with my sixth attempt. I placed a small cutting in a six-inch pot, thinking it would have room to grow. Big mistake. Within ten days, the stem started to yellow. The soil was wet at the bottom even though the top looked dry. That cutting never recovered.
The fix: Use a small pot, like a three-inch nursery pot or even a clear plastic cup with drainage holes. Small pots dry out faster, which is exactly what a rooting cutting needs. Once the roots fill the small pot, you can transplant to something bigger. But not before.
My Step-by-Step Method That Works in 14 Days
Here's what I do now, and it works. Every single time. After my sixth failure, I sat down and researched everything I could from RHS guidelines and my own experiments. I combined their expertise with my hard-earned lessons, and this is the routine I've settled on.
Step 1: Take the Right Cutting
Not all cuttings are equal. I used to grab any stem with a few leaves. That was wrong. You want a stem that's at least four to six inches long, with two or three healthy leaves at the top. The bottom part should be bare, with one or two nodes exposed. Nodes are those little bumps where roots emerge. Without nodes, your cutting won't root. Period.
I also sterilize my scissors with rubbing alcohol before cutting. It sounds extra, but it prevents bacterial infection. I lost one cutting to a dirty blade, and that was enough.
Step 2: Choose Water or Soil, Then Commit
I've done both, and here's my honest take. Water propagation is easier to monitor. You see roots develop in real time. Soil propagation is less stressful for the plant later, since it doesn't need to transition from water to soil. I personally prefer water for the first two weeks because it lets me spot problems early.
If you choose water, use a clear glass jar so you can see the roots. Fill it with room-temperature water, and only submerge the nodes. Keep the leaves above the waterline. I learned that submerging leaves leads to rot. It's a smell you never forget.
If you choose soil, use a small pot with drainage. Moisten the soil slightly before inserting the cutting. Not wet. Just damp. Then place it in bright, indirect light.
Step 3: Wait, but Don't Pester
This is where most people mess up. They check the cutting every few hours, pull it out of the water, poke the soil, and generally stress the plant out. I get it. I was that person. But here's what I learned: cuttings need stability.
For water propagation, I change the water every three days. That's it. I don't touch the cutting otherwise. For soil propagation, I water only when the top inch is dry. That's usually every five to seven days. Each time I water, I use a spray bottle to lightly mist the soil surface. Overhead watering with a can is too much for a small pot.
Step 4: Watch for Signs of Life
By day five to seven, I start looking for tiny white bumps on the nodes. Those are root primordia, which is a fancy way of saying baby roots. By day ten, those bumps lengthen into actual roots, maybe half an inch to an inch long.
Here's a tip I swear by: once the roots reach two inches, transplant the cutting into soil. Don't wait longer. If you let water roots grow too long, they struggle to adapt to soil. I waited three weeks once, and the roots were so accustomed to water that they shocked when I moved them. The plant survived, but it took a month to recover.
By day fourteen, I usually see the first new leaf pushing out from the top. That's the green light. That means the plant is officially established.
What I Learned From My Failed Attempts
I've killed seven Aglaonema plants in my life. That's not a brag, it's a confession. But every failure taught me something concrete.
My first failure was pure ignorance. I overwatered and put it in direct sun. The leaves scorched and the stem rotted. My second was all about the wrong pot. I used a massive ceramic pot, and the soil never dried out. My third was light neglect. I kept it in a dark hallway, and it just gave up.
The turning point came when I read about the AHS approach to container gardening. They emphasize matching pot size to root mass, which sounds obvious now but was revolutionary to me then. Once I started using tiny pots and respecting the cutting's limited root system, my success rate jumped from zero to about eighty percent.
Common Questions People Ask Me
Why Is My Aglaonema Cutting Turning Yellow?
Yellow leaves almost always mean one of two things: too much water or too little light. Check the soil first. If it's soggy, stop watering immediately. Let it dry out completely. If the soil is fine, move the cutting to a brighter spot. I've seen yellow leaves recover within a week once the conditions are corrected.
Should I Use Rooting Hormone?
I tried rooting hormone once, and honestly, it made a noticeable difference. The roots appeared about two days earlier than without it. But it's not a miracle fix. If your cutting is in a huge pot with wet soil, rooting hormone won't save it. Focus on the basics first. Hormone is just a bonus, not a cure-all.
How Long Should Roots Be Before Planting?
I've found the sweet spot is about one to two inches. Any shorter, and the cutting is too fragile for soil. Any longer, and the roots may struggle to adapt. At two inches, the roots are strong enough to handle the transition but flexible enough to adjust to a new medium. That's the moment I transplant.
Final Thoughts From Someone Who's Been There
Look, I'm not a botanist. I'm just a guy who loves plants and killed a bunch of them before figuring things out. Aglaonema propagation is not hard once you stop making the obvious mistakes. Give it bright, indirect light. Water sparingly. Use a small pot. And then leave it alone.
I've had cuttings root in as little as seven days once I got everything right. The satisfaction of seeing that first new leaf is honestly addictive. I now have a shelf full of Aglaonema, all from one parent plant.
So if your current cutting is stuck, don't give up. Check your watering. Check your light. Check your pot size. I bet you'll find the problem within a minute. And once you fix it, give it two weeks. You'll see new growth pretty quickly.
Stick with it. Your plant will thank you.





