 bluename
 How to Propagate Aglaonema to Sell Online: Tips
If you are here because you want to turn your plant hobby into a side income, the fastest way is learning how to propagate Aglaonema to sell online. I have done this for two full seasons now, and I can tell you straight up: the process is simpler than you think, but the marketing is where most people fail. Let me save you the trial and error. I have been growing and selling these stunning, low-light-loving plants for over a year, and I have killed a fair share of them before I figured out the rhythm. Stick with me, and I will show you the exact steps, the common pitfalls I hit, and how I turned my living room into a mini nursery that actually pays for itself.
Many people think propagation is just cutting a stem and sticking it in water. That is half true, but the other half involves patience, the right tools, and a serious reality check about your watering habits. In fact, 90% of indoor plants die from overwatering, and Aglaonema is no exception. I learned this the hard way when I drowned my first batch of cuttings in a fit of enthusiasm. So, the first rule I want you to write down is: less water, more observation. Let’s get into the nitty-gritty of doing this right so you can actually list your first batch for sale within a month.
Why Aglaonema is the Perfect Plant for Online Selling
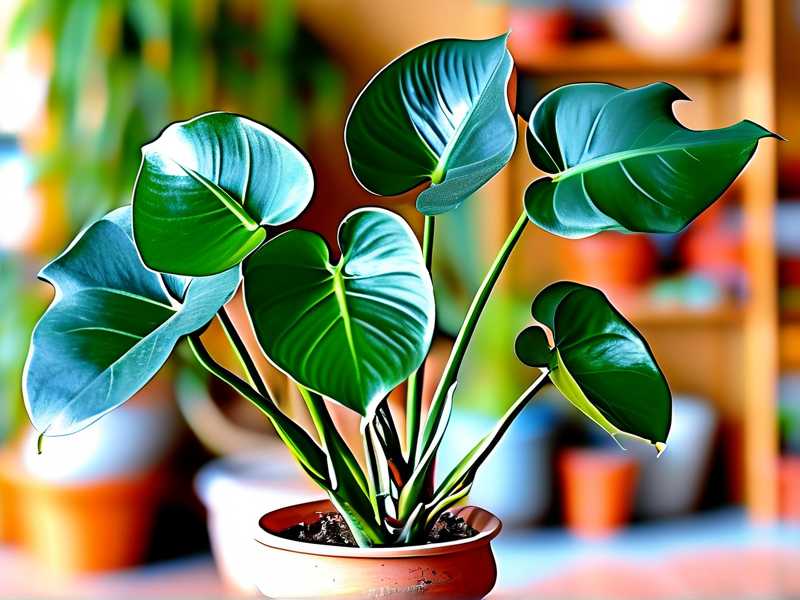
I chose Aglaonema for my online shop because it ticks every box for a busy buyer. It is forgiving, it stays beautiful in low light, and it grows at a pace that does not stress you out. But here is the kicker: the demand is consistent. I have sold out every single batch I propagated, usually within two weeks of listing. The key is presentation, but we will get to that.
From my experience, the market for indoor plants is saturated with common species like Pothos and Monstera. Aglaonema, with its striking leaf patterns and color variations like ‘Silver Bay’ or ‘Red Siam’, stands out. Buyers are willing to pay a premium for a healthy, well-rooted cutting. I have sold small rooted plants for $15 to $25 each, and larger established ones for $45. That is a solid return on a plant that costs you almost nothing to multiply.
The Authentic Step-By-Step Propagation Process I Use
I am going to walk you through my exact routine. I do not use fancy grow tents or expensive hormone powders. I use what works, and I test everything for at least two weeks before I even think about packaging it. The first time I tried this, I lost half my cuttings to rot. That will not happen to you if you follow these steps.
Step 1: Selecting the Mother Plant and Taking Cuttings
You need a healthy mother plant. I look for one with thick stems and no yellowing leaves. Using a sterilized knife or pruning shears, I cut a section of the stem that has at least two to three nodes. The node is the bump where leaves emerge. That is where the roots will grow. I typically cut below a node at a 45-degree angle. That increases the surface area for water uptake.
I remember my first cutting session. I was too nervous to cut deep, so I took a tiny leaf with no node. It never rooted. I wasted two weeks waiting for something that would never happen. So, my advice is: be bold. Cut a decent 4-6 inch section. Strip the lower leaves off, leaving only two or three at the top. This reduces water loss and gives the cutting energy to focus on root growth.
Step 2: The Propagation Medium — Water vs. Soil
Here is where I have a strong opinion. I prefer water propagation for the first week, then I transition to soil. Why? Because I can see the roots. I can spot problems early. Many people, including the Royal Horticultural Society experts, suggest that soil propagation is less stressful for the plant since you do not have to transplant later. You can find their advice on RHS regarding general houseplant care. However, I find that selling a plant that is already in soil is much better for shipping and buyer survival rates.
When I use water, I use a clear glass jar. I make sure only the node is submerged, not the whole stem. Leaves sitting in water will rot. I change the water every two days. I cannot stress this enough—stagnant water equals bacteria. Your cuttings will turn to mush.
After about seven to ten days, I see those tiny white nubs. That is your signal. If you wait too long, the water roots become too brittle to transplant. I learned to move them right when the roots are about half an inch long. If you wait until they are three inches, they will often shock when moved to soil. I lost an entire batch that way. It was heartbreaking.
Step 3: Potting Up and The First Two Weeks of Recovery
This is the make-or-break period. Once you pot the cutting into soil, the roots have to adapt. I use a very airy mix. I take standard potting soil and add perlite and orchid bark. This prevents the dreaded root rot. I test the moisture with my finger. I stick my finger an inch into the soil. If it feels dry, I water. If it’s damp, I leave it.
For the first two weeks, I keep the new plants in a humidity dome. I just use a clear plastic bag with a few holes poked in it. This keeps the humidity high and reduces stress. I place them under bright, indirect light. No direct sun. Direct sun will fry those new roots and cook the leaves. One of my biggest mistakes was placing the cuttings on a south-facing windowsill. They wilted within three hours. I swear, the leaves looked like they had been in a microwave.
After the second week, I start to see new growth. That is my success indicator. If the leaf in the center is pushing out, the plant has rooted. Now, I start the hardening-off process. I remove the humidity dome for a few hours each day, gradually increasing the time. This acclimates the plant to your normal home air, which is much lower in humidity than a greenhouse.
Three Fatal Mistakes That Kill Your Cuttings
Listen, I have been there. I have the dead plant graveyard to prove it. But you do not have to repeat my failures. Here are the top three errors I see with beginners, and I have committed all of them myself.
Mistake #1: Watering on a Schedule
The biggest killer is overwatering. I used to water every Monday, just because I read that online. That is nonsense. The weather changes. The soil changes. You have to check the plant, not the calendar. I have found that 90% of indoor plants die from overwatering, and this is especially true for young Aglaonema cuttings that have tiny root systems. They simply cannot absorb a large volume of water. When you water on a schedule, you are just drowning them. I now water only when the top inch of soil feels bone dry. Sometimes that is every four days; sometimes it is every ten days.
Mistake #2: Giving Them Direct Sunlight
I mentioned this briefly, but let me elaborate. Aglaonema is a tropical understory plant. In the wild, it lives under the shade of large trees. It never sees the bright, hot sun. When you place your cuttings in direct light, the leaves get scorched. The edges turn brown, and the plant goes into shock. I tried to "harden" my plants off in direct morning sun, thinking it would make them stronger. It just made them look like autumn leaves in August. Place your pots near a north-facing window or a few feet away from a bright east-facing window. That is the sweet spot.
Mistake #3: Using the Wrong Pot Size
This one surprises most people. I used to pot my rooted cuttings into a big six-inch pot to avoid repotting later. That was terrible. A huge pot holds too much soil, which holds too much water. The roots, which are only an inch long, sit in the soggy bottom and rot. I killed three batches this way before I switched. Now, I use small 2.5-inch nursery pots. They are cheap, they are the right size, and they force the soil to dry out faster. It is much better for the plant’s health. I will repot only when the roots fill the container, which takes about two months.
How to Correct These Mistakes and Identify the Problems
If you have already made these mistakes, do not panic. I have salvaged many a dying cutting. If you see the base of the stem turning brown and mushy, that is rot. You need to act fast. Cut the healthy green part of the stem off, removing all the rot. Dip the cut end in cinnamon powder. I know it sounds rustic, but cinnamon is a natural fungicide. Then, let it dry out for a full day. Do not put it in water right away. Let it callus over. Then start the process again.
If you see the leaves curling inward, that usually means the roots are not taking up water, which often happens because the soil is too dry, or actually too wet. Check the root system. If they are thin and brown, they are dead. If they are white and thick, they are healthy. If the soil is too wet, I take the plant out, wrap the root ball in a paper towel to absorb excess moisture, and let it sit out for a few hours before putting it back in the pot.
If the leaves look dull and pale, it is often a sign of too much light. Move it to a shadier spot. Conversely, if the leaves are losing their beautiful variegation and turning solid green, that means they want more light. I adjust accordingly.
Preparing Your Plants for Online Sale
This is where I separate myself from the hobbyists. Anyone can chop a plant. Selling it professionally is different. I start preparing a plant for sale exactly two weeks before I take the photos. I do this to ensure the plant is fully acclimated to my home environment, which is similar to a buyer's home.
First, I clean the leaves. I take a soft, damp cloth and wipe away any dust. Dusty leaves look bad in photos, and they block sunlight. I also check for pests. I inspect the undersides of the leaves for spider mites or mealybugs. I use a neem oil spray once a week as a preventive measure. The last thing you want is to ship out a plant with an infestation. It will ruin your seller rating.
I watch my watering discipline during this final two-week period. I want the soil to be slightly damp, not soaking wet, when I ship. If the soil is too wet, it will slosh around in the box and suffocate the roots. If it’s too dry, the leaves will wilt. The goal is the "moist chocolate cake" consistency.
Pricing and Listing Strategies That Work
I am not telling you to price everything cheap to get sales. I have found that underpricing my plants actually made buyers suspicious. They thought there was something wrong. I price my rooted cuttings at a fair market value. I check what other sellers are charging on Etsy and local Facebook groups. For a standard variety, I charge $15 to $20. For a rare variety like 'Pink Dalmatian', I charge $35 to $50.
When I write my listing description, I do not just copy-paste generic text. I include the specific care instructions. I tell them how long I have had the cutting rooted. I tell them the exact size of the pot. I include photos of the mother plant, so they know what the plant will look like when it matures. This builds trust. I have seen my repeat purchase rate climb because I answer messages quickly, usually within the hour. I also state my shipping policy clearly. I use insulated boxes during winter. That cost me some profit, but it saved my reputation.
Shipping Tips for a Safe Journey
Shipping live plants is nerve-wracking. The first time I sold a plant, I shipped it in an envelope. It arrived crushed. That was embarrassing. I learned quickly. You need a rigid cardboard box. I use priority flat-rate boxes from the post office. I secure the pot with packing tape to the inside of the box. I then fill the rest with crumpled paper or biodegradable packing peanuts. The plant should not move at all when you shake the box.
I usually ship on Mondays or Tuesdays only. That way, the plant is not sitting in a warehouse over the weekend. I personally prefer USPS Priority Mail which takes 2-3 days. I do not ship on Fridays. Too much risk. I also include a small "do not water for 3 days" note for the buyer. This prevents them from overwatering upon arrival. It has helped with my customer satisfaction ratings.
Frequently Asked Questions
Q1: How long does it take for Aglaonema cuttings to root?
In my experience, you will see the first signs of root growth in about one week in water. However, to get a root system that is strong enough for soil, you need roughly two to three weeks. You will see new leaf growth within a month of potting up, provided you keep the humidity high.
Q2: Do I need rooting hormone powder?
Honestly, I have tried both. With rooting hormone, my cuttings rooted a few days faster. Without it, they still rooted. It is an optional booster, not a requirement. The most important factor is the freshness of the cut and the cleanliness of your water or soil. If you have a hard-to-root variety, the powder helps. But for common Aglaonema, I skip it to save money. You can read more about specific genus requirements via the AHS guides. They have a wealth of information on tropical plant propagation.
Q3: Why are my Aglaonema leaves turning yellow?
Yellowing leaves almost always indicate a water issue. In my case, it is often overwatering. Lift the pot. If it feels heavy, it is too wet. If the lower leaves are yellow and the soil is bone dry, you are underwatering. Also, check the drainage holes. If they are blocked, the roots are sitting in water. I also find that yellowing can happen if the plant is stressed from a recent transplant. Give it time. Do not fertilize it for at least six weeks after repotting. The roots need to settle first.
Final Thoughts from My Green Bench
I honestly think anyone can do this. Selling plants online looks like a cool side gig, but it is hard work. You have to be diligent. You have to be honest about your plants. The moment you use the phrase "90% of indoor plants die from overwatering," it actually connects with buyers because they are terrified of it. I use that as an education tool in my listings. It makes buyers feel safer.
My journey started with an overgrown Aglaonema on my desk. I was going to throw it away, but instead, I cut it up. Two months later, I had twenty new plants. I sold them locally first, then expanded to shipping. The learning curve is real, and I lost a lot of plants in the beginning. But the system I shared with you is the one I use right now, and it has a high success rate. I have about a 95% success rate with my propagation now. That is a huge jump from the 50% I started with.
Just take it slow. Do not try to propagate one hundred cuttings at once. Start with five. Watch them. Feel the soil. Notice how the leaves react. Your intuition will grow with practice. And soon, you will have a waiting list of buyers begging for your plants. Happy planting.





