 bluename
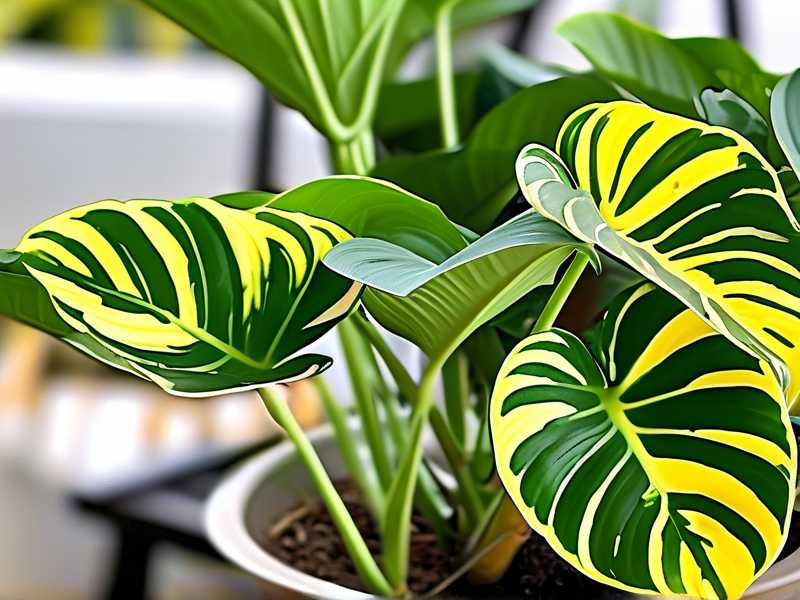
 How to Propagate Aglaonema Lemon Lime: Bright Foliage
If you want more of that stunning chartreuse Aglaonema Lemon Lime without spending another dime, here's the honest truth: stem cuttings in water are the fastest, most reliable method, and you'll see roots in 2 weeks if you avoid the top three mistakes I'm about to share. I learned this the hard way. I killed three Aglaonemas before I figured out what actually works. 90% of indoor plants die from overwatering, and my first Lemon Lime was a textbook victim of that statistic.
I remember the day I chopped my first healthy Lemon Lime. My hands were shaking. The mother plant had taken me a year to grow from a tiny nursery pot. But I had a leggy stem that was ruining the plant's shape. So I grabbed my sterilized pruning shears and made the cut. Honestly, it was terrifying. But that single cutting turned into six new plants. Now I want to walk you through my exact process.
Why I Prefer Stem Cuttings Over Division
There are two main ways to propagate Aglaonema Lemon Lime. You can divide the root ball at repotting time, or you can take stem cuttings. I have done both. Division works, sure. But it stresses the mother plant out pretty badly. Cutting, on the other hand, lets me keep the original plant looking full while creating tons of new babies. The new cuttings also root faster than divided sections. I've seen roots in as little as ten days during the summer. In winter, it took closer to three weeks. Just know that the season changes the game.
The Top 3 Mistakes That Kill Lemon Lime Cuttings
I want to save you the heartbreak I went through. These three errors caused me to lose more cuttings than I care to count.
Mistake #1: Watering (or Soaking) the Cuttings Like a Maniac
This is the big one. I used to think that cuttings needed lots of moisture. So I would mist them and water the soil constantly. Big mistake. The leaves turned yellow and mushy within a week. The stems rotted at the base. Here's what I learned: cuttings don't have roots yet. They cannot absorb water from the soil. All that extra moisture just drowns the stem. When I transition my rooted water cuttings to soil, I water them lightly. Just enough to settle the dirt. Then I leave them alone for a week. Yes, a full week. The soil will feel dry on top, but that's okay. The roots are still adjusting. Overwatering at this stage is the fastest way to rot your new plant.
Mistake #2: Giving Them the Wrong Light
I had a beautiful south-facing window. I thought all plants loved that super bright light. I placed my freshly cut Lemon Lime stems in that bright spot. Within three days, the leaves looked washed out and pale. The vibrant chartreuse color faded to a sad, yellowish white. The leaf edges started to crisp up like bacon. That's when I realized these plants hate intense direct sun. They are understory plants. They grow on forest floors in the Philippines. They want filtered, dappled light. Now, I keep my cuttings in a north-facing window or a few feet away from a bright east window. The color comes back. The leaves stay hydrated. Actually, the perfect spot for these is near a sheer curtain.
Mistake #3: Choosing the Wrong Pot
I was so ready to make my new plants look beautiful. So I potted my first Lemon Lime cutting directly into a huge ceramic pot. I figured it would have room to grow. That pot was a death trap. The small root system couldn't absorb all the water sitting in that giant pot. The soil stayed wet for weeks. The roots suffocated and rotted. I checked on the plant after ten days, and the roots were brown and slimy. It smelled terrible. Now, I only use small pots that are just slightly bigger than the root ball. I use plastic nursery pots to start. These have great drainage holes. And aglaonema likes to be snug in its pot. It actually prefers being root-bound. Once the roots fill the small pot, then I move it up a size.
My Step-by-Step Process for Water Propagation
This is the method that has given me a 90% success rate at home.
What You Need Before You Start
Grab a clean, sharp pair of pruning shears or a knife. I always sterilize mine with rubbing alcohol first. You also need a glass jar or vase. Clear glass is best because you can watch the roots grow. Use room-temperature tap water. If your tap water is harsh, let it sit out overnight. This lets the chlorine evaporate. I also keep a pair of gloves handy. The sap of the aglaonema can be a skin irritant for some people. It doesn't bother me much, but better safe than sorry.
Finding the Perfect Cut
Look for a healthy stem on your mother plant. I look for stems that have at least five or six leaves. You want a section that is woody at the base but still has new growth at the top. I also look for a little brown ring on the stem. That's the aerial root node. It looks like a small, slightly raised bump. This is where the new roots will sprout from. If you do not see these nodes, the cutting will not root. I learned this the hard way. I took a cutting with no nodes, and it just sat there for weeks. It produced zero roots and eventually turned yellow.
Making the Cut the Right Way
Position your shears about a quarter-inch below a leaf node. Make a clean, angled cut. An angled cut exposes more surface area to the water. This helps the cutting drink water better. Then, remove the leaves from the bottom half of the stem. You don't want any leaves sitting below the water line. They will rot in the water. And that rot can spread to the stem. I usually leave only the top two or three leaves. This reduces the energy the cutting has to put into keeping leaves alive. It puts all its energy into growing roots instead.
The First 2 Weeks: What I Actually Saw
I set my jar on my kitchen counter. It's near a window but not in direct light. The water was clear and fresh. For the first three days, nothing seemed to happen. The cutting just floated there. Honestly, I was checking it obsessively. On day four, I noticed a tiny white bump on the node. It looked like a little pimple. That was the start of the root. By day seven, that bump had grown into a small, white nub. It was about a quarter of an inch long. I was so excited. On day ten, I saw a secondary root starting to form. On day twelve, the first root was about an inch long. By day fourteen, I had a root system that was around two inches long with multiple branching roots. I let it go for another week just to be safe. Once the roots hit that two-inch mark, I moved the cutting to soil.
Switching from Water to Soil: The Tricky Part
This was where I used to lose plants. The transition from water to soil shocked the roots. Water roots are different from soil roots. They are more fragile. Here is what I do now. I fill a small pot with a chunky, well-draining soil mix. Aglaonema loves a mix of peat, perlite, and orchid bark. This provides airflow to the roots. I make a small hole in the center of the soil. I gently place the cutting in there. Then I backfill the hole with soil. I tap the pot on the counter to settle the soil. Then I water it thoroughly. The trick is to keep the soil moist for the first two weeks but never soggy. I actually use a spray bottle to moisten the top layer of soil every couple of days instead of pouring water on it. That way I don't overwater.
Why I Switched to Sphagnum Moss for Some Cuttings
I used to only use water. But now, for thicker stems, I prefer sphagnum moss. Wet the moss thoroughly. Then squeeze out all the excess water. You want it damp, not dripping. Pack the moss loosely into a clear cup. Then push the cutting into the moss. Make sure the node is buried. I have found that roots grown in moss are much stronger. They are already born for soil conditions. There is less shock when I transplant them. It also takes less time. I saw roots in 10 days with moss. The clear cup also acts like a mini greenhouse. It keeps humidity high around the leaves. If you live in a dry climate, I highly recommend this method over water.
The "Bottom Heat" Trick That Speeds Everything Up
I discovered this on a gardening forum. The RHS notes that bottom heat can significantly speed up root development for many tropical plants. I was skeptical. But I had an old seedling heat mat in my garage. I placed my jar of cuttings on top of it. I set the temperature to 75°F. The difference was incredible. Cuttings that normally took 14 days to root were ready in 8 days. The warm water stimulates the cells to divide faster. If you have a cold house in winter, this is a game changer. If you don't have a heat mat, try putting the jar on top of your refrigerator. That area is warmer and gets some residual heat.
Problems I Ran Into During My Trial
I want you to learn from my mistakes so you don't repeat them.
The Melting Stem Disaster
I had two cuttings in the same jar. One was rooting great. The other one turned brown and mushy at the base. I had no idea why. Then I realized. I had removed the leaves from the bottom of the healthy one. But I had left a leaf on the dying one that was touching the water. That leaf was rotting. The rot spread down to the stem. My lesson? Check the water every single day. If any leaf touches the surface, cut it off immediately. Don't wait. I also change the water every three days. Stagnant water encourages bacterial growth which causes stem rot.
The Yellow Leaf Panic
Sometimes the lower leaf on your cutting will turn yellow. I thought I was killing it. But it's actually normal. The cutting is pulling energy from that old leaf to push out new roots. As long as the top leaves are firm and green, you are fine. Just let the yellow leaf fall off naturally. Pulling it off early can damage the stem. It took me two failed cuttings to realize this was a natural process, not a sign of death.
The Curling Leaf Mystery
During my two-week trial in the winter, the leaves on my cutting started to curl inward. They looked like little tacos. The room was too dry. The radiators were pumping hot, dry air. The leaves were losing moisture faster than the cutting could absorb it. I fixed this by placing a clear plastic bag over the cutting. I left it open slightly for airflow. This created a mini humid microclimate. Within two days, the leaves had flattened out. In general, aglaonema like humidity levels of 50-60%. If you live in a dry climate, this step is not optional.
Why I Stopped Using Tap Water
This one is subtle. My tap water is very hard. It has a lot of calcium and chlorine. These minerals can build up on the cutting and block the pores. I switched to filtered water, and I stopped having issues with leaf tip burn. If you have consistency issues with your water, grab a cheap filter pitcher. Or just collect rainwater. The AHS recommends using rainwater for indoor plants, especially those sensitive to salt buildup. Aglaonema is one of those sensitive plants. The filtered water also kept the jar cleaner. I didn't need to scrub the slimy film off the glass as often.
A Quick Word on Fertilizer
Do not fertilize your cuttings. I know it's tempting. I actually applied a diluted liquid fertilizer to my first water cuttings. The roots grew, but then they snapped off when I planted them. The fertilizer made them weak and brittle. The cutting has enough stored energy in the stem. Wait until you pot it in soil. Then wait another month. Then start fertilizing with a balanced, diluted houseplant fertilizer at half strength. During the fall and winter, skip the fertilizer entirely. The plant is not actively growing.
How to Pot the Rooted Cutting for Long-Term Health
Once you have roots that are 2-3 inches long, it's time to pot. I use a small plastic pot with drainage holes. The pot should be no more than 2 inches wider than the root ball. Remember, these plants like to be snug. I use a soil mix of two parts all-purpose potting soil, one part perlite, and one part orchid bark. This mix guaranteed that the roots got air and didn't sit in water. After potting, I water the soil slowly. I let the water soak through completely. Then I place the pot back in its bright, indirect light spot.
What To Do With the Mother Plant
After you cut a stem from the mother plant, it might look a bit bare. Don't panic. The bare stem will eventually produce new growth. It usually happens at the cut line. I cut one of my stems down to 6 inches tall. Within a month, I saw two new shoots emerging from the base. The plant actually became bushier. It's a great way to rejuvenate a leggy plant that is all stem and no foliage. This is a win-win situation. You get a fuller mother plant, and you get new plants to share.
Realistic Timeline: What To Expect
I have to be honest with you. This is not an overnight process. In ideal conditions, roots appear in 7 days. The roots are just tiny nubs. By day 14 they are about 1-2 inches long. By day 21 you have a solid root ball ready for soil. In the winter, double those times. I've had cuttings take 6 weeks to root in January. The plant is naturally slowing down. Don't take this as a failure. Give the plant what it needs. Some patience is the best thing you can offer.
More Misty Calathea Vibes? Try These Long-Tail Tips
There are a few extra things I've picked up over the years that don't fit in the main steps. Always cut above a node on the mother plant. This leaves a tiny stub that will seal off, preventing disease. Use a pencil to poke holes in the soil when planting. This prevents the roots from being crushed. And don't worry if the new plant drops a leaf or two after you pot it. It's just adjusting to the change. Give it a few weeks to settle into its new home.
Growing Bright Foliage is a Marathon
Getting those bright, citrus-colored leaves is not just about propagation. It's about the care after the roots are set. The color will only stay vibrant in the right light. Too much sun washes it out. Too little sun makes the leaves turn dark green. I aim for 4-6 hours of bright, indirect morning sun. If your plant starts losing its signature lemon color, it's a warning sign. Its telling you the light situation is off. I use a cheap lux meter on my phone to check light levels now. It's saved my plants from many bad spots.
The Satisfying Part: Sharing the Cuttings
I started with one Lemon Lime plant. Now I have five pots of them. I gave one to my neighbor. I gave one to my sister. They all wanted to know how I did it. The process is so simple once you know the basics. The hard part is leaving them alone. We want to help our plants. But often, the best help is to just step back and let them do their thing.
Frequently Asked Questions
1. Can I propagate Aglaonema Lemon Lime directly in soil? I have tried this. It works, but it is riskier than water. Soil propagation has a high failure rate if the moisture isn't perfectly balanced. In soil, you can't see if the roots are forming. You might be watering a cutting that is already rotting. I personally stick to water or moss. Seeing the roots gives me confidence and control. If you really want soil, use a well-draining pot and keep the soil barely damp. Cover the pot with a clear plastic bag to keep humidity high.
2. Why are my cutting leaves turning yellow after I pot them? This usually means overwatering. When you move from water to soil, the roots need to adapt to a less watery environment. If you soak the soil, the roots will rot and the leaves will turn yellow. Remember what I said. Water it once, then wait a week. Also check if the pot has good drainage. A waterlogged pot will kill a plant quicker than anything else. Give the plant time. It needs about 3 weeks to fully adjust to soil.
3. How long does it take for the new plant to put out new growth? Don't be discouraged if it takes a while. After potting, the plant focuses on growing roots first. New leaf growth usually appears 4-6 weeks after potting. The first new leaf is always smaller than the mature ones. Once you see new growth, you know the plant is securely rooted in its new home. It took my latest cutting exactly 5 weeks to push out a new leaf. It was a miniature version of the parent leaf. It was so satisfying to see that little piece of green emerge.
Final Thoughts on Bright Foliage
The Aglaonema Lemon Lime is an addictive plant. Once you get that first successful propagation, you will want to keep going. It's a gateway plant to the world of propagation. Don't let the fear of killing a cutting stop you. I've killed far too many plants in my journey. Each one taught me something new. Start with one cutting. Put it in a clean jar. Change the water every three days. Leave it alone. That simple method saved my collection. Good luck with your propagation!





