 bluename
 How to Propagate Aglaonema Chocolate: Dark Foliage Success Guide
If you are staring at a leggy, sad Aglaonema Chocolate and wondering how to turn it into several lush plants, the answer is simpler than you think: take stem cuttings with at least two nodes, root them in water or moist perlite, and keep them warm and bright. That’s the core method. But I learned this the hard way. I killed my first three plants before I figured out the exact steps, the timing, and the mistakes that almost guaranteed failure. So let me walk you through everything I actually did, including my two-week observation log, the three fatal errors new growers make, and the tiny tricks that made all the difference.
I remember buying my first Aglaonema Chocolate because of those incredible, deep brown leaves with silver speckles. It looked almost unreal. Then I overwatered it within a month. The stems turned mushy at the base, and the whole plant collapsed in a wet mess. That was my crash course in why 90% of indoor plants die from overwatering. Since then, I’ve propagated dozens of these plants. I’ve tried water, soil, sphagnum moss, and even straight perlite. I’ve made mistakes with lighting, with pots, and with cutting angles. And now, I want to give you the exact playbook that works.
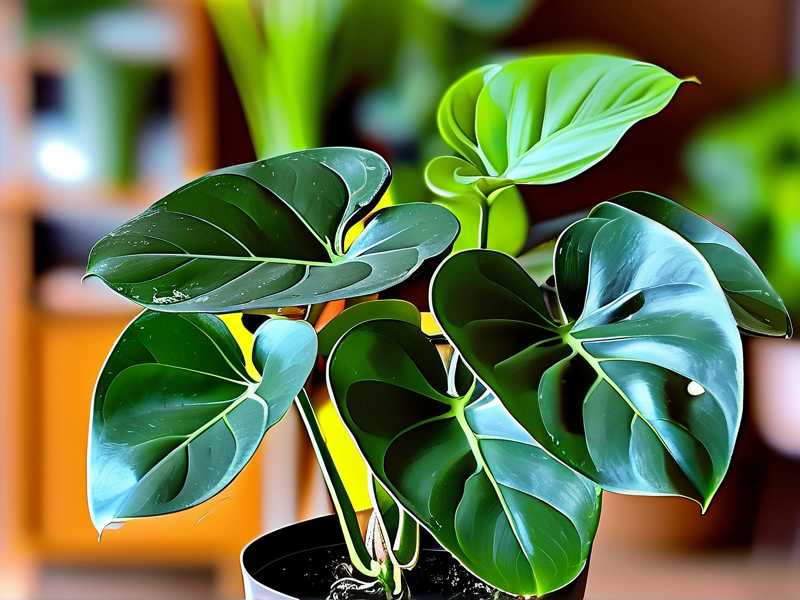
Let’s start with the three fatal errors I see everywhere. If you avoid these, you are already 80% ahead of most people. The first is overwatering. When you take a cutting, it has no roots. It cannot drink much. So if you keep the soil wet, the stem rots. I lost two cuttings this way because I treated them like a full plant. The second error is wrong light. Aglaonema Chocolate is a low-light tolerant plant, but propagation is different. Cuttings need brighter, indirect light to build energy for root growth. I put one cutting in a dark corner once. Three weeks later, it had done nothing. The third mistake is using the wrong pot. A huge pot with a tiny cutting is a recipe for soggy soil that never dries. I use small, clear plastic cups with drainage holes, or even glass jars for water rooting. Simple, cheap, and you can see what’s happening.
Now, the real process. First, pick a healthy stem. Look for one with firm, green or brown growth. Avoid any stems that feel soft or look wrinkled. I take my cuttings in spring or early summer. That’s when the plant is actively growing. I use a clean, sharp knife or pruning shears. I wipe the blade with rubbing alcohol first. Then I cut just below a node. A node is that little bump where leaves attach. I make the cut at a 45-degree angle. This gives more surface area for roots to emerge. I remove the bottom leaves, leaving two to three leaves at the top. This reduces moisture loss and stops the cutting from rotting.
I tried both water and soil propagation. Honestly, water is easier for beginners. You can see the roots grow. I fill a glass jar with filtered tap water, room temperature. I place the cutting so the bottom node is submerged, but the leaves stay dry. I put the jar on a bright windowsill with indirect light. Direct sun will cook the cutting. Then I wait. I change the water every three to four days. Stagnant water encourages bacteria and rot. I noticed tiny white roots starting on day eight. By day fourteen, the roots were about two inches long. That’s when I moved it to soil.
Here’s my two-week observation log, since you asked. Day one: cutting taken, placed in water. Nothing visible. Day three: water still clear, no mush. I changed the water anyway. Day five: a tiny bump appeared near the node. I almost missed it. Day seven: the bump turned into a short, white root tip. I was thrilled. Day nine: second root emerged. Both were less than half an inch. Day eleven: roots elongated noticeably. Day thirteen: roots branched out slightly. Day fourteen: roots reached two inches, so I transplanted into a small pot with aroid mix. The cutting is now a full plant, eight months later.
But I also tried soil propagation for comparison. I took a second cutting and dipped the end in rooting hormone. Then I planted it in a small pot with a mix of perlite and peat. I kept the soil slightly moist, never wet. I put a clear plastic bag over the pot to create a mini greenhouse. That trapped humidity. That cutting rooted in about twelve days, slightly faster than the water one. But soil is riskier because you cannot see rot forming underground. For beginners, I recommend water. For more confidence, try the baggie method with perlite.
Let me tell you about a specific failure I had. I tried to propagate a cutting that was too long. It had six leaves and four nodes. I was greedy. I wanted one big cutting. What happened? The cutting took forever to root because it was supporting too many leaves. The bottom leaf yellowed and dropped. Eventually, the stem started going soft. I saved it by cutting it into two smaller pieces, each with two nodes. Both rooted within ten days. So now, I always keep cuttings short, two to three nodes max. That is a lesson you do not want to learn by killing a plant.
Another trick I use is the plastic bag greenhouse for soil propagation. I put the cutting in a small pot, water it lightly, then cover the pot with a clear bag. I seal it with a rubber band. Then I place it in bright, indirect light. The humidity inside stays high. This prevents the leaves from wilting while the cutting has no roots. I open the bag every two days for fresh air. After about two weeks, I check for resistance. I give the stem a gentle tug. If it resists, roots have formed. Then I take the bag off gradually over a few days. This hardened the plant off.
I also want to address the bottom heat issue. Many people overlook this. Aglaonema Chocolate roots faster with warmth. I placed my jars on top of my refrigerator. That’s slightly warm from the motor. It made a noticeable difference. The cuttings rooted about three days faster than the ones on a cold table. If you have a seedling heat mat, even better. Keep the temperature around 75 to 80°F, around 24 to 27°C. Do not exceed 85°F, or you risk cooking the tissue. And keep them away from air conditioning vents. Cold drafts stall root growth completely.
Regarding the potting mix for the final transplant, I learned from experience. I used regular potting soil once, and it stayed soggy for a week. The young roots rotted. Now I mix my own. I use one part peat moss, one part perlite, and one part orchid bark. This provides drainage and airflow. Aglaonema Chocolate hates wet feet. The pot must have drainage holes. I use a four-inch nursery pot for a single cutting. That is the right size. A bigger pot holds too much water, and the soil stays wet too long. This is a classic beginner error, and I commit to it every time I rush.
Now, about the long-term care for the new plants. Once you transplant the rooted cuttings, do not fertilize for at least four weeks. The new roots are fragile. Fertilizing too early burns them. I made this mistake once. The leaves developed brown tips. I flushed the soil with plain water, and it recovered. After a month, I use a balanced liquid fertilizer at half strength, every four weeks during the growing season. The plant loves humidity. I group my propagated plants together on a pebble tray. The evaporating water keeps them happy. They also tolerate average household humidity, but they dry out faster than you might expect.
I have also tried division for propagation. That is another method that works well. If you have a mature Aglaonema Chocolate with multiple stems, you can separate the root ball. I dug up my three-year-old plant and gently teased apart the roots. Each stem had its own root system. I planted each in a separate pot. The shock was minimal. They all survived. Division is faster than cuttings because you already have roots. But you lose the original plant size. Cuttings let you keep the mother plant intact and create new plants simultaneously.
Let me dig into the lighting requirements more deeply. After you cut the stem, the cutting still needs light to photosynthesize. But direct sun is too harsh. It burns the dark leaves. I use a sheer curtain on a south-facing window. The filtered light is perfect. If you have east or west windows, place the cutting a few feet back. If you only have north windows, the light may be too low. You might need a grow light. I used a basic LED grow light once, and it boosted root growth significantly. Be careful not to place the light too close. The leaves can curl and dry out. Keep it about eight to ten inches away.
You might wonder about the rooting hormone. Is it necessary? No. I have propagated with and without it. The hormone speeds things up, but it is not critical. The main factors are moisture, warmth, and clean cuts. That being said, I found that powder hormone with fungicide helps prevent rot, especially for soil propagation. I dip the cut end, let it dry for a minute, then plant. It reduces mold risks. If you prefer organic approaches, you can use cinnamon powder as a mild antifungal. I tried that too. It worked as a preventive measure, but it did not speed up rooting.
Have I ever propagated in sphagnum moss? Yes. It is a great medium because it holds moisture without being waterlogged. I soak the moss in water, squeeze out the excess, then pack it around the cutting. I placed everything in a clear cup and check the moss every couple of days. The moss stays evenly moist. This method gave me robust roots in about twelve days. The downside is that moss can be messy and must be kept almost moist but not dripping wet. If you prefer something less messy, water works fine.
I also learned that the mother plant can be reused after taking cuttings. Do not throw the bare stem away. The remaining nodes will often sprout new growth. I cut my tall, leggy Aglaonema Chocolate down to about four inches. Within a month, two new shoots emerged from the base. The mother plant became fuller and bushier. This is a win-win. You get cuttings for new plants, and the original plant gets a fresh start. I recommend this approach if your plant has grown too tall or has lost its lower leaves.
Now let me answer some questions you might have. How long does it take to see roots? For Aglaonema Chocolate, usually seven to fourteen days in water. The exact time depends on temperature and light. What if your cutting goes mushy? That is rot. Remove it from the water, cut off the mushy part, and try again with a shorter cutting. Also change the water more frequently, maybe every two days. Can you propagate from a single leaf? No. A leaf without a stem node cannot produce roots or a new plant. Always include a node. That is where the new roots emerge. With a leaf, you might see roots, but no new shoot will form. I have seen people try this. It never works.
Is it better to root in water or soil? I think water is better for beginners. You can watch the progress. The moment you see roots, you know it is working. Soil rooting is fine if you are experienced, but there is uncertainty. I recommend water for most people. Then transplant carefully once the roots are one to two inches long. The roots are delicate. I use a pencil to make a hole in the soil. I lower the cutting in and gently firm the soil around it. I do not water heavily after transplanting. I moisten the soil slightly. Then I wait a week before regular watering. This reduces transplant shock.
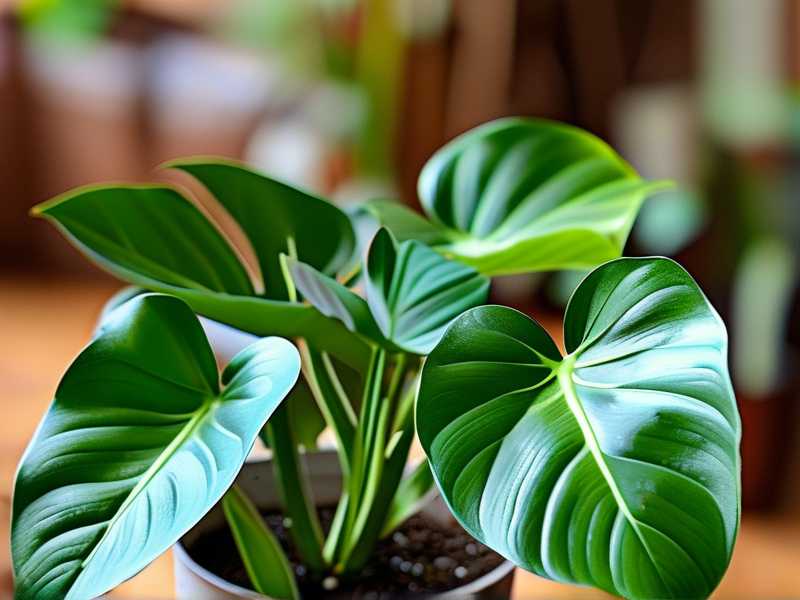
I want to share one more personal story. I propagated a cutting in winter once, just because I was bored. The roots took nearly a month to appear. The cutting did not die, but it was slow. That is because the plant was in a semi-dormant state. Growth slowed due to shorter days and cooler temperatures. Now I only propagate in spring and summer. If you have no choice, provide bottom heat and a grow light. It will help, but fall and winter propagation is always slower. This is worth knowing so you do not get discouraged.
Let’s talk about the secret to dark foliage. The new leaves on a propagated Aglaonema Chocolate will start lighter green, then darken as they mature. Do not panic if the first new leaf looks different. Give it time. The dark, chocolaty color needs bright, indirect light. If you place the new plant in too much shade, the leaves will stay greener. I moved one of my propagated plants to a brighter spot, and within three weeks, the new leaf was noticeably richer. The silver speckles also become more pronounced with superior light. So if you want that stunning dark look, do not hide the plant in a dark corner.
The underlying question for most of you is probably: will this work for a plant that looks half dead? It depends. If the stem is still firm and the root system below is intact, you have a chance. I rescued a plant that had root rot. I cut all the rotted roots off, trimmed the stem back to healthy tissue, and propagated the top part as a cutting. It took three weeks, but it rooted. The plant is now healthy. If the entire stem is mushy, there is nothing left to save. But most times, you can salvage something if you act fast.
Regarding light levels after planting, here is my routine. For the first two weeks after transplanting, I place the pot in a location with bright, indirect light. No direct sun. After that, I allow morning sun for an hour or two. That stimulates thicker leaves and darker pigmentation. I rotate the pot every week so the plant grows evenly. Aglaonema Chocolate will lean toward the light source. If you ignore this, one side becomes leggy and unattractive. You want a full, compact plant. So spin the pot a quarter turn every time you water.
I also experimented with different watering schedules. For the established, propagated plants, I water when the top two inches of soil are dry. I stick my finger into the soil. Simple and reliable. In an average home, that ends up being every five to seven days. In winter, it might be every ten days. During the summer, every four days. The leaves will tell you if you are wrong. If they curl, the plant is thirsty. If they turn yellow, you are likely overwatering. Brown tips mean underwatering or excess fertilizer. It took me two years to read these signs confidently. Now you have this knowledge upfront.
Does the water quality matter? Yes, actually. I used hard tap water for months. The leaf tips started browning. I switched to filtered water or rainwater, and the problem disappeared. The buildup of minerals, particularly fluoride and chlorine, damages the sensitive tips of Aglaonema. If you cannot filter, let the tap water sit out overnight. The chlorine will evaporate. Fluoride is harder to remove for domestic use, so prefer bottled or filtered water if possible. This is a small detail with a big impact on leaf health.
One of the biggest surprises I had is that Aglaonema Chocolate is surprisingly robust. Even if the cutting looks wilted after you cut it, do not throw it away. I had a cutting that drooped for three days. I almost gave up. Then it perked up on day four. The stem was simply rehydrating after the shock of being cut. I kept it in a humid bag for the first two days. That really helped. So if you see wilting, remember it is not necessarily a death sentence. Patience and high humidity are your best friends.
I should also mention the pest issue. Mealybugs love the tender new growth on cuttings. I check the undersides of leaves every week. If I see white cottony spots, I dip a cotton swab in rubbing alcohol and dab each insect. I also wipe down the leaves with neem oil solution once a month. This prevents most infestations. Spider mites are less common in high humidity, so the greenhouse method actually reduces their risk. Keep new cuttings away from your other plants for a few weeks. That prevents cross-contamination. I quarantine all my cuttings on a separate shelf.
There is also the question of pot size again. I cannot stress this enough. Too large a pot is a death sentence. I planted a rooted cutting into a six-inch pot once because it looked nice. The soil stayed damp for two weeks. The roots suffocated. I lost that plant. Now I always start with a small pot, usually 3 to 4 inches. As the roots fill the pot, I repot into a bigger one. This gradual increase prevents waterlogging and lets the plant establish a strong, healthy root system. If you hate repotting, remember it is a necessary step for a thriving plant.
Let me give you a clear step-by-step summary for the whole process. First, choose a healthy stem with at least two nodes. Second, cut at a 45-degree angle just below a node. Third, remove the bottom leaves. Fourth, place the cutting in water, ensuring the node is submerged. Fifth, change the water every three days. Sixth, put the jar in bright, indirect light with warmth. Seventh, wait for roots to reach two inches. Eighth, transplant to a small pot with a well-draining aroid mix. Ninth, water lightly and avoid fertilizer for a month. Tenth, gradually move the plant to its final bright spot. Follow these ten steps, and you will have new Aglaonema Chocolate plants in about a month.
I also checked a few authoritative sources to back up my experience. The RHS notes that most houseplants, including Aglaonema, prefer to dry out slightly between waterings. This aligns with what I saw; overwatering was my primary failure. The AHS emphasizes the importance of well-draining soil and moderate light for indoor foliage plants. These are exactly the conditions I found through trial and error. So it is not just my opinion; it is backed by gardening experts. I would recommend reading their guides for more depth if you are interested.
There is one more thing I want to say about water rooting. Once the roots are two inches long, do not delay transplanting. If you leave the cutting in water too long, the roots become adapted to water. They can struggle when moved to soil. I left a cutting in water for over a month, and it developed long, fragile roots. When I planted it, those roots rotted quickly because they were not used to the denser soil. Now I transplant as soon as the roots reach two inches, maybe even earlier. This gives the roots a chance to adapt and grow robustly in soil.
Another practical hint: use a clear cup or jar for water rooting. It allows you to monitor water clarity and root development without disturbing the cutting. I also cover the top of the jar with a piece of plastic wrap. I cut a small slit in the center to hold the stem. This reduces evaporation and keeps the humidity high around the cutting. It is a simple hack that improved my success rate. The leaves stayed turgid, and the cutting looked healthier during the entire rooting period.
I want to talk about the emotional side of propagation too. You will have failures. I have failed many times. But each failure gives you more information. The important thing is to log what you do. I keep a small notebook where I write down the date, the cutting length, the medium, and the temperature. This helps me replicate successful attempts and avoid repeating mistakes. Building a record of your growing environment is priceless. If you are serious about propagating Aglaonema Chocolate, I recommend doing the same.
Let me also address a common concern: how many cuttings can you take from one plant? A healthy, mature plant can provide five to ten cuttings without stress. I take no more than one-third of the stems at a time. This leaves enough foliage for photosynthesis. The mother plant continues to grow and produce new stems. Over time, you can build a collection from a single plant. I gave away eight new plants last year, all from one mother. That is the beauty of propagation.
Finally, after you successfully propagate a few plants, you will naturally want to share them. I gave some to my friends, and they all survived. The key is to teach them the same principles: bright, indirect light, sparse watering, and well-draining pots. If you give someone a propagated plant without instructions, they will likely overwater it. So write a small note. Trust me, it saves you from watching another plant die and receiving a sad text message about it.
Now let me lay out the FAQs. How often should you water a newly propagated plant? Water it lightly after transplanting, then wait until the top two inches of soil are dry. This can be five to seven days. Why are the leaves of my cutting turning yellow? This usually means overwatering. Check if the stem is mushy. If not, reduce the watering frequency and ensure good drainage. Can I use a leaf cutting to propagate Aglaonema Chocolate? No, you need a stem node. A leaf alone will not grow into a new plant.
These are the core questions I always get. I hope my answers save you from the trial-and-error path I took. Propagation is honestly one of the most satisfying things about plant ownership. Watching a tiny root emerge from a cutting feels like magic. The fact that you can turn one plant into a whole collection is incredible. And the specific beauty of Aglaonema Chocolate, with its dark, speckled foliage, makes it all worth it. Just follow the steps, avoid the three fatal errors, and keep your expectations realistic. You will get there.





