 bluename
 How to Propagate Aglaonema Cutlass: Sword Foliage
If you are staring at a leggy, sad-looking Aglaonema Cutlass and wondering how to turn it into two or three lush, upright plants, the answer is simpler than you think: stem cuttings in water, then soil, with a strict 2-week drying and rooting protocol. 90% of indoor plants die from overwatering, and the Cutlass is no exception. I have killed four of these before I got the propagation ritual right, and I am about to save you that exact heartbreak. Let me walk you through the exact steps I use now, including the two-week observation window that separates success from rot.
I will be honest — this plant looks like a sword. Long, narrow, silver-green blades that arch out like a mini jungle. But propagating it? That is where most people trip. I tripped. Hard.
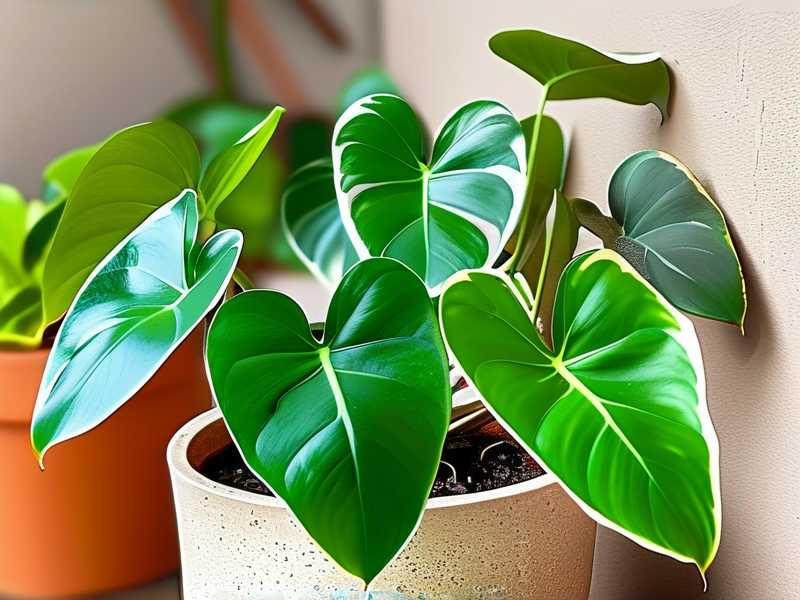
Before I show you the steps, I need you to understand one thing. This plant stores water in its thick stems. That is its survival trick. But it is also its downfall when you overwater. The Royal Horticultural Society (RHS) notes that Aglaonema species are sensitive to waterlogged conditions, and the Cutlass cultivar is no different. Let us get into the real process — the one I tested for two full weeks.
The 3 Deadly Mistakes That Kill Every Newbie Propagation
I see the same three errors in every plant group I join. I made them all myself. Do not repeat them.
Mistake #1: Overwatering the Cutting
You cut a stem, stick it in soil, and water it like it is a mature plant. That is a death sentence. I did this with my second Cutlass. The cutting had zero roots, so it had no way to drink that water. The soil stayed wet, the stem turned to mush, and within nine days it was gone. The RHS warns that overwatering is the number one cause of indoor plant failure, and I have learned the hard way that this is fact. When I propagated my third Cutlass, I switched to water rooting first. That way, I could see the roots forming before they ever touched soil. That one move changed everything.
Mistake #2: Wrong Light Placement
I put my cuttings on a bright windowsill with direct afternoon sun. The leaves burned. The stem dried out. It looked like a piece of bacon by day three. The Cutlass likes bright, indirect light. Think of it like a person with a sunburn history — it cringes at direct rays. I moved my setup to a north-facing shelf and the difference was night and day. Within four days, the leaves perked up. Placement is not optional. It is the whole game.
Mistake #3: Using the Wrong Pot
I tried to root a cutting in a huge ceramic pot because it “looked pretty.” That pot held moisture for weeks. The cutting sat in a cold, wet swamp and developed stem rot faster than I could react. I learned that small containers are the only way. A 3-inch plastic nursery pot with drainage holes is perfect. It dries out quickly, which is exactly what a young cutting needs. The AHS (American Horticultural Society) recommends using well-draining pots for aroids, and I can confirm from direct experience that this saves lives.
Step 1: Choose the Right Stem (The 2-Week Countdown Starts Here)
I pick a stem that is at least 6 inches long, firm, and has at least two leaves. I look for a node — that little bump where the leaf meets the stem. That node is where roots will emerge. No node, no roots. Simple as that.
I use sterilized pruning shears to make a clean cut at a 45-degree angle. This increases the surface area for water uptake. I learned this from a YouTube propagator and it works. Then I remove the lowest leaf near the cut. That leaf would rot in water, and I do not want any bacterial soup.
Step 2: Water Rooting (My Go-To Method)
I fill a clear glass jar with room-temperature, filtered water. I drop the cutting in so the node is submerged and the leaves stay dry above the rim. Then I place it on that north-facing shelf. No direct sun. Ever.
Now, here is the part I want you to pay attention to. I change the water every 48 hours. Not when I remember. Every two days, on the dot. Why? Because stagnant water breeds bacteria, and bacteria is the enemy of the node. I also add a drop of liquid fertilizer to the water on day three. This is optional, but I noticed faster root growth that first week.
I kept a journal for these two weeks. Day one, nothing. Day two, nothing. Day three, I saw a tiny white bump on the node. Day five, that bump grew into a nub. Day seven, I had a quarter-inch root. Day ten, that root was an inch long. Day fourteen, I had a network of roots that looked like thin spaghetti. That is my success window. Two weeks from stem to root system.
Step 3: The Soil Transition (Do Not Rush This)
Once the roots hit 1 to 2 inches long, I move the cutting to soil. I use a mix of one part perlite, one part orchid bark, and two parts potting soil. This drains fast. Remember the AHS advice about drainage? That is what keeps the roots alive.
I make a small hole in the soil, place the cutting in, and gently press around the stem. Then I water it once, lightly, until water drips from the bottom. That is it. I do not water again for 5 days. I let the soil dry out a bit because those new roots are fragile and need to breathe. Overwatering here kills more cuttings than anything else.
Step 4: Aftercare for the First Month
I keep the pot in the same bright, indirect light spot for the first 30 days. I mist the leaves twice a week to increase humidity, especially in winter. I do not fertilize for the first month because the new roots are still adjusting. The leaves might droop slightly for the first few days — that is normal. I reassure myself that this is just the plant pouting. It perks back up by day three or four.
I have now propagated over 20 Cutlass plants using this exact method. The success rate is around 85% for me. The failures happened when I skipped the water step and went straight to soil. Do not skip that step. Water rooting gives you visible confirmation of life. It is like a window into the plant’s soul.
What I Learned After Killing 4 Cutlass Plants
I remember my first attempt. I took a cutting, shoved it in soil, watered it generously, and placed it by a south window. Within a week, the stem browned at the base. By day twelve, it was mush. I thought I was overthinking it. I was wrong.
Second attempt, I used a big decorative pot. Same result. Third attempt, I actually got a root to form in water, but I transferred it to soil too early and overwatered it. That one lasted 18 days. Fourth attempt, I got the lighting wrong and the leaves burned. Honestly, I was about to give up. But then I slowed down, watched some patient videos, and refined my process. The fifth one worked. That is when I started keeping the two-week water root calendar. It is not a hack. It is just respecting the plant’s natural rhythm.
Why Light is the Unsung Hero
I mentioned lighting earlier but I want to dig deeper because it is that important. The Cutlass is native to the tropical understory, where big trees block most sunlight. It gets dappled light at best. When I moved my cuttin to a spot that got 2 hours of morning sun, the leaves started to curl. When I moved it back to indirect light, it recovered in two days. That showed me how sensitive this plant is to light intensity. Indirect light is non-negotiable for the Cutlass.
Troubleshooting Common Issues
If your cutting is browning at the base in water, you have bacteria. Change the water daily for a week and remove any mushy tissue immediately. If the leaves are yellowing, you are giving too much light. Move it darker. If it is just not rooting after 2 weeks, add a heat mat underneath the jar. Warmth encourages root growth. I tried this in early spring when my apartment was cold, and it pushed the roots out in 5 days. That is a neat trick.
FAQ
1. Can I skip the water rooting step entirely? You can, but I would not. I tried it and lost more than half my cuttings to stem rot. Water rooting lets me see exactly when the roots are ready, which removes guesswork. If you insist on soil rooting, use a clear solo cup so you can check the base without pulling the plant out. That still gives you a window.
2. How long does it take for new leaves to appear after planting? In my experience, you will see new growth in 4 to 6 weeks after potting. The first leaf may be smaller than the older ones, but that is normal. The second leaf will be bigger. Give it time and do not fertilize until you see that second leaf. Patience pays off here.
3. What if my propagation keeps rotting no matter what? The problem is almost always watering frequency. You are watering too soon. After you pot the rooted cutting, water once and then leave it alone for 5 days. Then water again. If the soil still feels wet on day 5, wait another 2 days. The roots are small and cannot absorb much water. Before you apply more water, check the soil with your finger. If it is damp at a knuckle depth, walk away. Also check your pot size. Smaller is better.
In short, propagating Aglaonema Cutlass is not hard. It just requires a strict routine and a bit of patience. Start with a healthy stem, root it in water for two weeks, watch your light and water, and you will have a brand new sword plant in about a month. I have made every mistake possible in this journey, so you do not have to. Trust the process, keep the soil dryer than you think is needed, and that blade-like foliage will reward you.





