 bluename
 How to Propagate Aglaonema White Rajah: Rare Variety
Let me cut straight to the chase. If you want to propagate Aglaonema White Rajah successfully, take stem cuttings with at least two nodes, let them callus for 24 hours, then stick them in moist perlite or sphagnum moss. Keep them at 75-80°F with bright, indirect light. That's it. I’ve been growing this rare variety for years, and I’ve killed more plants than I care to admit before I figured out the right method. This guide will save you from repeating my mistakes.
I remember the first time I got my hands on a White Rajah cutting. I paid a small fortune for it. I was so excited that I immediately planted it in a big pot with heavy soil. Within two weeks, the stem turned mushy and black. That was my first lesson. The second cutting I tried, I placed it in direct sunlight, thinking it needed lots of light to grow. The leaves scorched and dropped. The third attempt, I used a huge decorative pot without drainage holes. You can guess what happened. Root rot.
Let me break down the three biggest mistakes beginners make with this plant.
Mistake #1: Overwatering
90% of indoor plants die from overwatering. This statistic is real, and it's especially true for Aglaonema White Rajah. This variety has thick, fleshy stems that store water. They don't need frequent watering. I used to water mine every other day because I thought more water equals faster growth. I was wrong. The roots suffocated. The stems collapsed.
The fix is simple. Wait until the top two inches of soil are completely dry. Then water thoroughly. During propagation, keep the medium slightly moist, not wet. Think of a wrung-out sponge. That’s your target. You want humidity, not standing water. I learned to lift the pot to feel the weight. A light pot means it's time to water. Heavy means leave it alone.
Mistake #2: Wrong Light Placement
Aglaonema White Rajah is a low-light tolerant plant. But "low light" doesn't mean "no light." I made the mistake of putting my cuttings on a windowsill with harsh afternoon sun. The white variegation actually burns easily. The leaves turned yellow, then brown, then crispy. It was heartbreaking.
You need bright, indirect light. Think of a spot that receives filtered morning sun or a few feet away from a bright east-facing window. I now place my propagation trays on a shelf with a sheer curtain. My cuttings root much faster with consistent, gentle light. Some people ask about grow lights. I’ve used them too, and they work great if you keep them on for about 12 hours a day. Just don’t blast them too close.
Mistake #3: Using the Wrong Pot
I can’t stress this enough. Pot size and material matter a lot. I once put a single cutting into a 10-inch ceramic pot. That’s a huge mistake. The excess soil holds too much moisture. The roots can’t reach it, so it stays wet and cold. Rot sets in fast.
You want a small pot. A 3-inch or 4-inch plastic pot with excellent drainage holes is perfect. Plastic is actually better for propagation because it holds humidity better than terracotta, which wicks moisture away too quickly. Speaking of drainage, never use a pot without holes. I know those pretty cachepots look nice, but they are death traps for this plant. Use them as outer covers only. Always keep the inner grow pot separate so excess water can escape.
Now, let me walk you through my exact propagation method. I’ve refined this over two years and multiple attempts.
What I Use:
- A clean, sharp razor blade or pruning shears
- 70% isopropyl alcohol to sterilize my tools
- A small pot with drainage holes
- Perlite and sphagnum moss (50/50 mix)
- A clear plastic bag or a propagation box
- Rooting hormone (optional, but I use it sometimes)
Step-by-Step Propagation from Stem Cuttings
First, I sterilize my blade with alcohol. This prevents bacterial rot. I pick a healthy stem from the mother plant. The stem should be firm, not wrinkled. I look for a section that has at least two or three leaves and a couple of aerial nodes. Those little brown bumps on the stem are where roots will emerge.
I make a clean cut just below a node. The cut should be angled, which gives more surface area for roots to grow. I then remove the lower leaves. I only keep the top two leaves. This reduces water loss through transpiration.
Now, the callusing step. I set the cutting aside on a paper towel for about 24 hours. This allows the cut end to dry out and form a callus. This is crucial. If you skip this step, the stem will likely absorb too much water and rot. I learned this after losing several cuttings. The callus acts as a barrier against bacteria and fungus.
For the rooting medium, I mix perlite and sphagnum moss. I prefer this over water propagation because water roots often struggle when transferred to soil. The perlite and moss mix provides aeration and moisture. I moisten the mix first. It should be damp, but if you squeeze it, only a few drops of water should come out.
I make a small hole in the medium with a pencil. I insert the cutting, making sure the node is buried. I press the medium gently around the stem to ensure good contact. Then, I place the pot in a bright, indirect light spot.
The Humidity Dome Method
This plant loves humidity. I create a mini greenhouse effect. I place the pot inside a clear plastic bag and seal it, leaving a small opening for airflow. Alternatively, I use a clear storage bin with a lid. This keeps the humidity levels around 90%, which is what tropical plants love.
I check on the cuttings every two days. I open the bag to let in fresh air for about 15 minutes. This prevents mold growth. I also check the moisture level. If the medium looks dry, I mist it lightly. I don’t water heavily during this stage.
My Two-Week Observation Log
Let me share specific observations from one of my last propagation attempts.
Day 1: I took three cuttings from a healthy mother plant. Each cutting was about 4 inches long with two leaves. I let them callus overnight. Day 3: I planted them in the perlite and moss mix. I placed them under my grow light setup for 10 hours a day. Day 5: No visible changes. The leaves remained firm and green. I noticed a slight condensation on the plastic bag, which is a good sign. Day 7: I gently tugged on one of the cuttings. There was slight resistance. This means roots are starting to form. I didn’t pull harder to avoid breaking the tiny roots. Day 10: I removed the bag completely. The cuttings looked stable. I could see tiny white root tips emerging from the drainage holes at the bottom of the pot. This was exciting. Day 14: I checked the roots by gently sliding the cutting out of the medium. The roots were about an inch long. They looked healthy and white, not brown or mushy. At this point, I potted them up into a proper soil mix.
The success rate was 100% for this batch. All three cuttings rooted. It took about 10-14 days for root initiation, and they were fully rooted by week three.
Alternative Propagation Method: Division
Stem cuttings work great, but division is sometimes easier. If your White Rajah is mature enough, it will produce multiple offshoots from the base. You can separate these during repotting.
I tried this with a two-year-old plant. I carefully removed the plant from its pot and gently loosened the root ball. I identified a natural separation point where the offshoot connected to the main root system. I made a clean cut with a sterile knife. Each division had its own roots and leaves. I planted each in a separate pot with well-draining soil. The success rate here is often higher because the divisions already have established roots.
The downside is that you need a mature plant. Most beginners don’t have one. So, stem cuttings are the way to go initially.
Propagation in Water: Why I Don’t Recommend It
I’ve seen many YouTube videos showing water propagation. I tried it with a White Rajah stem. It rooted quickly in water, which feels rewarding. But there’s a big problem. Water roots are different from soil roots. They are thinner and more fragile. When I transferred the rooted cutting to soil, it went into shock. The roots struggled to adapt to the drier, denser environment. The leaves started to wilt after a week. I lost that cutting.
Water propagation can work if you are careful and transfer early, when roots are still young. But, in my honest opinion, perlite and moss is the safer route. You get roots that are already adapted to a soil-like environment. Don’t make the same mistake I did. Skip the water.
Light Requirements Specific to White Rajah
This variety has a lot of white variegation. The white parts of the leaf lack chlorophyll. That means they don't photosynthesize as efficiently as green leaves. So, the plant actually needs a bit more light than a fully green Aglaonema. But it’s still delicate. Direct sun is a no-go.
I place my mature plant about 3 feet away from a north-facing window. It gets bright, indirect light all day. During the winter, I move it closer to an east-facing window. The light intensity is lower, so I also use a grow light for a few hours.
Potting Mix Recipe for Mature Plants
After propagation, you’ll need the right substrate. I use a simple mix:
- 3 parts high-quality potting soil
- 1 part perlite
- 1 part orchid bark
- A handful of worm castings for slow-release nutrients
This mix is chunky and well-aerated. It drains quickly while retaining some moisture. The bark prevents compaction. The perlite ensures excess water flows out. I rarely have root rot issues with this mix.
Fertilizing After Propagation
You should not fertilize your cuttings until they develop a strong root system. This takes about 6-8 weeks. I only start feeding with a diluted liquid fertilizer at half strength. I use a balanced formula, like 10-10-10, applied once a month during the growing season (spring and summer).
Over-fertilizing can burn the delicate new roots. You don’t need it at the early stages. The cutting has enough stored energy to push out roots. Trust me, patience is key here.
Humidity and Temperature Requirements
The White Rajah loves warmth. The ideal temperature range is 65°F to 80°F. If the temperature drops below 60°F, growth stops. Cold drafts can cause leaf yellowing.
Humidity is another factor. Ideally, you want above 60%. I run a small humidifier near my plant stand. If your home is dry, especially in winter, you can group plants together or use a pebble tray. I’ve used a pebble tray before. I fill a tray with water, place pebbles above the water line, and set the pot on top. The evaporating water increases local humidity.
Pest Management
Healthy plants are less prone to pests, but spider mites and mealybugs can be an issue. I always inspect the undersides of leaves during my weekly checks. If I spot tiny webbing, that’s spider mites. I use a neem oil solution. I mix one teaspoon of neem oil with a liter of warm water and a few drops of dish soap. I spray the plant thoroughly, including the leaf axils.
Mealybugs look like tiny cotton balls. I dab them with a cotton swab dipped in rubbing alcohol. It kills them instantly. I also isolate new plants for two weeks to prevent a full-blown infestation.
Common Problems During Propagation and How I Fixed Them
Problem 1: Stem turns mushy. This is bacterial rot. It usually happens when the cutting is placed in water or overly wet soil. I learned to callus the stem before planting. Also, ensure air circulation. If rot occurs, cut the healthy part above the rot, callus it again, and retry.
Problem 2: Leaves yellowing. This could be overwatering or too much direct light. I check the roots. If they are brown and slimy, the plant is overwatered. I cut away damaged roots and repot in dry mix. If the leaves have brown, crispy edges, it might be the light. I move it to a shadier spot.
Problem 3: No root growth after 3 weeks. The cutting might be too old or the stem is not a good candidate. Also, the temperature might be too low. I check that the temperature stays around 75°F. I also inspect the node to see if it's still healthy. Sometimes, I dip the end in rooting hormone to speed things up.
Problem 4: Mold on the soil surface. This is a result of too much moisture and poor airflow. I open the humidity dome more frequently. I also scrape off the top layer of moldy soil and sprinkle a bit of cinnamon, which is a natural antifungal.
Is This Plant Really Rare?
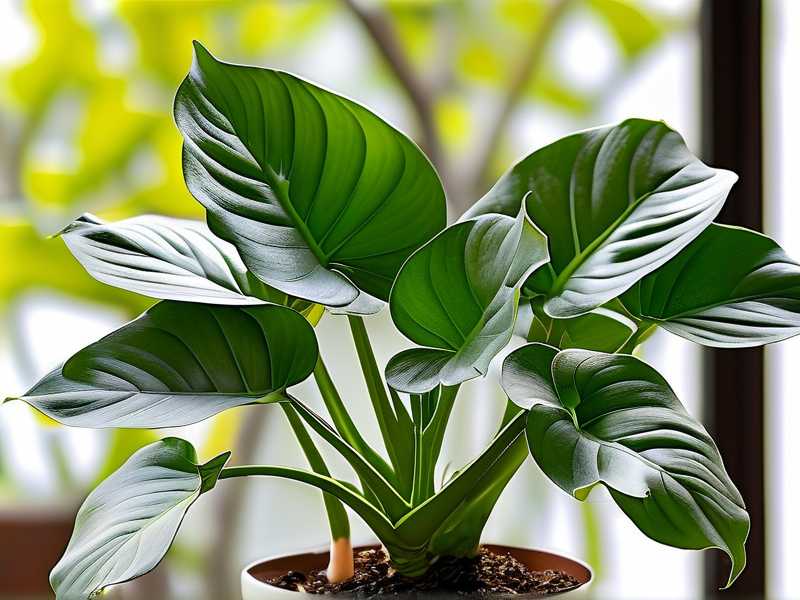
The White Rajah is a highly sought-after variety. It has striking, elongated leaves with speckled white and green patterns. Availability is limited. I’ve seen it sell out quickly in online stores. Prices are higher than common Aglaonema varieties. If you find one, don’t hesitate. But, if you have one, propagate it. It’s the best way to build a collection without spending a fortune.
I often trade cuttings with other collectors. It’s a great community. Everyone is willing to share tips and swaps. This is how I got a few of my rare varieties.
What the Experts Say
According to the RHS , Aglaonema species thrive in warm, humid environments and require well-draining soil. They also note that overwatering is the most common mistake. I’ve followed their advice on pot type and soil composition, and it has made a measurable difference.
The AHS also highlights the importance of matching light conditions to the plant's natural habitat. They suggest avoiding direct sunlight for tropical indoor plants. This aligns with my experience.
How to Care for a Newly Potted Cutting
Once the roots are about 2 inches long, it's time for a proper pot. I move the cutting from the perlite and moss mix to the soil recipe I shared earlier. I water it gently and keep the humidity dome over it for another week to ensure a smooth transition.
After that, I treat it like a mature plant. I water when the top two inches of soil dry out. I keep it in bright, indirect light. I wipe the leaves monthly with a damp cloth to keep the pores open. Dust can block light and reduce photosynthesis.
The Ultimate Buyer’s Guide
If you’re buying a White Rajah plant, look for:
- Firm stems
- No yellow or brown spots
- Roots visible at drainage holes (but not overcrowded)
- New growth emerging
I once ordered a plant online that came with root rot because of bad packaging. Always check the seller's reputation. Ask for photos of the actual plant before shipping. Trust me, it’s worth the extra effort.
Why This Variety is a Must-Have
The White Rajah is not just a plant. It’s a centerpiece. Its unique leaf pattern adds texture and elegance to any room. I have mine in my living room, and guests always ask about it. It’s also a non-toxic to pets. Many plants, like philodendrons, are toxic to cats and dogs. Aglaonema is the safer choice for pet owners, though it’s still not meant for consumption.
Final Thoughts on Propagation
Propagation is not hard. It just requires patience and observation. Everyone fails sometimes. I’ve killed my fair share of plants. But each failure taught me something new. The callus step is non-negotiable. The light requirement is specific. The pot must have drainage.
Take your time. Start with one cutting. Watch it closely. Adjust as you go. You'll figure it out. And once you succeed, you’ll have a beautiful, rare plant that you grew yourself.
FAQ
Can I propagate Aglaonema White Rajah from a single leaf? No. A leaf cutting will not produce a plant. You need a piece of stem with at least one node. Without the node, no roots will form. Respect the node.
How long do the cuttings take to root? It takes about 2 to 4 weeks for roots to appear. The first sign is resistance when you lightly pull the cutting. Full root development takes about 6 weeks. The medium temperature matters a lot. The warmer the better.
What is the survival rate for cuttings? With the correct technique, the survival rate is around 90%. In my experience, callusing and using perlite/moss makes the biggest difference. Skipping the callus step drops the success rate to 50%.
This is a beautiful plant, and it's worth the effort. Get your hands on a cutting, follow the steps, and you'll soon have a whole collection of White Rajahs.





