 bluename
 How to Propagate Aglaonema After Repotting: A Realistic Guide for Home Gardeners
Let me guess what brought you here. You just repotted your Aglaonema, and either the pot broke, or you noticed the root ball was so crowded that pieces fell away. Now you're staring at those loose stems and wondering if you can turn them into new plants instead of tossing them. Good news: yes, you can. And honestly, Aglaonema propagation after repotting is one of the easiest plant projects you'll ever do.
Here's the short answer up front: take the divided stems or offshoots you got during repotting, let the cut ends callus for a few hours, then root them in either water or a light potting mix. Keep them warm, bright, and barely moist. New roots usually appear in two to four weeks.
I've done this exact thing more times than I can count. Some worked beautifully. Some rotted into mush because I got impatient. So let me walk you through what actually works, what doesn't, and the mistakes I made so you don't have to.
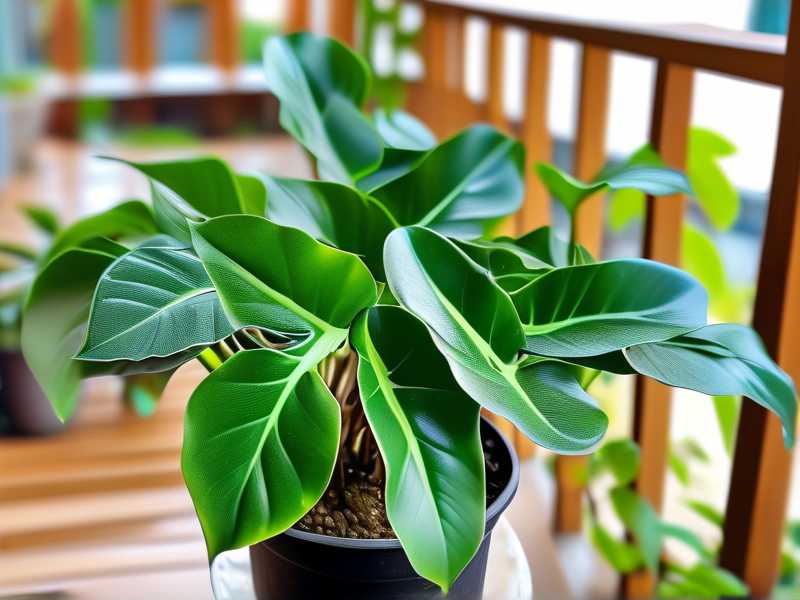
Why Repotting Is Actually the Perfect Time to Propagate
When you repot an Aglaonema, you're already disturbing the root ball. The plant is already stressed. Dividing it into sections during this process is far less shocking than doing it randomly in the middle of summer.
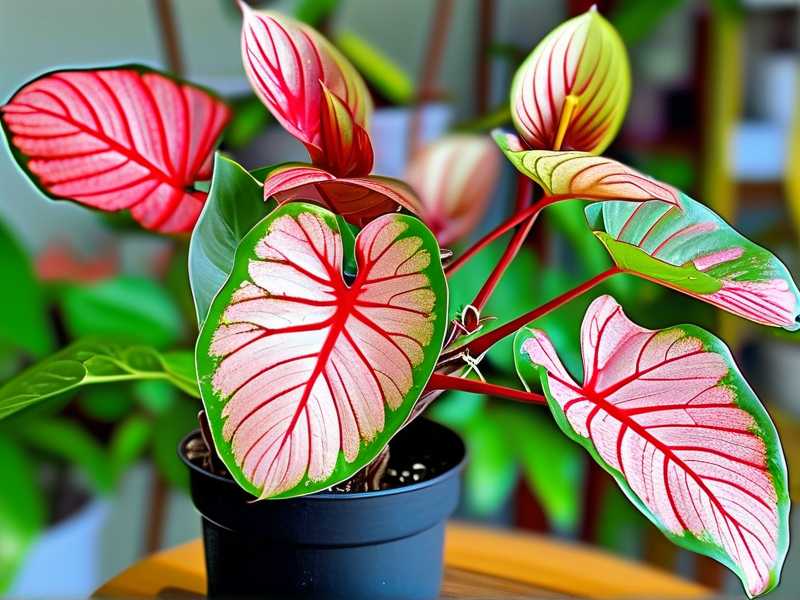
Also, Aglaonema — often sold as Chinese Evergreen — naturally grows in clumps. Each clump has its own root system and stems. So when you lift the plant out of its old pot, you'll often find that what looked like one plant is really three or four separate ones tangled together.
That's your propagation material right there.
I used to feel guilty pulling them apart. Now I see it as a free plant giveaway. One repot, three new pots on my windowsill. Not bad for an afternoon's work.
According to the RHS, division is one of the most reliable methods for propagating clump-forming houseplants. They're not wrong. I've had far better luck with division than with leaf cuttings on this genus.
My 2-Week Observation: What Actually Happens After You Divide
I want to share a specific experiment I ran. I divided a large Aglaonema 'Silver Bay' into four sections. Two went into water. Two went into a chunky soil mix. I checked them every day for two weeks.
Days 1–3: Nothing visible. The soil ones looked slightly droopy. The water ones perked up fast. I nearly panicked and watered the soil ones again — glad I didn't.
Days 4–7: One water cutting showed tiny white nubs at the base. The soil ones still looked identical to day one. I kept my hands off them.
Days 8–10: Two of the water cuttings had roots about half an inch long. The soil cuttings finally stopped drooping. No visible roots yet, but the stems felt firm.
Days 11–14: Water roots were now an inch long and branching. I could see faint new root tips in the soil ones when I gently tugged — resistance means roots are forming.
The takeaway? Water rooting gives you faster visual feedback. Soil rooting is slower but produces stronger roots from the start. Both work. Pick based on your patience level.
The 3 Fatal Mistakes New Growers Make
I've made every single one of these. Let me save you the grief.
Mistake 1: Overwatering — The Silent Killer
You've heard it before, but it bears repeating: 90% of indoor plants die from overwatering. I killed my first three Aglaonemas this way. Not because I neglected them, but because I loved them too much.
After repotting, the roots are damaged. They can't absorb water efficiently yet. If you soak the soil, you're basically drowning a plant that's already in shock.
What I do now: water lightly at potting time, then wait until the top inch of soil is dry before watering again. In a 4-inch pot, that might mean waiting 7–10 days. It feels wrong. Do it anyway.
Mistake 2: Wrong Light — Too Much or Too Little
Aglaonema is a understory plant. In the wild, it grows under tree canopy. Direct sun will scorch those beautiful patterned leaves. But zero light means no energy for root growth.
I once put a freshly divided Aglaonema on a south-facing windowsill in July. By day four, the leaves had bleached patches. I moved it to an east-facing spot with sheer curtains. Recovery took three weeks.
The sweet spot: bright, indirect light. A few feet back from a bright window. Or under a grow light set to low intensity.
Mistake 3: Wrong Pot Size — The Root Rot Trap
I know the temptation. You want to give your new plant room to grow. So you grab a pot two sizes bigger. Don't.
An oversized pot holds more soil than the roots can use. That excess soil stays wet. Root rot sets in. I lost a beautiful 'Red Siam' this way. The pot was gorgeous. The plant was dead in ten days.
Use a pot only 1–2 inches wider than the root ball. Terracotta is great because it wicks moisture. Plastic works too if you're careful with watering.
Step-by-Step: How I Propagate Aglaonema After Repotting
Here's my actual process, refined over years of trial and error.
Step 1: Prepare Your Tools and Workspace
You'll need:
- Clean, sharp scissors or pruners (wipe with rubbing alcohol)
- A few small pots (3–4 inches)
- Fresh potting mix (I use a blend of peat, perlite, and orchid bark)
- A jar of room-temperature water if water propagating
- Gloves if you're sensitive to sap
Aglaonema sap contains calcium oxalate crystals. It's not dangerous, but it can irritate skin. I learned that the hard way after rubbing my eye mid-repot. Not fun.
Step 2: Separate the Clumps Gently
After you lift the plant from its old pot, shake off loose soil. You'll start to see natural divisions — places where stems pull apart easily.
Don't force anything. If a section won't separate without a fight, use your pruners to cut through the connecting rhizome. I try to keep at least two or three stems per division. Single stems root, but they take forever and often fail.
Step 3: Let the Cuts Callus
This step is non-negotiable. Fresh cuts are open wounds. If you put them straight into water or wet soil, bacteria and fungi move in fast.
I set my divisions on a paper towel in a shaded spot for 2–4 hours. Overnight is fine too. The cut surface should look dry and slightly sealed.
I skipped this step once because I was in a hurry. Two of three cuttings rotted within a week. Lesson learned.
Step 4: Choose Your Rooting Method
Water method:
- Place the stem base in a jar with 1–2 inches of water
- Change water every 3–4 days
- Keep in bright, indirect light
- Roots appear in 2–4 weeks
Soil method:
- Fill small pots with pre-moistened mix
- Poke a hole, insert the stem base, firm gently
- Do not water again for at least a week
- Keep in bright, indirect light
- Roots form in 3–5 weeks
I use both. Water lets me monitor progress. Soil gives me stronger plants that don't need transitioning later. For beginners, I'd suggest water first. You'll see roots forming and feel encouraged instead of anxious.
Step 5: Provide Bottom Heat (Optional but Helpful)
Aglaonema roots faster when the soil is warm. I use a seedling heat mat set to 75°F (24°C). If you don't have one, a warm room works. Just don't put them on a radiator or in direct sun.
According to the AHS, warm soil temperatures significantly improve rooting success for tropical houseplants. I've definitely noticed the difference. Cuttings on the heat mat rooted about a week faster than those without.
Step 6: Wait and Resist the Urge to Check
This is the hardest part. I still catch myself pulling cuttings out of soil to see if roots have formed. Don't. Every time you disturb them, you break tiny new roots.
For water cuttings, you can see roots without touching. For soil cuttings, gently tug the stem after three weeks. If it resists, roots are there.
What to Do After Roots Form
Once roots are 2–3 inches long in water, it's time to pot them up.
I use the same chunky mix. I water lightly and keep the new plants in slightly lower light for a week. Then I move them to their normal spot.
Don't fertilize for at least a month. New roots are sensitive. I made the mistake of giving a diluted feed too early once. The tips burned. It set the plant back weeks.
Long-Term Care for Your New Aglaonema
Aglaonema is forgiving once established. Here's what I do:
- Water when the top inch of soil is dry
- Feed monthly in spring and summer with diluted liquid fertilizer
- Wipe leaves with a damp cloth to keep them dust-free
- Repot every 2–3 years or when roots circle the pot
I also rotate my pots a quarter turn each week. It keeps growth even. Small habit, big difference.
Frequently Asked Questions
Can I propagate Aglaonema from a single leaf?
No. Aglaonema leaves won't produce new plants on their own. You need a stem section with at least one node. This is different from plants like snake plants or begonias that root from leaf pieces. I tried a leaf once out of curiosity. It stayed green for a month, then died. No roots. No new growth.
How long before I see new leaves on my propagated plant?
Roots come first. New leaves usually appear 6–8 weeks after rooting begins. I've had some push out a new leaf in five weeks. Others took three months. Don't panic if yours is slow. As long as the stem is firm and the leaves are green, it's working.
My cutting is turning yellow and mushy. What went wrong?
That's rot, and it's almost always from too much moisture. Either you skipped the callus step, the water was too deep, or the soil stayed soggy. Toss the rotten part. Start again with a fresh cut. Let it callus longer this time. And go easier on the water.
Final Thoughts
Propagating Aglaonema after repotting isn't complicated. It's just a matter of timing, patience, and not overdoing it.
The biggest thing I've learned over the years: plants don't need us to hover. They need us to set them up correctly, then step back. Every Aglaonema I've saved from the repotting pile has rewarded me with months of beautiful foliage. And every one I've killed taught me something I now pass along to you.
So go ahead. Divide that crowded root ball. Pot up the extras. Share them with friends. You'll be surprised how quickly your one plant becomes five.





