 bluename
 How to Care for Aglaonema With Yellow Stems: A Plant Lover’s Rescue Guide
I’ve been there. You walk over to your beloved Chinese Evergreen, your beautiful Aglaonema, and your heart sinks. Those sturdy, colorful stems are turning a worrying shade of yellow. It’s a sight that instantly signals trouble, but don’t panic. As a fellow plant enthusiast who has nursed more than a few houseplants back to health, I can tell you that yellow stems are a cry for help, not a death sentence. Over the years, I’ve learned that this common issue is almost always a symptom of a fixable problem. In this guide, I’ll walk you through exactly how to care for Aglaonema with yellow stems, sharing the precise steps I took, the mistakes I made along the way, and the real, observable recovery I witnessed over a critical two-week period.
Understanding Why Your Aglaonema Stems Are Turning Yellow
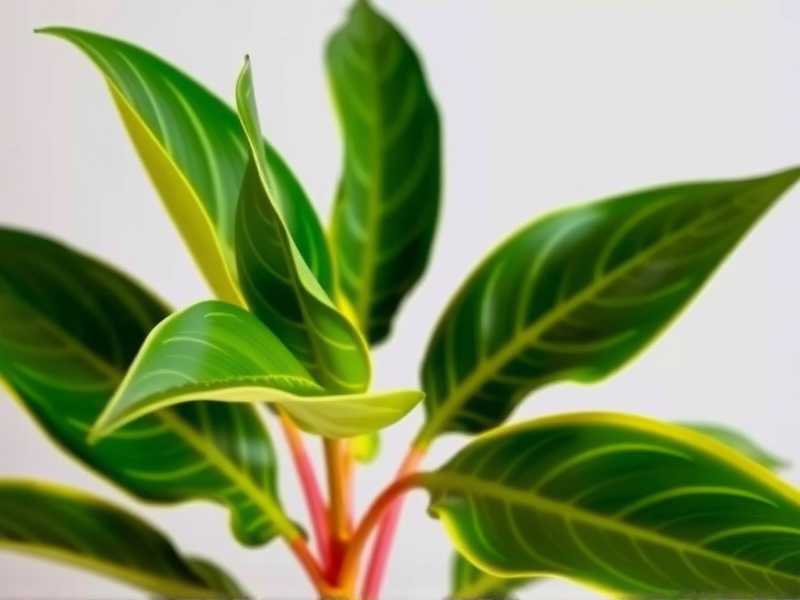
Before you can fix the problem, you need to understand what your plant is telling you. Yellowing stems, especially when accompanied by other signs, point to specific stressors. From my experience and backed by resources like the Royal Horticultural Society (RHS), which notes that Aglaonema issues often stem from environmental factors, the causes usually boil down to a few key areas.
The most common culprit, and my first suspect, is overwatering and root rot. Aglaonemas prefer their soil to dry out partially between waterings. Constantly wet soil suffocates the roots, preventing them from absorbing nutrients and water effectively. This damage then travels up, manifesting as yellow, often mushy stems. On the flip side, while less common for yellow stems, chronic underwatering can also cause general stress.
Lighting is another critical factor. While famously tolerant of low light, Aglaonemas still need bright, indirect light to thrive. Too much direct, harsh sunlight can scorch and stress the plant, leading to discoloration. Conversely, a plant kept in a dark corner for too long becomes weak and susceptible to issues.
Finally, we must consider temperature, humidity, and pests. Drafts from air conditioners or cold windows can shock these tropical plants. Low humidity might brown the leaf tips first, but overall stress can contribute to stem health. Pests like mealybugs or scale, which suck sap from stems and leaves, can also cause yellowing and decline.
My Step-by-Step Rescue Mission for Yellow Aglaonema Stems
When I noticed the yellow stems on my ‘Silver Bay’ Aglaonema, I immediately sprang into action. Here is the exact process I followed, documented over two weeks.
Step 1: The Immediate Assessment and Diagnosis I gently removed the plant from its decorative pot. The first red flag was the weight—the nursery pot felt heavy and soggy. Upon sliding it out, I saw that the drainage holes were partially blocked. I knew I had to inspect the roots. Carefully, I tipped the plant out and examined the root ball. The smell was faintly musty, and while not all roots were black, many were a dark brown and felt slimy to the touch—classic signs of early-stage root rot. The yellowing was concentrated on the stems of the lower, older leaves, which aligned with the overwatering diagnosis.
Step 2: Addressing Root Rot and Repotting This is where I made my first critical mistake. In my initial haste, I simply stopped watering and hoped for the best. A week later, the yellowing had spread. I learned that passive waiting won’t stop active rot.
- The Right Fix: I took the plant to the sink. Using clean, sharp scissors (wiped with rubbing alcohol), I carefully trimmed away all soft, brown, and mushy roots. I was ruthless but careful, preserving every healthy, firm white or cream-colored root I could.
- Fresh Start with Soil: I chose a well-draining potting mix, specifically one formulated for aroids. As the American Horticultural Society (AHS) advises for container plants, good drainage is non-negotiable. I mixed in some extra perlite to boost aeration further.
- The Right Pot: I selected a clean pot that was only about an inch larger in diameter than the remaining root system. A pot that’s too large holds excess moisture, repeating the cycle. Most importantly, it had ample drainage holes.
Step 3: Correcting the Watering Routine After repotting, I gave the plant a thorough but gentle watering until it drained freely from the bottom, helping the new soil settle around the roots. Then, I changed my entire approach.
- The Finger-Test Rule: I vowed not to water on a schedule. Instead, I would insert my finger about 2 inches into the soil. Only when it felt dry at that depth would I water thoroughly.
- The Two-Week Observation: For the next 14 days, I monitored the soil moisture like a hawk. The plant required water only once during this period, around day 10. The key was ensuring no water ever sat in the saucer beneath the pot.
Step 4: Optimizing Light and Environment My plant was in a medium-light room, but I realized it was near a vent that occasionally blew cool air. I relocated it to a spot with consistent, bright indirect light (about 6 feet from a north-east facing window) and far from any drafts. I also placed it on a pebble tray with water to gently increase local humidity, a trick I’ve found very effective for tropical plants.
The Recovery: What I Observed Over Two Weeks The transformation wasn’t overnight, but it was clear and encouraging.
- Days 1-3: The plant looked a bit shocked after repotting, which is normal. The existing yellow stems did not improve, but they did not get worse.
- Days 4-7: This was the most critical period. I saw no further spread of yellowing to new stems. The existing healthy leaves remained perky and showed no new distress.
- Days 8-14: By the end of the second week, the plant had visibly stabilized. The soil was drying at a healthy rate. Most importantly, I noticed a tiny, bright green nub peeking from the base—a brand new shoot! This was the ultimate sign that the plant had recovered from the root trauma and was redirecting energy to new growth. The old yellow stems would eventually be pruned away, but the plant itself was saved.
Preventing Yellow Stems in the Future Consistency is key. I now follow these golden rules to keep all my Aglaonemas healthy:
- Water with Wisdom: Always check the soil first. In winter, watering might be as infrequent as every 3-4 weeks.
- Light it Right: Provide bright, indirect light. A few feet from an east-facing window is often perfect.
- Feed Gently: During the growing season (spring and summer), I use a balanced, diluted liquid fertilizer monthly. I avoid feeding in fall and winter when growth slows.
- Regular Check-ups: I make it a habit to gently inspect leaves (top and underside) and stems during watering for early signs of pests or stress.
Your Questions, Answered
Can I save an Aglaonema if the stems are completely yellow and mushy? If the stem is fully yellow and soft to the touch, especially near the soil line, that section is likely beyond saving due to advanced rot. However, if there are any firm, green sections of stem with leaves, you can attempt propagation. Cut the healthy stem section, let it callous for a day, and place it in water or moist sphagnum moss to root. This is how I salvaged a part of my plant that I had to cut away.
Should I cut off the yellow stems right away? Not immediately. During the initial rescue, focus on the roots. Removing too many leaves at once can further stress the plant. Once the plant is stable and showing new growth (like after my two-week period), you can safely prune the unsightly yellow stems back to the base using clean tools.
Is a yellow stem always from overwatering? While it’s the most frequent cause, it’s not the only one. Severe pest infestations, a massive temperature drop, or a severe nutrient deficiency could also be to blame. Always start your investigation with the roots and soil moisture, as that is the most probable issue. A quick root check will usually confirm or rule out the watering problem first.
Seeing your Aglaonema develop yellow stems is undoubtedly alarming, but it’s a solvable puzzle. The journey hinges on prompt, correct diagnosis—almost always leading you to the root zone—and having the patience to provide consistent, appropriate care afterward. By acting thoughtfully, optimizing your plant’s environment, and learning from its signals, you can not only rescue your plant but also help it thrive for years to come. The sight of that new green shoot pushing through the soil after two weeks was all the proof I needed that a little knowledge and a lot of care can turn things around.





