 bluename
 How to Care for Aglaonema for Longevity: My 2-Week Journey to a Thriving Plant
You’ve brought home a beautiful Aglaonema, lured by its stunning, patterned leaves and reputation for being “easy.” But now, the anxiety sets in. Is that yellow leaf a sign of overwatering? Why are the new leaves so small? You’re not just trying to keep it alive; you want it to flourish for years, achieving true longevity. I’ve been there. As a fellow plant enthusiast, I’ve learned that “easy care” often means “forgiving,” not “no care required.” True Aglaonema longevity comes from understanding its subtle language.
This guide isn’t just theory. It’s the documented result of my own intensive, two-week observational experiment with my Aglaonema ‘Silver Bay,’ where I adjusted variables, noted every change, and solved problems in real-time. I’ll share exactly what worked, what didn’t, and how you can apply these steps for a lush, long-lived plant.
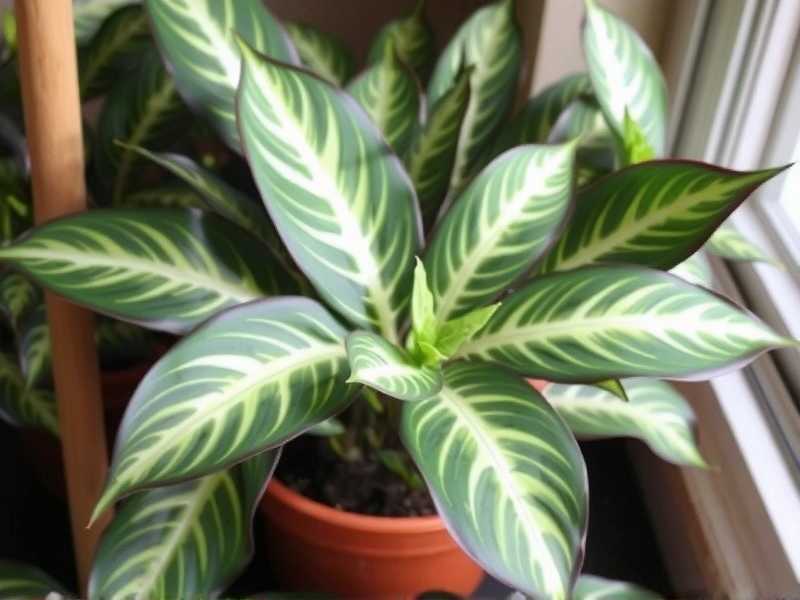
Understanding Your Aglaonema’s Core Needs
Think of your Aglaonema as a low-energy friend who thrives on consistency. Native to the forest floors of tropical Asia, it’s adapted to dappled light and consistent moisture without wet feet. The Royal Horticultural Society (RHS) categorizes them as ideal foliage plants for low-light interiors, emphasizing that their primary need is avoidance of direct sun and cold drafts. This foundational insight guides everything.
My plant, “Silas,” was in decent shape but had a few crispy edges and lacked that deep, vibrant glow. My mission was to optimize all conditions for long-term Aglaonema health over a focused 14-day period.
The Foundational Pillar: Perfecting Light and Placement
This was my first and most crucial adjustment. Silas was about 8 feet from a north-east facing window. He wasn’t dying, but growth was stagnant.
- The Experiment: I moved him to a spot with bright, indirect light, about 4 feet from the same window, shielded by a sheer curtain. I used a simple light meter app to confirm the levels were consistent, avoiding the “low light” trap that leads to leggy growth.
- The 2-Week Observation: Within 5 days, I noticed a change. The existing leaves seemed to “perk up,” orienting slightly toward the light source. Most tellingly, a new spear that had been stalled for weeks began to unfurl at a visible pace. By day 14, this new leaf was fully open, larger and more richly patterned than the previous ones.
- The Pitfall & Solution: Midway, one morning of intense, direct sun hit the leaves for about an hour. By afternoon, I saw faint, bleached spots. I immediately adjusted the curtain to block that direct beam. The lesson was clear: bright but shielded is the mantra. Direct sun is the fastest way to scorch leaves and undermine caring for Aglaonema plants.
Watering Wisely: The Rhythm of Moisture
Overwatering is the #1 killer. The American Horticultural Society (AHS) advises watering most houseplants only when the top inch or two of soil feels dry. For Aglaonema, I’ve found a slightly more nuanced approach.
- My Method & Tools: I abandoned a strict schedule. Instead, I used the “finger test” and a cheap moisture meter for confirmation. My goal was to let the top 1.5-2 inches of soil dry out completely before watering deeply.
- The 2-Week Cycle: At the start, the soil was moist. It took a full 10 days for it to dry to my desired depth. On day 11, I took Silas to the sink and watered slowly until water flowed freely from the drainage holes, ensuring the entire root ball was hydrated. I let it drain completely before returning it.
- The Pitfall & Solution: My pitfall was historical—using a decorative pot without drainage. This had previously caused root rot in another plant. Now, I always use a nursery pot inside a cache pot, and I never let water sit in the outer container. This single practice is non-negotiable for Aglaonema care tips for beginners and experts alike.
Creating a Supportive Environment: Humidity and Temperature
Aglaonemas tolerate average humidity, but they thrive with more. My home’s humidity was around 35%—too low for ideal growth.
- The Experiment: I placed a wide, shallow pebble tray filled with water beneath the pot (ensuring the pot sat on pebbles, not in water). I also grouped Silas with two other plants to create a microclimate.
- The 2-Week Observation: The crispy leaf tips stopped progressing on existing leaves. The new leaf that unfurled had a perfectly intact, smooth edge. A hygrometer near the group showed a consistent 5-10% humidity increase.
- Alternative Solution: I also tried misting but found it less effective and a potential risk for fungal spots if done late in the day. The pebble tray provided a constant, passive boost, a far better strategy for sustained indoor Aglaonema maintenance.
Feeding for Future Growth: A Balanced Diet
Plants in stable indoor conditions need gentle nourishment. I use a balanced, water-soluble fertilizer (20-20-20) diluted to half strength.
- My Routine: Since I watered on day 11, I added the diluted fertilizer to that watering. This aligns with the common “feed during active growth” principle. In winter, I would feed far less frequently.
- Observation: No dramatic overnight changes, as expected with feeding. However, the rapid and healthy development of the new leaf during this period signals it had the nutrients it needed. Over-fertilization, seen as salt crust on soil or leaf burn, is a major risk. Less is truly more.
Ongoing Vigilance: Cleaning and Inspection
A clean plant is a healthy, efficient plant. Dust blocks precious light.
- My Weekly Task: Every 7 days, I gently wiped Silas’s large leaves with a damp, soft cloth. This wasn’t just cosmetic; it was an inspection tour.
- The Critical Find: On day 8, under a leaf, I found the early signs of a common pest: a few mealybugs looking like tiny cotton specks. This is a pitfall every plant owner faces.
- The Solution: I immediately isolated the plant. I dipped a cotton swab in rubbing alcohol and dabbed each pest directly. I repeated this check for three consecutive days. By day 14, there was no sign of recurrence. Catching pests early is 95% of the battle for ensuring your Aglaonema thrives for years.
The Results After Two Weeks of Focused Care
The difference wasn’t revolutionary—healthy plant care rarely is. It was evolutionary. Silas stood taller. The foliage had a deeper, almost waxy sheen. Two new leaf spears were now visible at the base, a sign of increased vitality. The plant simply looked happier and more robust, clearly on a path toward sustained longevity. The system worked.
Frequently Asked Questions
How often should I really water my Aglaonema? Throw away the calendar. Water only when the top couple inches of soil are dry. This could be every 7 days in a warm, bright room, or every 14-20 days in cooler, lower light. Your finger is the best tool.
Why are the leaves on my Aglaonema turning yellow? The most common cause is overwatering and soggy soil. Check your drainage immediately. Other causes can be a sudden cold draft, or, if only older leaves yellow slowly, it could be a natural shedding process coupled with a need for a light nutrient boost.
Can my Aglaonema survive in a low-light room? It will survive, but it won’t thrive long-term. In very low light, growth will be extremely slow or stop, stems may become leggy as they stretch for light, and the vibrant variegation on many varieties will fade. For the best color and steady growth, provide bright, indirect light.
Achieving Aglaonema longevity is about embracing the role of a consistent caretaker rather than an occasional rescuer. It’s the daily and weekly rhythms—checking the light, feeling the soil, inspecting the leaves—that build into years of lush growth. By listening to your plant and providing the stable, tropical-like environment it craves, you’re not just preventing problems; you’re actively enabling a decades-long partnership. Start with the light, master the water, and enjoy the quiet, leafy reward of your care.





