 bluename
 How to Fix Aglaonema Sun Stress Problems: A Plant Lover’s Recovery Guide
I’ll never forget the day I almost lost my favorite Aglaonema ‘Silver Bay’. I came home to find its usually lush, patterned leaves looking pale, crispy, and covered in unsightly brown patches. My heart sank. I had placed it in a sunny spot, thinking more light would help it grow faster, but I was wrong. That’s when I learned firsthand about Aglaonema sun stress problems. If you’re seeing bleached leaves, brown crispy tips, or a general faded look on your Chinese Evergreen, you’re likely dealing with the same issue. The good news? These resilient plants can bounce back beautifully if you act correctly. Over the next two weeks, I documented my recovery process, made mistakes, found solutions, and I’m here to guide you through every step.
Understanding Sun Stress in Aglaonema Plants
First, let’s clarify what sun stress is. Aglaonemas, or Chinese Evergreens, are native to the dense, tropical forest floors of Southeast Asia. In their natural habitat, they receive dappled, filtered light through a thick canopy. Their leaves are simply not adapted to handle direct, intense sunlight.
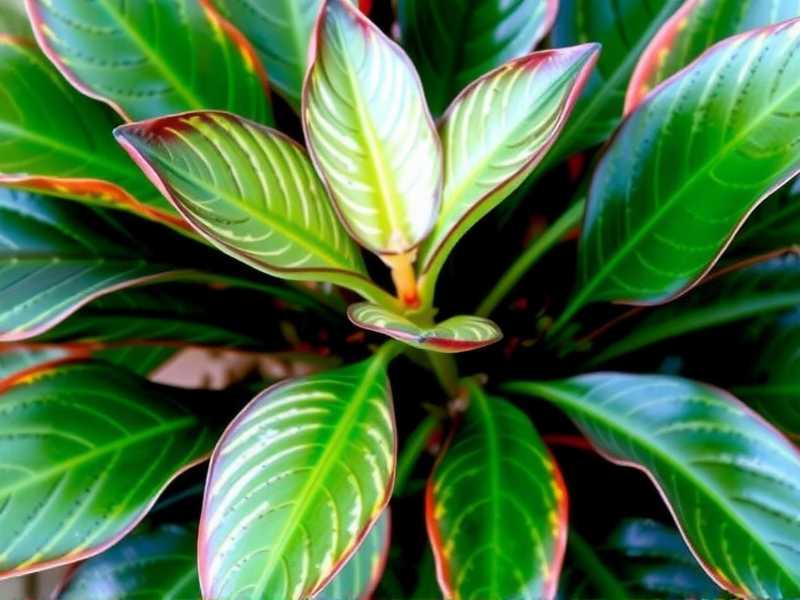
When exposed to too much sun, several things happen. The chlorophyll, which gives leaves their green color and drives photosynthesis, begins to break down. This leads to bleaching or scorching of Aglaonema leaves. You’ll see the vibrant greens and silvers turn pale yellow or white. In more severe cases, the plant’s tissues literally get burned, causing dry, brown, crispy patches or tips—a clear sign of Aglaonema leaf scorch. The plant loses its ability to produce energy efficiently and goes into survival mode.
As the Royal Horticultural Society (RHS) notes, many popular houseplants hailed as “low-light tolerant” are often the most susceptible to scorching from sudden exposure to direct sun. The American Horticultural Society’s heat zone map also reminds us that indoor light intensity can rival full summer sun, especially in south-facing windows. Recognizing these signs early is 90% of the battle.
My Step-by-Step Recovery Plan for a Sun-Stressed Aglaonema
Here is the exact plan I followed to nurse my ‘Silver Bay’ back to health. This isn’t just theoretical; it’s a tested protocol from my own living room.
Step 1: Immediate Relocation and Assessment The moment I identified the problem, I moved the plant. This is the single most important action. I took it away from the south-facing window and placed it in a room with bright, indirect light. An east-facing window sill proved perfect, offering gentle morning sun without the harsh afternoon rays.
I then gave the plant a thorough assessment. I noted which leaves were severely damaged (fully yellow or crispy brown) and which were only mildly affected (slightly pale or with small brown tips). It was crucial not to panic and start cutting everything. Removing too many leaves at once adds more stress.
Step 2: The Initial Watering Check Sun stress often goes hand-in-hand with underwatering, as intense light dries out soil faster. I checked the soil moisture with my finger. It was bone dry several inches down, meaning the plant was dealing with both light and water stress. I gave it a thorough, deep watering right away. I placed the pot in my sink and watered slowly until water flowed freely from the drainage holes, ensuring the entire root ball was rehydrated. I then let it drain completely. No plant should sit in a saucer of water, especially when it’s already stressed.
Step 3: Strategic Pruning (The “Less is More” Approach) After 24 hours, once the plant had stabilized from its move and drink, I addressed the damaged foliage. I used a clean, sharp pair of scissors. Here’s my rule: I only removed leaves that were more than 50% damaged or completely yellow. For leaves with just brown tips, I carefully trimmed off just the crispy part, following the natural shape of the leaf. This preserves the healthy green tissue that is still helping the plant recover. I made sure to wipe my tools with rubbing alcohol between cuts to prevent spreading any potential pathogens.
Step 4: Optimizing the Environment Recovery isn’t just about removing the problem; it’s about providing ideal conditions. I focused on three factors:
- Humidity: Aglaonemas love humidity. To help the stressed leaves, I started using a humidifier nearby, setting it to around 60%. Alternatively, you can place the pot on a pebble tray filled with water (ensure the pot sits above the water line).
- Temperature: I kept it in a room with stable temperatures between 65-80°F (18-27°C), away from drafts, air conditioning vents, or heating sources.
- No Fertilizer: This was critical. A stressed plant cannot use fertilizer. Feeding it would have burned the roots and set back recovery. I resolved not to fertilize for at least 2-3 months.
The Two-Week Observation Diary: What Actually Happened
This is where the real learning happened. I monitored my plant every single day.
Days 1-3: The plant looked… sad. The remaining leaves were droopy and pale. This was expected—it was in shock. I resisted the urge to water again or move it. I simply ensured the environment was stable. Days 4-7: I noticed the drooping stopped. The stems felt firmer. The green color on the remaining leaves seemed to deepen slightly. This was the first sign of recovery! The plant was using its energy to repair cells, not grow new leaves yet. Days 8-14: By the end of the first week and into the second, the real progress was visible. I spotted a tiny, new spear of a leaf unfurling from the center of the plant. This was the ultimate sign that the plant was out of crisis mode and confident enough to invest in new growth. The new leaf was a healthy, deep green with perfect variegation.
The Pitfalls I Encountered and How I Fixed Them
My journey wasn’t flawless. I made two big mistakes during recovery.
Mistake 1: Overwatering in Panic. Around day 5, because the plant still looked a little limp, I assumed it needed more water. I gave it another heavy drink. Two days later, the lower leaves started to yellow rapidly—a classic sign of overwatering and potential root rot. I had mistaken recovery slowness for thirst.
- Solution: I immediately stopped watering. I gently tipped the plant out of its pot to check the roots. They were still firm and white, thankfully not rotten. I let the root ball dry out significantly—almost to the point I would normally water a healthy plant—before resuming my careful watering schedule. The key is to water based on soil dryness, not a calendar or the plant’s appearance during shock.
Mistake 2: Premature Leaf Removal. In my initial pruning, I got a bit scissor-happy and removed a leaf that was only about 30% scorched. I later learned that even damaged leaves contribute to photosynthesis. Removing too much of the plant’s “solar panel” system slows down its ability to produce the energy needed for recovery.
- Solution: I became much more conservative. For any new damage that appeared (a small brown spot here or there), I left it alone unless it was spreading. The plant needed every bit of functional green tissue.
How to Prevent Future Sun Damage on Your Chinese Evergreen
Once recovered, your goal is to never let this happen again. Prevention is simple with the right knowledge.
- Find the Sweet Spot: Aglaonemas thrive in low to bright indirect light. A spot a few feet away from a north or east-facing window is ideal. If you only have a south or west window, use a sheer curtain to diffuse the light.
- Observe and Rotate: Pay attention to how the light moves in your room throughout the day and across seasons. The gentle winter sun can become a scorching summer beam. Rotate your plant periodically for even growth.
- Acclimate Slowly: If you want to move your plant to a brighter spot (which I don’t generally recommend for variegated types), do it over several weeks. Increase light exposure by an hour or two every few days to allow it to adapt.
Will the brown spots on my Aglaonema leaves ever turn green again? No, they will not. Once leaf tissue is scorched and turns brown or crispy, that damage is permanent. The plant cannot repair those dead cells. Your focus should be on preventing further damage and supporting the growth of new, healthy leaves. You can trim off the damaged portions for aesthetics, following the leaf’s natural shape.
Can a sun-stressed Aglaonema be saved if all the leaves are damaged? Yes, there is often still hope. Even if all the aerial leaves are badly damaged, check the stems and the soil line. If the stems are still firm and not mushy, and particularly if you see any healthy nodes (the little bumps on the stem), the plant may regrow. Cut back the severely damaged growth to just above a node, provide perfect indirect light and careful watering, and wait. It may take months, but Aglaonemas are surprisingly tenacious.
What is the difference between sun stress and underwatering? They look similar. This is an excellent question and a common point of confusion. Both can cause browning. The key difference is texture and pattern. Sun scorch typically causes bleached, papery, or crispy patches, often on the areas of the leaf most exposed to light (tips, edges, or centered patches). The color fade is pronounced. Underwatering usually causes browning that starts at the very tips and edges, and the leaves may feel dry and brittle overall, often accompanied by significant drooping or curling. Often, as in my case, the two issues occur together, as intense light accelerates soil drying.
Watching my Aglaonema push out that first new, perfect leaf after two weeks was incredibly rewarding. The process taught me more about plant care than any textbook could. These plants communicate their needs clearly through their foliage. Crispy, pale leaves are a cry for help—a sign to move them out of the sun’s harsh spotlight. By acting quickly, relocating to a gentler light source, and providing consistent care without overcomplicating things, you give your plant the best chance to not just survive, but thrive once more. Remember, patience is your greatest tool during recovery.





