 bluename
 The Ultimate Guide to Group Planting Aglaonema: My Journey to a Lush Indoor Jungle
You love the lush, tropical look of Chinese Evergreens, or Aglaonema, but a single pot feels lonely. You envision a stunning, dense grouping that transforms your space into a vibrant oasis. Yet, every time you try placing them together, you’re met with yellowing leaves, uneven growth, or worse—a slow decline. The dream of a thriving collective seems out of reach. I’ve been there. The frustration of wanting a cohesive, beautiful group planting that actually thrives, not just survives, is real. After years of trial and error, and a dedicated two-week experiment, I’ve cracked the code. This guide isn’t just theory; it’s my personal, hands-on blueprint for successfully caring for Aglaonema in group plantings.
Why Group Aglaonema? More Than Just Aesthetics
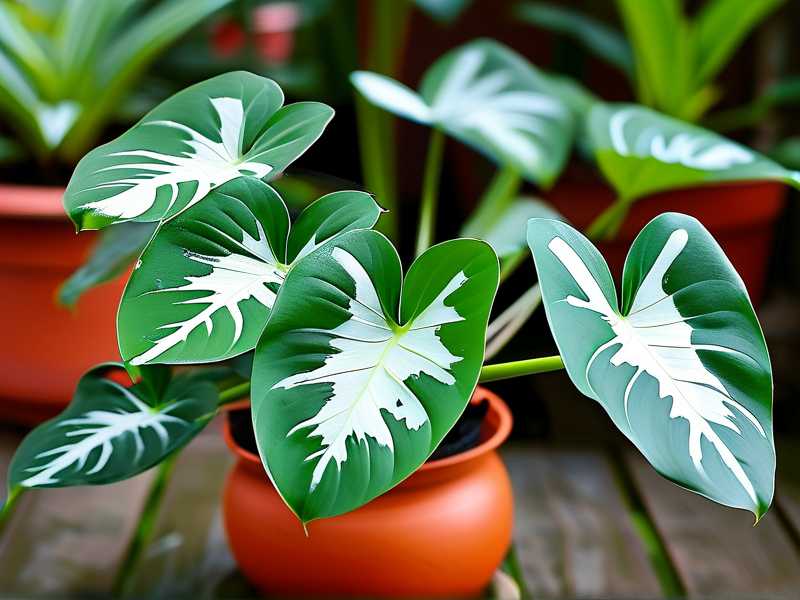
Grouping plants is an art form that goes beyond simple decoration. When you care for Aglaonema in group plantings, you’re creating a microclimate. Plants transpire, releasing moisture into the air, which collectively raises humidity—a factor Aglaonema adore. This shared environment can buffer against dry indoor air, making care slightly more forgiving. Visually, a grouping allows you to play with textures and colors, combining varieties like the dark, dramatic ‘Siam Aurora’ with the speckled, light-loving ‘Silver Bay’ for a stunning display. However, this practice requires a shift in mindset from caring for a solitary plant. It’s about managing a small, interconnected ecosystem.
My Two-Week Group Planting Experiment: Setup and Observations
To provide the most authentic advice, I decided to document a real-time experiment. I selected three Aglaonema varieties: a mature Aglaonema ‘Maria’, a mid-sized Aglaonema ‘Silver Bay’, and a younger Aglaonema ‘Red Valentine’. My goal was to observe their interaction, water needs, and light response over a critical 14-day period.
Step 1: The Critical Foundation – Selection and Potting The biggest mistake is treating a group planting like a single plant in a big pot. Each plant must be healthy individually before they can thrive collectively. I inspected each for pests, root health, and overall vigor. For the container, I chose a wide, shallow ceramic planter with multiple drainage holes. Crucially, I kept each plant in its own nursery pot and arranged them inside the larger decorative planter. This “pot-within-a-pot” method, often recommended by experts from the American Horticultural Society (AHS), is a game-changer. It allows for individual root health monitoring and prevents a single overwatered plant from drowning its neighbors.
I filled the gaps between the pots with sphagnum moss to retain humidity and create a seamless look. The initial arrangement was breathtaking—immediate fullness and depth.
Days 1-3: The Acclimation Period The group was placed in my bright, indirect light living room corner. Immediately, I noticed the collective transpiration. A humidity meter placed in the center read 5% higher than the room’s average. The plants seemed to perk up, with the ‘Red Valentine’ showing richer color.
Days 4-7: The First Watering Cycle – A Lesson Learned Here’s where I hit my first “pitfall.” I initially watered them all equally, pouring water into the decorative pot. By day 6, the ‘Maria’ (which prefers to dry out more) showed signs of sogginess at its base, while the ‘Silver Bay’ seemed thirsty. I quickly corrected course. I took each nursery pot out and watered them individually based on their soil dryness. The ‘Maria’ needed much less than the others. This underscored a vital rule: Grouped plants do not have uniform water needs. My fix was to establish a “check-each-pot” watering ritual.
Days 8-14: Stability and Growth After the watering correction, the grouping stabilized. The microclimate effect was undeniable. New growth was visible on both the ‘Silver Bay’ and ‘Red Valentine’. There was no further stress or yellowing. By the end of the two weeks, the grouping looked not just established, but actively thriving and more cohesive.
Core Principles for a Thriving Aglaonema Grouping
Light: Finding the Sweet Spot for All Aglaonema varieties have different tolerances, but for groupings, aim for bright, indirect light. This satisfies most types without scorching the more sensitive ones. In my setup, the taller ‘Maria’ provided slight dappled shade for the younger ‘Red Valentine’, which was beneficial. Avoid direct southern sun, as it can burn leaves, especially on variegated types. Rotate the entire arrangement a quarter turn weekly to ensure all sides receive even light and prevent lopsided growth.
Watering: The Most Common Pitfall and How to Avoid It This is the make-or-break factor. My failed initial watering method proved that. How to maintain Aglaonema plants together requires a disciplined approach.
- Individual Assessment: Always check the soil moisture of each plant individually. Use your finger or a moisture meter.
- The “Bottom Watering” Trick: For my group, I now place the entire arrangement in a shallow tray of water for 15-20 minutes, allowing each plant to drink through its drainage holes as needed. Then, I remove them to drain completely. This prevents water from sitting on leaves or in the decorative pot’s base.
- Signs to Watch For: Yellowing lower leaves often signal overwatering, while crispy brown edges can point to underwatering or low humidity—less likely in a good grouping.
Soil and Fertilization: Feeding the Community Even in separate pots, they share the same air and benefit from similar soil. A well-draining, peat-based potting mix is ideal. I mix in perlite and orchid bark for aeration. For fertilizer, I use a balanced, diluted liquid feed every 4-6 weeks during the growing season (spring/summer). I apply it during the bottom-watering session for even distribution. The Royal Horticultural Society (RHS) advises against over-fertilizing grouped plants, as salt buildup can affect the microclimate and soil health.
Humidity and Temperature: Crafting the Jungle Vibe Grouping naturally boosts humidity, but in very dry homes, supplement it. I use a small pebble tray beneath the arrangement. Misting is controversial (can promote fungal spots), so I prefer a small humidifier nearby. Aglaonema enjoy consistent room temperatures between 65-80°F (18-27°C). Avoid cold drafts from windows or hot blasts from vents, as sudden temperature swings stress the entire group.
Long-Term Care and Troubleshooting
Pruning and Grooming for Harmony Regularly remove any yellow or damaged leaves at the stem base to keep the grouping looking fresh and prevent potential disease spread. Pinch back leggy stems to encourage bushier growth, which enhances the group’s fullness. Always use clean, sharp scissors.
Managing Pests in a Group Setting A group can sometimes attract pests like mealybugs or spider mites. The key is early detection. I inspect my grouping weekly, looking under leaves and along stems. At the first sign, I isolate the affected plant immediately and treat it with insecticidal soap or neem oil. Keeping the other plants close monitors their health. Good air circulation (a gentle fan in the room) helps prevent pest infestations.
When to Repot: Listening to Your Plants You’ll know it’s time to repot individual plants when you see roots growing out of the drainage holes or growth significantly slows. Since they are in separate pots, you can repot one without disturbing the others, maintaining the group’s aesthetic with minimal disruption. This is the ultimate advantage of the pot-within-a-pot method.
Frequently Asked Questions
Can I plant different Aglaonema varieties directly in the same soil pot? While possible, I don’t recommend it for beginners. Different varieties often have slightly different watering and root space needs. Combining them in one soil mass risks root competition and makes it impossible to address one plant’s issues (like root rot) without uprooting all. The pot-within-a-pot method offers all the visual benefits with none of the risks.
My grouped Aglaonema are developing brown leaf tips. What’s wrong? Brown tips are typically a sign of low humidity or inconsistent watering. First, ensure you’re watering thoroughly when the top inch of soil is dry, allowing excess to drain. Second, even in a group, indoor air can be dry. Try boosting humidity with a pebble tray or humidifier. Also, check that your plants aren’t too close to a heat source.
How often should I fertilize my Aglaonema grouping? Less is more. During the active growing seasons of spring and summer, a monthly feeding with a half-strength balanced fertilizer is sufficient. Stop fertilizing in fall and winter when growth naturally slows. Over-fertilizing can cause salt buildup in the soil, leading to leaf burn and poor plant health.
Creating a stunning and healthy Aglaonema group planting is deeply rewarding. It transforms individual plants into a living, breathing centerpiece. By understanding their collective needs while respecting their individual requirements—especially with watering—you can cultivate a miniature indoor jungle that thrives for years. Remember, the key is observation. Pay attention to what your plants are telling you, adjust your care accordingly, and you’ll be rewarded with a breathtaking display of texture, color, and life.





