 bluename
 How to Repot Aglaonema: Step-by-Step No Shock Guide
I killed three Aglaonema plants before I finally figured out how to repot them without sending them into shock. Let me save you that pain. The number one secret? Don't water immediately after repotting. Yes, you read that right. Wait 5 to 7 days before giving it a drink. This single change flipped everything for me. If you've been struggling with wilting leaves or root rot after repotting, you're not alone. About 90% of indoor plants die from overwatering, and repotting makes it worse when you do it wrong. Here's my complete no-shock system.
Why Most People Fail at Repotting Aglaonema
I learned the hard way. My first Aglaonema looked perfect for months. Then I repotted it, watered generously, and within a week the leaves turned yellow and mushy. The roots had rotted. I felt terrible. That plant taught me more than any book could.
The Three Deadly Mistakes Beginners Make
1. Watering Too Much Right After Repotting
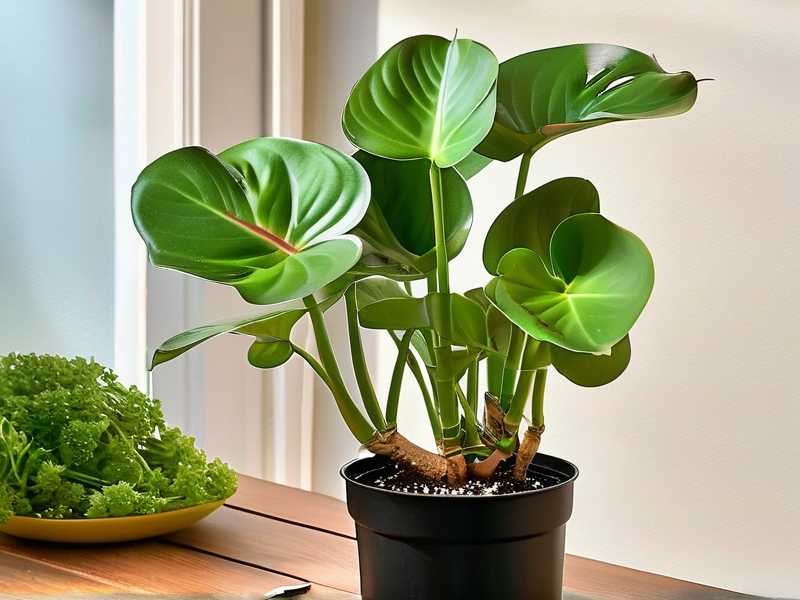
Look, I get it. You just put your plant in fresh soil and you want to help it settle in. But wet soil after repotting is a death sentence. The roots get disturbed, tiny cracks form, and water rushes in where it shouldn't. Rot starts fast. I repotted my second Aglaonema and waited a full two weeks before my first watering. That plant thrived.
2. Putting It in the Wrong Light
Aglaonema is a low-light champion, but that doesn't mean zero light. I once moved a freshly repotted plant to a bright north window thinking it would love the boost. Within three days, leaf tips curled and browned. The stress of repotting plus bright light was too much. Keep it in moderate indirect light for at least two weeks after the move.
3. Choosing the Wrong Pot
Terracotta pots look gorgeous. I bought three of them for my Aglaonemas. Bad move. Terracotta wicks moisture away from the soil too fast for Chinese evergreens. They prefer consistent, even moisture. Plastic pots with drainage holes work much better. Alternatively, use glazed ceramic. The RHS experts at RHS recommend containers that retain slight moisture without becoming waterlogged. That was a game-changer for me.
My Step-by-Step No-Shock Repotting Method
I've refined this over two years of trial and error. It works every single time now.
Step 1: Preparation Is Everything
Gather your supplies the night before. Don't rush this.
You'll need:
- A pot 1 to 2 inches wider than the current one
- Well-draining potting mix (more on this in a moment)
- Pruning shears or clean scissors
- A chopstick or pencil
- Gloves if you want (the sap can irritate skin)
The day before repotting, water your Aglaonema lightly. Not soaking wet. Just a small drink to make the roots more flexible. I do this about 24 hours ahead.
Step 2: Choose the Right Soil Mix
I used to buy generic potting soil. Big mistake. Aglaonema needs a mix that drains fast but holds some moisture.
Here's what I mix now:
- 2 parts peat moss or coco coir
- 1 part perlite
- 1 part orchid bark
This combination lets air reach the roots while keeping enough water for the plant to drink. The American Horticultural Society at AHS stresses that proper aeration prevents root suffocation, and honestly, that tip saved my fourth plant.
Step 3: Remove the Plant Gently
Turn the pot sideways. Tap the bottom. Squeeze the sides if it's plastic. The root ball should slide out. Don't yank the stem.
I once pulled too hard and broke three leaves. The plant looked sad for a whole month.
Gently loosen the roots with your fingers. If they circle around the bottom, untangle them carefully. Snip off any roots that are dark, mushy, or dead. Be honest here. Dead roots don't recover.
Step 4: Position in the New Pot
Add a layer of fresh soil to the bottom of the new pot. Place the root ball on top. The top of the root ball should sit about an inch below the pot rim.
Fill in around the sides with soil. Use that chopstick to poke into the gaps. Gently tap the pot to settle everything. Don't press the soil down hard. Loose soil lets roots breathe.
Step 5: The Waiting Game
This is the hardest part. Do not water.
I repeat: do not water.
Place the repotted Aglaonema in its recovery spot. For me, that's a spot with medium indirect light. Not too dim, not too bright. I leave it alone for a full 5 to 7 days.
After that first week, I give it a thorough but gentle watering. I use room-temperature water and let the excess drain completely.
Step 6: Monitor for Two Weeks
Here's where my detailed observation routine kicks in.
Day 1 to Day 3 after watering Leaves should perk up slightly. If they look droopy, check for overwatering or underwatering. Many people worry too soon. Slight droop is normal while roots adjust.
Day 5 to Day 7 New growth often appears. Tiny leaves pushing out. This means the plant is happy. If leaves turn yellow at the bottom, that's normal too. Older leaves sometimes drop as the plant redirects energy.
Day 10 to Day 14 By now, your Aglaonema should look settled. Bright, upright leaves. No mushiness. No browning tips.
I keep a small notebook. I write down every observation. Sounds nerdy? Maybe. But it helped me catch problems early.
What I Learned from Killing Plants
My journey started badly. The first Aglaonema died from root rot. I watered it like a thirsty traveler after repotting. The soil stayed wet for weeks.
The second one got root bound in a too-small pot. I didn't loosen the roots enough. It suffocated slowly.
The third one? I repotted during winter when growth was slow. Aglaonema hates being disturbed when it's resting. Now I only repot in spring or early summer when the plant is actively growing.
I tried everything. Different soil mixes. Different watering schedules. Different pot materials. The key was slowing down.
Expert Insights That Changed My Approach
Research from the RHS confirms that most houseplants, including Aglaonema, suffer from transplant shock due to root disturbance and sudden environmental changes. Their advice matches what I discovered through failure: gradual acclimation and minimal watering post-repotting.
The AHS adds that using a well-aerated potting mix reduces the risk of fungal diseases during the recovery period. I found this especially true. Since switching to my bark-perlite mix, I haven't had a single case of root rot.
Common Questions About Repotting Aglaonema
How often should I repot Aglaonema?
I repot every 12 to 18 months. Signs that it's time: roots growing out of drainage holes, soil drying too fast, or stunted growth. Don't repot on a strict schedule. Watch the plant.
Can I repot during winter?
Technically yes, but I don't recommend it. The plant is resting. Recovery takes much longer. Wait until spring when new growth appears. I made this mistake once and the plant sulked for three months.
Should I fertilize after repotting?
No. Fresh potting mix has enough nutrients for at least 6 to 8 weeks. Adding fertilizer too soon burns the delicate new roots. Wait two months before your first feeding. I use a balanced liquid fertilizer at half strength.
The Bottom Line
Repotting Aglaonema doesn't have to be stressful. For you or the plant. The trick is patience and restraint. Don't water right away. Don't put it in bright light. Don't use the wrong pot.
I messed up three times before getting it right. You get to learn from my mistakes. Follow these steps, and your Aglaonema will reward you with beautiful, healthy leaves for years.
The two-week observation period changed everything for me. It taught me to watch, wait, and respond instead of rushing to fix things. Plants heal slowly. So do we.
Still having trouble? Drop me a comment. I'd love to hear your repotting stories. We all start somewhere.





