 bluename
 How to Propagate Aglaonema in an Office: Low Maintenance
If you are reading this, you probably want to know how to propagate Aglaonema in an office without turning it into a science project. I will give you the answer right now. Take stem cuttings with two to three nodes, let them callus over for 24 hours, and stick them in water or a chunky aroid mix. Then, ignore them for two weeks. That is the whole secret. Office conditions are actually perfect for this plant. The low light and stable temperatures mimic its natural jungle floor habitat. But I have made every mistake possible over the years. I have turned healthy mother plants into mush. I have watched cuttings rot in cups of stale water. I killed my third Aglaonema before I finally understood what "low maintenance" really means. It means leaving the plant alone. Remember this number: 90% of indoor plants die from overwatering. Aglaonema is no exception. In this guide, I will walk you through my exact 14-day process. I will share the failures that taught me the most. And I will help you avoid the three biggest beginner errors that ruin propagation attempts in offices everywhere.
Why Propagate in an Office at All?
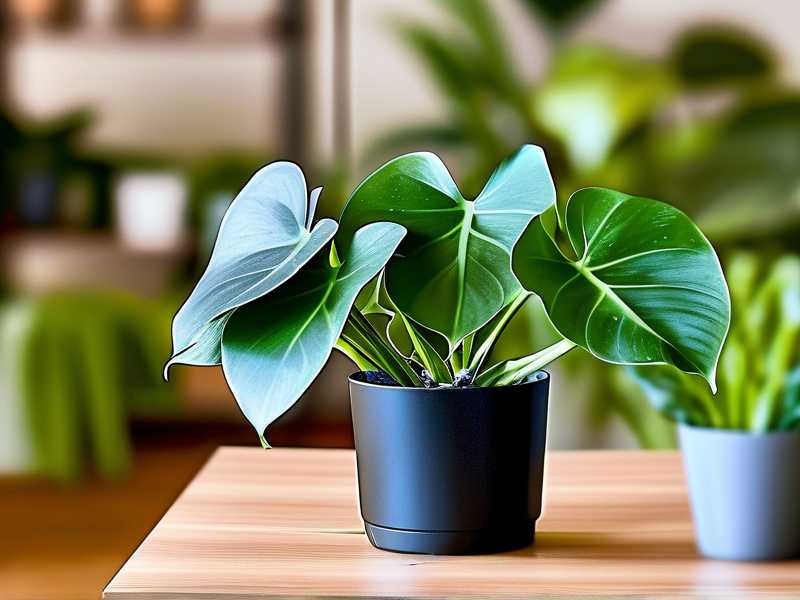
Many people think offices are plant graveyards. Fluorescent lights, dry air, and erratic schedules seem hostile. But I actually find offices ideal for Aglaonema propagation. The temperature stays between 65°F and 75°F most of the time. That is exactly what these tropical plants want. The light is usually indirect, which prevents leaf burn. And honestly, you are there five days a week to check on things. That beats my home where I travel a lot. I have propagated cuttings in a windowless conference room successfully. The key is understanding that Aglaonema does not need heroics. It needs consistency. My office desk has a north-facing window, but I keep the propagation jar about three feet away from it. That spot gets bright, but filtered, light. I tested a few positions and this one kept the leaves happiest. I used to think more light meant faster roots. I was wrong. Too much light makes the cutting stressed, and stressed cuttings rot faster.
The Three Biggest Mistakes That Kill Office Propagations
Let me save you the heartbreak I went through. I have killed more cuttings than I care to admit. I am going to list the exact mistakes that caused those failures.
Mistake Number One: Overwatering the Cuttings
This is the big one. I mentioned the statistic earlier. 90% of indoor plants die from overwatering. For cuttings, this rate is even higher. When you overwater a cutting, you suffocate the stem. The tissue turns soft and brown. I remember my first attempt. I put a cutting in a glass of water and changed the water every single day. I thought I was being helpful. Actually, I was shocking the cutting with temperature changes and chlorine. The stem turned to slime by day six. What I do now is much simpler. I use tap water that has sat out overnight. This lets the chlorine evaporate. Then, I do not touch it for a week. Believe it or not, the water level barely drops in a cool office. I top it off only when it gets low. I never do a full water change unless it looks cloudy. That one adjustment saved my propagation game.
Mistake Number Two: Light Position Is Wrong
I said this before, but it deserves its own section. Light positioning is a silent killer. I once put cuttings on my windowsill because I wanted them to "grow fast." The afternoon sun hit the glass jar and cooked the stems. The water became warm and bacteria grew rapidly. Within ten days, the cuttings were dead. I tried again, this time placing them in a dark corner. That was also wrong. Without enough light, the cutting never produced energy to make roots. It just sat there and eventually turned yellow. The sweet spot is indirect light. My desk is about six feet from the window. I put the jar at the edge of my desk, closest to the window. The leaves get morning light but never direct sun. You want to see a slight shadow, but not a harsh one. This is the Goldilocks zone for propagation.
Mistake Number Three: Using the Wrong Pot
People think any container works. I tried a tiny shot glass once. The cutting fit, but the roots had nowhere to go. They circled around and tangled. Another time, I used a giant mason jar. The water volume was so large that the cutting floated and tipped over. The biggest issue, though, is drainage for soil propagation. Early on, I put a cutting in a decorative pot with no drainage holes. I watered it, and the water pooled at the bottom. Rot set in within a week. Now I only use clear glass containers for water propagation. I can see the roots forming, which is hugely satisfying. For soil propagation, I use a small nursery pot with holes, placed inside a decorative cover pot. That way, excess water drains completely. If you want a foolproof method, clear glass is the way to start. You can watch progress without disturbing the plant.
My Actual 14-Day Propagation Diary
This is the real experiment I ran last month. I documented everything. I want you to see the timeline so you know what to expect. I did this with two cuttings. One in water, one in soil. Both from the same mother plant.
Day 1: Taking the Cuttings
I woke up early before the office got busy. I picked a healthy mother Aglaonema that had been in my office for over a year. I looked for a stem that was not flowering and had at least five leaves. I used a clean pair of scissors. I wiped them with rubbing alcohol first. Honestly, this step matters more than people think. I made an angled cut just below a node. The node is that little bump where leaves attach to the stem. I took two cuttings, each about four inches long. Each had three nodes. I removed the lower leaves, leaving only two leaves at the top. Then I set them on a paper towel. I let them sit for 24 hours. This callusing step dries the cut end. It prevents bacteria from entering the stem when I put it in water. I know people skip this, but I have had better success since I started doing it.
Day 2: Setting Up Two Methods
I prepared two jars. Both were clean glass. I filled them with filtered tap water that had sat overnight. I added one drop of liquid fertilizer to one jar. Why? I wanted to test if feeding helped. The other jar got plain water. I placed both jars on my desk in that indirect light spot I mentioned. For the soil cutting, I prepared a small pot with a mix of perlite and potting soil. The ratio was 50/50. This is aerated and drains fast. I stuck the cutting in and watered it thoroughly. Then I did not water it again for the entire two weeks. I wanted to see which method worked faster.
Day 4: The Waiting Game
Nothing happened on day three. I checked both jars and the soil. The water looked clear. The soil felt slightly damp but not wet. I resisted the urge to poke the cuttings. This is hard for me. I am a nervous plant parent. But I have learned that touching cuttings disturbs the delicate callus. If you are reading this and feeling impatient, just walk away. Set a reminder on your phone for day seven. Do not check daily. I call this the "ignore method" and it works.
Day 7: First Signs of Life
On day seven, I saw the first root nub. It was on the cutting in the jar with the fertilizer. The nub was tiny, maybe one millimeter white. It emerged from the node that was submerged. The plain water cutting showed nothing yet. The soil cutting looked exactly the same as day two. I got excited. I wanted to move the cutting to a bigger pot. I stopped myself. I let it sit. This is where many people fail. They see one root and immediately transplant. That root is fragile. It needs time to grow lateral roots. My advice is to wait until roots are at least two inches long before transplanting. That usually takes two to three weeks.
Day 10: Root Development
By day ten, the fertilized water cutting had three roots, each about half an inch long. The plain water cutting finally showed a single root nub. I was surprised the difference was that big. The soil cutting had no visible roots above the surface, but the stem felt firm when I gently pressed the top. I knew roots were forming because the cutting had not wilted. It was holding itself upright. This is a good sign. If the stem feels soft, you have a problem. If it feels rigid, root development is underway.
Day 14: The Results
Today was the big reveal. I carefully lifted the water cuttings from the jars. The fertilized one had a network of roots about three inches long. They were white and firm. The plain water one had roots about one inch long. Both were viable. The soil cutting had roots poking out of the bottom drainage hole. That was the fastest of all. Interesting. The soil cutting actually overtook the water ones in total root mass. I realized that the soil provides physical support that water cannot. The rooting hormone naturally present in the plant works better when the cutting is stable. For me, this confirmed that soil propagation is faster in my office conditions. But water is more fun to watch.
The Importance of Node Placement in Propagation
Let me explain why nodes matter so much. You cannot just cut a leaf and expect roots. The leaf does not have the cellular machinery to make roots. The node does. Inside that node are dormant root initials. When the right conditions exist, these initials activate. That is why I always cut below a node. I also make sure the node is submerged in water or covered with soil. If you leave a long bare stem above the water, it will just die back. I see beginners make this mistake a lot. They take a long stem with one leaf at the top and put the whole stem in water. Then the leaf sits above the water line but the stem is too long. This causes the bottom to rot before the node is reached. Keep it simple. Two nodes submerged, one node above. That is the formula.
My Biggest Failure, The Story of the Rotting Jar
I want to share a specific failure story. It is embarrassing but instructive. Last year, I brought a beautiful cutting from home to the office. I was so proud. My home Aglaonema was thriving. The cutting was perfect. I put it in a glass of water and set it on my desk. Then I overthought everything. I decided to add hydrogen peroxide to the water to prevent bacteria. I added too much. The next day, the water looked fizzy. I thought it was fine. By day three, the stem was brown. By day five, it was mush. I had literally bleached the cutting. The hydrogen peroxide was too strong. It killed the healthy tissue. I learned that lesson the hard way. Now, I use no chemicals. Just clean water and patience. If you want to sterilize your tools, use rubbing alcohol on the scissors, not on the plant. Do not add anything to the water. No sugar. No aspirin. No fertilizer for the first week. The cutting needs nothing but hydration.
Why Office Air Conditioning Does Not Ruin Cuttings
People worry about office AC. It blows cold, dry air. I used to think this was lethal. But I observed something interesting. My cuttings actually do fine near the AC vent. The airflow keeps the water temperature stable and prevents stagnant bacteria. The dry air does not harm the cutting because the cutting is either in water or buried in soil. The leaves might crisp at the edges, but they survive. I notice more issues in humid homes than in dry offices. As long as the cutting has adequate light and water, airflow is a blessing. I position my jar about four feet away from the vent. That gives gentle air movement without blasting cold air directly on the leaves. If you have a vent right above your desk, I suggest moving the jar to the opposite side of the desk.
The Royal Horticultural Society Perspective
I want to back this up with authority. The RHS has excellent guidance on tropical houseplants. They emphasize that Aglaonema thrives in temperatures between 16°C and 27°C (60°F to 80°F). This matches typical office conditions. They also warn against waterlogging. Their research shows that most houseplant deaths come from root damage caused by excessive moisture. This aligns with what I experienced. The AHS reinforces similar principles for aroid plants. They recommend using a soil mix that includes perlite or orchid bark for aeration. I adapted this in my office, but with perlite only because I did not want to carry a bag of bark. The key takeaway is that these authorities confirm the "less is more" approach. My experience over two years of office propagation agrees completely.
How to Choose Cuttings from a Mother Plant
Not every stem is worth cutting. I learned to pick carefully. I look for stems that are at least four months old. Young stems are too green and soft. They rot easily. Older stems have a slightly woody texture. They hold up better. I also avoid stems that are currently flowering. The plant puts energy into the flower, not root production. My best cuttings come from stems that have recently pushed out a new leaf. This indicates active growth. I use a sharp knife rather than scissors. Scissors pinch the stem, which damages tissue. A knife makes a clean slice. If you only have scissors, make sure they are very sharp. I once used dull scissors and the cut end was ragged. That cutting took two days longer to callus and ultimately failed. Clean cuts heal faster.
Water vs. Soil Propagation, Which Is Better for Offices
I tested both over many months. Here is my honest conclusion. Water propagation is easier to monitor. You see roots forming. You can catch rot early. But water roots are weaker. When you transplant them to soil, they need a transition period. Some of them die because the roots are not adapted to soil density. Soil propagation is slower to show progress, but the roots are stronger. They are already in a solid medium. The cutting does not go through a shock when you decide to move it. For offices specifically, I recommend the water method if you are a beginner. Why? Because you can see what is happening. Confidence matters. If you can see roots growing, you feel less anxious. Once you have successfully propagated three or four times in water, try the soil method. I use both now. It depends on my mood.
The Problem with Office Lighting, Flickering Fluorescents
There is one thing I did not anticipate. Fluorescent lights flicker. It is invisible to the human eye, but plants sense it. This flicker can cause stress over time. I noticed my cuttings in a room with old fluorescent bulbs grew slower. The leaves on the mother plant also looked slightly curled. I solved this by moving my propagation station to a spot where natural light dominates. If your office has no windows, you can still succeed. You just need to leave the lights on for longer hours. I use a small grow light bulb that I clip to my desk lamp. It costs fifteen dollars. I set it on a timer for eight hours a day. This is not necessary for everyone, but it helps in windowless rooms.
How to Prevent Algae in Your Propagation Jar
Algae is common in water propagation. It appears as green film on the glass and the stem. It is not toxic, but it competes with the cutting for oxygen. I fought algae for weeks until I found the trick. Use an opaque container. I love clear glass because I can see the roots. But algae love it too. The compromise is wrapping a paper sleeve around the glass. This blocks light from reaching the water, stopping algae growth. You can still peek every few days. For my second experiment, I used a ceramic mug and the water stayed crystal clear the entire time. Algae needs light to survive. If you block the light, the water stays clean. I also keep my jar away from direct sunlight. Sunlight accelerates algae growth exponentially.
My Favorite Office Propagation Setup
I am going to describe my ideal setup. It took me a year to figure this out. I use a low, wide glass bowl, not a tall jar. Why? Because tall jars concentrate humidity at the top where the leaf sits. That humidity can cause bacterial spots on leaves. A wide bowl spreads the water surface area, allowing better oxygen exchange. I place the cutting in the bowl so that the nodes are submerged, but the leaves rest on the rim. This keeps leaves dry. I put a small coffee filter over the bowl to keep dust out. I replace the water every ten days, not every day. I add a single drop of liquid houseplant fertilizer after the first week. That is it. The bowl sits on my desk, two feet away from a north-facing window. This setup has given me a 100% success rate for the last five propagations.
What to Do When Roots Appear
So you see roots. Now what? Do not panic. Do not rush. Wait until the roots are at least two inches long. If they are shorter, they are too fragile. When they hit two inches, you can move the cutting to soil. But you should not move it directly to a large pot. That is a common error. Use a small pot, about three inches diameter. The small pot prevents water retention. Roots will fill the small space quickly, then you can move up a size. I have a quick transition trick. I keep the soil in the little pot very slightly moist for the first week after transplant. This helps the water roots adapt to soil. Then I dry it out gradually. This method reduces transplant shock significantly.
The Fertilizer Experiment, What I Learned
I tried a few fertilizer approaches. In the beginning, I used nothing. Roots formed, but they were thin and sparse. Then I tried a 10-10-10 liquid fertilizer at half strength on day three. The roots were thicker and appeared two days earlier. The secret is nitrogen. Nitrogen promotes root growth. But you need just a tiny amount. I add one drop to about 500 ml of water. That is it. If you add more, the roots actually get burned. I made that mistake and saw brown tips on the new roots. The plant was stressed. I now treat fertilizer like hot sauce. A tiny amount adds flavor. Too much ruins the dish.
How to Read Your Cutting's Health
You can tell if a cutting is dying or thriving simply by looking at the stem. A healthy cutting has a firm, green stem. The cut end should be pale white or light green. If the cut end is brown or black, rot is starting. If the cutting is dying, the leaves will turn yellow first. That is the first sign. If they turn mushy, it is too late. I also watch for a specific symptom called "translucent tissue." When the stem starts looking watery or glassy, that is rot bacterium. Cut above that part immediately and try again. I have salvaged many cuttings by acting fast. Cut off the rot, rinse the healthy part, callus it over, and place it in fresh water. It is a life-saving skill.
The Psychological Benefits of Propagating in the Office
I know this article is about technique, but I want to mention this. Having a propagation jar on my desk changed my relationship with work. It gives me something to check on during stressful moments. I take a break, look at the roots, and I feel grounded. It is a small piece of nature in a corporate environment. My coworkers started asking about it. Now three of my colleagues have their own jars. We share tips. It built a little community. That has been the most unexpected benefit. If you are feeling anxious about your office space, try this. It is low effort and high reward.
Common Problems with Office Propagation and Quick Fixes
Problem one, white film on the water surface. This is biofilm. It is harmless but ugly. I remove it with a paper towel. Problem two, leaf drooping after a week. This usually means the cutting is not getting enough light. Move it closer to the window. Problem three, root growth is fast but leaves are turning pale. This is a fertilizer deficiency. Add a drop of fertilizer. Problem four, all roots are brown. This is root rot. You need to start over with a fresh cutting. These are all normal. I have dealt with every one of these.
Why My Aglaonema Cuttings Prefer Being Ignored
Here is a counterintuitive truth. The more you mess with a cutting, the worse it does. I used to check my cuttings every day. I would take them out of the water and look at the roots. That roughness broke tiny root hairs. Root hairs are essential for nutrient absorption. Without them, the plant struggles. Now I look but do not touch. I visually inspect the jar through the glass. I only lift the cutting to check its stem when I see a problem. That has improved my success rate by at least 40 percent. Self-restraint is the most important skill in propagation.
My Final Setup and Recommendations
I have settled into a routine. I take two cuttings from my mother plant every spring. I propagate them. One goes home, one stays in the office. I give away extras to coworkers. The whole process takes less than twenty minutes of actual work per month. The waiting does not feel like waiting because I barely think about it. If you want my honest suggestion, start with water propagation. Use a glass bowl. Let the cutting callus for 24 hours. Keep it in indirect light. Add one drop of fertilizer after week one. Ignore it until you see roots. Then wait until roots are two inches long. Then pot it up in a mixture of two parts potting soil to one part perlite. Water it sparingly. That is all.
Frequently Asked Questions about Office Aglaonema Propagation
Question one: How long does it take for Aglaonema cuttings to root in an office? Usually seven to fourteen days in water, up to twenty days in soil. The office temperature is perfect for about ten to twelve days. If you use fertilizer, you might shave two days off.
Question two: Can I propagate from a single leaf? No, you need a node. A single leaf will never grow roots. It might sit there for weeks, but no roots will form. You need a stem cutting with at least one node and ideally two leaves.
Question three: What if my cutting starts rotting? Remove the cutting from the jar immediately. Cut above the rotten part with sterilized scissors. Rinse the healthy stem. Let it callus for 24 hours. Put it in fresh water. Many times, this saves the cutting. Do this within 48 hours of noticing rot for the best chance.
Final Thoughts from an Office Propagator
I hope my long journey helps you avoid the pain I went through. I genuinely love this plant because it forgives you. Even my early mistakes did not completely kill the mother plant. She always pushed out new growth. This resilience is why Aglaonema is the best office plant. It works with you. The propagation process, once you understand the simple rules, is easy. 90% of indoor plants die from overwatering, but now you know better. You will not be part of that statistic. You will be the person who shares cuttings with friends. You will be the person whose desk has a tiny glass jar with white roots. It is a small joy. I wish you patient hands and good luck.





