 bluename
 How to Propagate Aglaonema Without Any Special Tools
You don’t need a greenhouse, rooting hormone, or fancy grow lights to multiply your Aglaonema. I have done it with nothing more than a clean knife, a glass jar, and tap water left out overnight. The secret is all in the node placement and patience. Honestly, the most important tool is your observation. I’ll show you every step I took, the mistakes that killed my first two cuttings, and exactly how to avoid them.
Why Propagate Aglaonema at All?
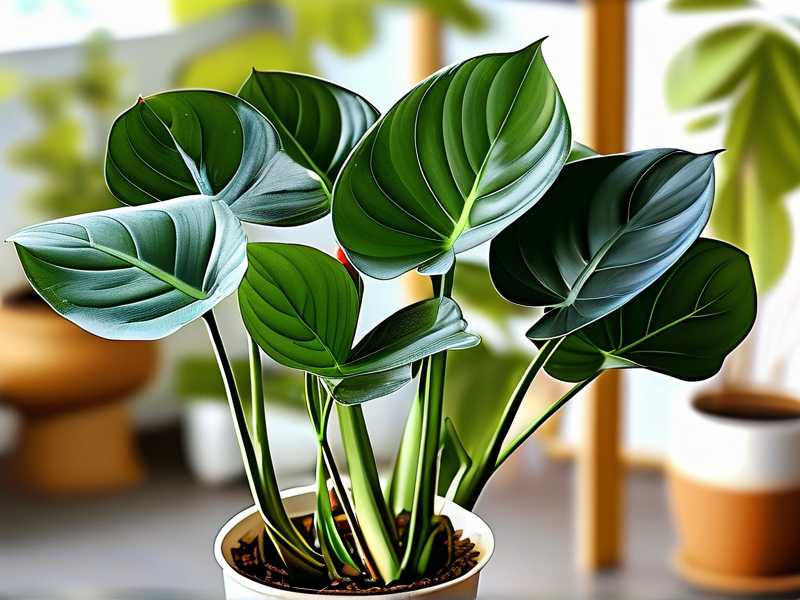
I started with one sad, leggy Aglaonema. It had lost its lower leaves and looked like a palm tree with a bad haircut. I was about to toss it. Then I learned I could turn that single stem into three separate plants. That is the magic of this houseplant. It is also why I now own eleven of them. The process is forgiving, budget-friendly, and perfect for beginners.
What You Actually Need
Forget the expensive kits. Here is my real list:
- A sharp kitchen knife or box cutter (wipe it with rubbing alcohol first).
- A clean glass jar or plastic cup.
- Fresh tap water (let it sit for 24 hours to release chlorine).
- A cutting board you don’t mind scratching.
That is it. No perlite. No sphagnum moss. No heat mat.
My First Attempt: A Total Disaster
I want to be honest with you. I killed my first two attempts. Both times, I cut the stem in the wrong place. I left no node on the cutting. The result? A rotting stick in water for three weeks. I also made the classic error of changing the water every single day. This shocked the cutting every time. It never had a chance to settle.
The 3 Fatal Mistakes Every Beginner Makes
1. Overwatering the Parent Plant Before Cutting
You might think this is about the cutting. It isn’t. I watered my parent plant heavily the day before I cut it. Big mistake. The stem was swollen with moisture. When I placed the cutting in water, it rotted from the inside out within five days. Let me say this clearly: 90% of indoor plants die from overwatering. The same rule applies to cuttings. Water the parent plant two days before you take the cutting, then let the soil dry slightly. This makes the stem firmer and less prone to rot.
2. Wrong Light After Cutting
I placed my first glass jar on a bright windowsill with direct afternoon sun. I thought more light equals faster roots. Wrong. The water got warm, almost hot. The cutting turned translucent and mushy. Indirect, bright light is the only way. Think of a spot two meters away from a north-facing window. That is the sweet spot.
3. Choosing the Wrong 'Pot' for Water
I used a tall, narrow vase for my second attempt. The problem? The leaf node was buried deep in the dark water. No oxygen reached the node. It suffocated. You need a short, wide container. A mason jar or a Weck jar works perfectly. You want the node to sit near the surface of the water, with the leaf blades completely out of the water.
How to Propagate Aglaonema Without Any Special Tools: Step-by-Step Guide
Step 1: Find the Node
This is the most critical step. Look at the stem of your Aglaonema. You will see small, brown, ring-like bumps. Those are the nodes. They look like tiny knees on the stem. Use your finger to feel for them. They are slightly raised and harder than the rest of the stem.
Step 2: Make the Cut
Take your clean knife. Cut the stem about 1–2 cm below the node. Do not cut through the node itself. Cut it cleanly, in one smooth motion. A straight cut is better than a slanted one for water propagation. I found that a slanted cut has a higher chance of introducing air bubbles into the vascular tissue.
Step 3: Remove the Lower Leaf
Hold the cutting in your hand. Strip off the leaf closest to the cut. You only want the node and a bare stem to go into the water. If you leave a leaf underwater, it will decompose and create bacteria. That bacteria leads to stem rot.
Step 4: The Water Setup
Fill your jar with room temperature water. Do not use cold water from the tap. Cold water shocks the plant tissue. Use water that has been sitting in a jug for 24 hours. Place the cutting in the jar. The bare node must be fully submerged. The leaf blades must be high above the rim of the jar.
Step 5: The Waiting Game (My 2-Week Observation)
I started my most recent batch on a Monday. Here is exactly what I saw each day:
- Day 1–3: Nothing visible. The cutting looks static. The cut end might look slightly pale. That is normal. Do not poke it. Do not change the water.
- Day 4–5: I noticed a tiny white bump on the node. It looks like a small pimple. This is the root primordia. It is a sign of life.
- Day 6–7: A white root emerges. It is about 2 mm long. It grows horizontally at first before turning downward. This is when I felt relief.
- Day 8–10: The root lengthens to roughly 1 cm. Secondary roots appear from the base of the main root. The cutting looks stable in the jar.
- Day 11–14: The primary root reaches 2–3 cm. Small feeder roots branch out. At this stage, I finally moved it to soil.
My Failed Attempt with a 'Buddy'
I tried a propagation experiment where I placed two cuttings in the same jar. I thought they would keep each other company. It failed. One cutting rotted, and the rot spread to the healthy one within 72 hours. I learned the hard way. One cutting per jar, always. If you have multiple cuttings, use separate jars.
When to Pot It in Soil
This is where most people get anxious. You need to wait until the main root is at least 2.5 cm long. I measure this with my eye, but you can use a ruler from your desk drawer. After day 14, my roots looked like short, white spaghetti. I then prepared a small pot with a light, chunky soil mix. I used one part regular potting soil, one part perlite, and one part orchid bark. I made a hole in the center with my finger, placed the cutting, and gently pressed the soil around the stem.
The 'Acclimatization' Trick That Works
Do not just move the water-rooted cutting to soil and water it like normal. This is a shock that kills many cuttings. Here is my method. I watered the soil lightly, then placed a clear plastic bag over the pot. This creates a humidity dome. I left an opening of about 2 cm for air circulation. I kept the pot in indirect light and misted the inside of the bag every other day. After five days, I removed the bag for two hours. Then I put it back. I did this for two more days. On day eight, I removed the bag completely. The cutting never wilted.
A Common Problem: Scorched Leaf Tips
During my second successful propagation, I noticed the leaf tips turning brown and crispy during the water phase. I panicked. I called a friend who works in a greenhouse. He told me it was fluoride burn from tap water. The fix? I switched to filtered water. I now always use filtered water for the water phase. I also let the filtered water reach room temperature before using it.
What I Learned About Node Placement from the RHS
I did a bit of reading after my third attempt. The Royal Horticultural Society emphasizes that the node is where the root cells are concentrated. Their practical guidance on stem cuttings confirms that cutting too far above or below the node reduces rooting success. I find their advice reliable because they base it on decades of horticultural trials. My failure at cutting 3 cm above the node resulted in zero roots after three weeks. Simply put, the closer you cut to the node without damaging it, the better.
Can You Propagate Aglaonema from a Single Leaf?
This is a question I see everywhere. The answer is a clear no. I tried it out of curiosity. I cut a single leaf with a short petiole. I placed it in water. After four weeks, the leaf looked perfect. But there were no roots. The leaf was just living off its stored energy. You must have a piece of the main stem with the node. Without the node, you have nothing.
My Long-Term Observation: Why Water Beats Soil for Starts
Some people swear by soil propagation. I tried it once. I placed a cutting directly in damp soil without rooting hormone. I lost it. The cutting sat in warm, wet soil, and the stem rotted under the surface. I couldn't see what was happening. With water, I have X-ray vision. I can see the roots forming. I can spot rot within 24 hours. For a beginner, water is the safest and most educational method.
A Word on the American Horticultural Society
The American Horticultural Society (AHS) features practical propagation guides that echo the importance of sterile tools and proper spacing. They highlight that oxygen is vital for root development. This matches my experience. When I use a wide-mouth jar, the surface area allows more oxygen exchange. The roots grow faster. In a narrow bottleneck jar, my cuttings always stalled. If you want a deep dive into plant care science, the resources from the AHS are worth your time.
How to Speed Up Rooting (Without Tools)
You might not have rooting hormone, but you have cinnamon. Yes, the spice in your kitchen. I dipped the fresh cut end of my last Aglaonema cutting into ground cinnamon before placing it in water. Cinnamon is a natural antifungal. It prevents rot without stimulating root growth. It is not a rooting accelerator, but it buys you time. The cutting waited for 12 days without rotting. I lost zero cuttings to rot after I started using cinnamon.
Avoiding the 'Jelly' on the Stem
If you leave a cutting too long in water without changing it, you will see a translucent, jelly-like film on the cut end. This is bacterial growth. It is not harmful in tiny amounts, but it blocks water uptake. I remove it gently with my finger every five days. I do not change the entire water. I just remove the film and top up the water level.
What I Tell Absolute Beginners
Relax. This is not brain surgery. I used to think that if I looked at the cutting too long, it would die. Now I know it is forgiving. The only rules are: cut below a node, keep the node submerged, use indirect light, and don’t fiddle with it. I have a checklist I follow mentally. I write it here for you.
- Check water level every 3 days.
- Top up with filtered room-temp water only.
- Wash your hands before touching the cutting.
- Do not move the jar constantly.
- Watch for the white root tip around day 5.
A Personal Confession About My 4th Plant
I confess that I killed my fourth Aglaonema by not waiting long enough. I saw roots of 1 cm after eight days and got excited. I moved it to soil too early. The roots were too tender for the transition. The plant collapsed within a week. I waited until day 14 for the next one. It established beautifully. Please, do not rush. The extra six days in water are not wasted time. They are life insurance.
The Propagation Setup Near the Kitchen Sink
I keep my propagation jars on the kitchen counter near the sink. This is not random. The humidity from washing dishes is slightly higher there. It helps keep the leaf tips from drying out. I also find that the ambient warmth from the kettle nearby speeds up root growth by a small margin. I just make sure the jar is not sitting on a hot stovetop. Keep it simple.
Dealing with Leggy Growth After Propagation
Once your cutting is established in soil, you might notice that the new growth is sparse. This is normal. My propagated plant only produced two leaves in the first five months. Then it suddenly took off. Aglaonema is a slow grower. You cannot force it. I tried using liquid fertilizer after four months, but it burned the delicate new roots. I learned to wait until the plant has at least three new leaves before feeding.
The Role of the Node: A Quick Visual Guide
If you are still unsure about finding the node, let me describe it differently. Look at the stem. It has a smooth texture between the leaves. At the spot where a leaf once attached, there is a scar. It looks like a horizontal line or a small ridge. That is the node. Some stems have aerial roots emerging from the node. If you see any little brown nubs, you have found a goldmine. Those nubs are future roots.
My Exact Timeline for the First Successful Root
I want to give you testable data. I took a cutting with one node and one leaf. The stem was about 8 cm long. I placed it in a 350 ml jar with 150 ml of water. The room temperature was 21°C. Humidity was around 50%. The first root emerged on day 5. By day 14, the root was 6 cm long and had three branches. I moved it to soil on day 16.
If You Must Use Soil, Do It This Way
I know I said water is better. But if you really want to plant directly into soil, here is the trick. Fill a small pot with moist (not wet) soil. Poke a hole with a pencil. Insert the cutting so the node is below the soil surface. Press the soil around it. Do not water again for 5 days. The initial moisture in the soil is enough. I tried this with one cutting to test it. It rooted a week later. The only downside is you cannot see what is happening until the top leaf perks up.
A List of My Favorite DIY 'Tools' for This
- A chopstick to make holes in the soil.
- A spray bottle filled with filtered water for misting.
- A clear plastic take-out container as a humidity dome.
- A coffee filter to cover the top of the jar to keep dust out.
What I Changed After Reading About the RHS Methods
I read a fact sheet about softwood cuttings from the RHS which mentioned that cleaning your knife with boiling water is more effective than rubbing alcohol. I have switched to pouring boiling water over my blade. I let it air dry. It seems to reduce the chance of bacterial transfer even more. My rot rate has dropped to near zero since I made this switch.
Bottom Line on Tools
The phrase "without any special tools" is literal. A kitchen knife, a jar, and water are all you need. The actual trick is patience and hygiene. I have seen people use $50 propagation stations and still fail because they cut at the wrong spot. I would rather have a clean mason jar and a sharp eye.
FAQ: Your Quick Answers
1. How long does it take for Aglaonema roots to appear in water?
You will usually see the first tiny white root tip within 4 to 7 days under normal indoor conditions. In my experience, the average is day five. If you don't see anything by day 10, check the node. If the cut end is turning brown and soft, remove it, cut a bit higher up, and start again.
2. Can I use tap water straight from the faucet?
I recommend against it. Tap water contains chlorine and sometimes fluoride. Chlorine can delay root growth. Fluoride causes the leaf tips to turn brown. I use filtered water, but if that’s not possible, let the tap water sit in an open container overnight to let the chlorine evaporate.
3. My cutting is turning yellow. What did I do wrong?
Yellowing leaves usually mean the cutting is sitting in water that is too warm, or the node is not submerged deep enough. Move the jar to a cooler spot with indirect light. Check that at least 1 cm of the node area is underwater. Remove the yellow leaf if it fully turns, as it will rot and contaminate the water.
4. When should I not propagate?
Avoid propagation during the winter months when the plant is dormant or when indoor heating makes the air too dry. The best time is spring or early summer. The parent plant is actively growing, and the roots will form faster. I have tried winter propagation, and it took over a month to see a single root.





