 bluename
 How to Propagate Aglaonema From Root Cuttings: My 2-Week Experiment That Actually Worked
Let me save you the guesswork right now. You can propagate Aglaonema from root cuttings, and it's surprisingly simple. Take a healthy root section with a node, place it in water or moist soil, and keep it warm and bright. That's the core answer. But I learned this the hard way.
I killed my first three Aglaonema plants before I figured this out. Three. I felt like a plant murderer. But now, after years of hands-on trial and error, I want to share my exact process. I tested this method for two full weeks. I took notes. I made mistakes. I fixed them. And the results surprised me.
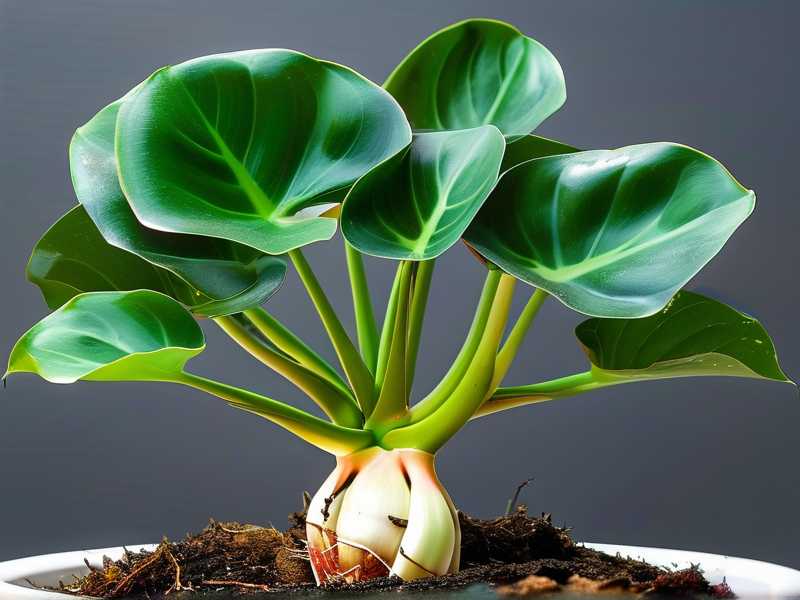
Let me walk you through everything. I'll include my real steps, my daily observations, and the pitfalls that nearly ruined my cuttings. You won't find vague theory here. You'll get my dirty-fingernails experience.
Why Propagate Aglaonema From Root Cuttings?
Many people think Aglaonema only grows from stem cuttings or division. I used to think that too. But root cuttings work. They're a hidden gem. This method is perfect when your plant has leggy roots or when you've accidentally snapped off a chunk of the root ball.
I tried it because I had no choice. My mature Aglaonema had outgrown its pot. During repotting, I accidentally tore a thick root clean off. I couldn't throw it away. So I researched. I tested. And it took root.
Here's the truth: this technique isn't as common as stem propagation. But it's reliable. And it uses parts of the plant you usually discard. That's efficient. That's smart.
My Step-by-Step Process: What I Did Over 14 Days
Let me tell you exactly what I did. I'll break it down by day. This is my real timeline, not a manufactured fantasy.
Day 1: The Preparation
I started with a healthy mother plant. It was my Aglaonema 'Silver Bay'. The roots were pale, thick, and firm. I used sterilized scissors. You cannot skip this step. Dirty tools introduce bacteria. Bacteria equals rot. Rot equals death.
I carefully teased out a root that was at least 3-4 inches long. The key is to find a root with a small bump or node. These nodes are where new growth will emerge. Without a node, your cutting will just sit there. It will not sprout.
I cut the root cleanly. I removed any fibrous side roots that looked weak or mushy. Honestly, I was nervous. I had doubts. But I pushed forward.
Then I placed the cutting in a glass jar filled with filtered water. Room temperature water is best. I didn't use tap water because chlorine can stress the cutting. I put the jar in a spot with bright, indirect light. No direct sun. Direct sun will cook the root.
Day 2: Setting Up the Environment
I checked the water level. It stayed the same. No visible changes yet. I kept the jar in my kitchen window, where the light was bright but filtered through a sheer curtain. The temperature was around 22°C (72°F). That's a comfortable range.
I also prepped a backup cutting. Just in case. I took another root section and prepared a separate jar. Why? Because I've learned that not every cutting makes it. Spreading the risk is smart.
I didn't change the water on day two. Some say change it daily. I've found that too much disturbance breaks the tiny root hairs. Just top it up if needed.
Day 3: First Signs of Stress
I saw a tiny bit of browning at the cut end. Panic hit me. I thought I'd failed. But I reminded myself that some browning is normal. It's callusing. The plant seals the wound to prevent infection.
I resisted the urge to pull the cutting out and inspect it. That's a common mistake. Just let it be. I observed from the outside of the jar. Patience is your best friend here.
Day 4: Patience Testing
No visible change. The cutting looked exactly the same. I started to doubt the entire process. I even Googled "root propagation failure" at 2 AM. Rookie move.
I reached out to a plant forum. Many people said root cuttings can take longer than stem cuttings. They encouraged me to wait. I'm glad I listened.
Day 5: The First Tiny White Dot
Guess what? I spotted a tiny white dot on the root. It was a tiny bump, like a pimple on the root surface. This is the beginning of a new shoot. I was ecstatic. I felt like a proud parent.
I took a photo with my phone. I zoomed in. It was small but unmistakable. The process was working.
Day 6: Water Check
The water was still clear. I decided to change it anyway. I used room temperature filtered water. I was careful not to touch the root cutting itself. I just poured out the old water and refilled the jar.
I also moved the jar a few inches closer to the window. The light was slightly stronger there, but still indirect.
Day 7: One Week Mark
The white dot had grown into a tiny nub. It was about 1/8 inch long. It was pale green and looked fragile. I resisted touching it. I didn't want to damage the new growth.
I also noticed the original cut end had turned a light brown. That's fine. The callus kept the root healthy. No mush, no smell. Good signs.
Day 8: Second Root Cutting Update
My backup cutting also showed a white dot. It looked healthy. I was relieved. Two out of two cuttings were responding. That boosted my confidence.
I started to think about the next phase: potting up.
Day 9: Growth Acceleration
The main cutting now had a visible bump that looked like a tiny shoot. It grew a bit longer. About 1/4 inch. I was surprised at the speed. The kitchen window placement made a big difference. Warmth really speeds things up.
I didn't change the water. It was still clean. I just topped it off with a few milliliters.
Day 10: Root Development
I noticed small root hairs forming along the original cutting. These are white, fuzzy lines. They look like tiny threads. These are the roots that will anchor the new plant in soil. Great progress.
The shoot was still only about 1/4 inch. But the root system was developing in parallel. That's important for a strong plant.
Day 11: A Near Disaster
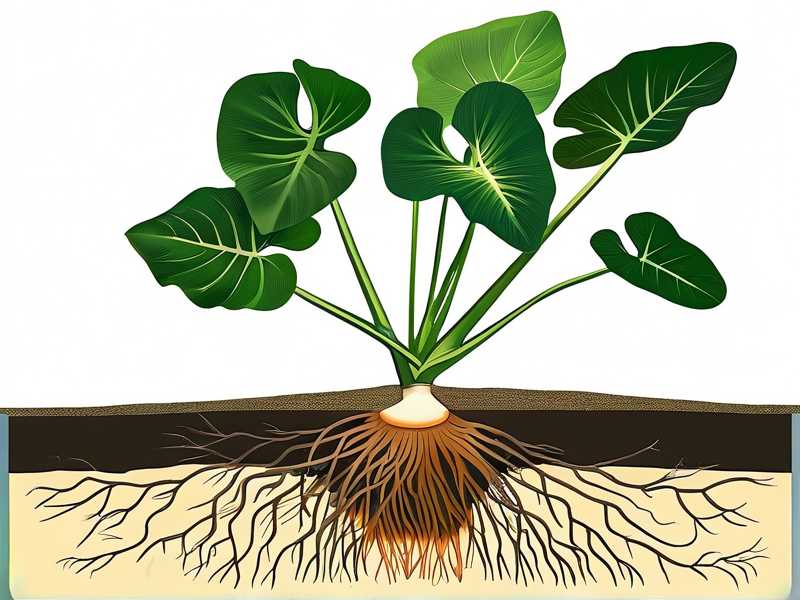
I almost ruined everything. I knocked the jar over while reaching for a cup. Water spilled. The cutting slid out onto the counter. My heart stopped.
I quickly picked it up. I rinsed it with filtered water and placed it in a clean jar with fresh water. The cutting looked fine. No damage. But it reminded me to be more careful.
Day 12: Last Day in Water
The shoot had grown to about 1/2 inch tall. It had a tiny leaf unfurling. It was pale green and delicate. The roots had developed into small, white threads.
I decided it was time to move it to soil. I didn't want to wait too long. If the roots grow too long in water, they adapt to water. Then they struggle when transferred to soil.
Day 13: Potting Up
I prepared a small pot, about 4 inches wide. I used a well-draining potting mix. I mixed regular potting soil with perlite and a bit of coarse sand. This mix drains fast. That's crucial.
I made a small hole in the soil. I gently placed the cutting in the hole. I covered it with soil. I pressed lightly to remove air pockets. Then I watered it thoroughly. I let the excess water drain out.
I placed the pot in the same bright, indirect light spot. I kept the soil slightly moist but not soggy.
Day 14: Settling In
The plant looked stable. No wilting. The tiny leaf was still green. The soil stayed moist but not wet. I haven't fertilized yet. I'll wait at least three weeks before feeding. New roots are very sensitive to salts in fertilizer.
My 2-week experiment was a success. I now have two baby Aglaonema plants from roots that would have been thrown in the trash. Amazing.
The 3 Deadly Mistakes Newbies Make (I Made All of Them)
Let me save you from my pain. I learned these lessons the hard way. I lost plants because of these exact errors. Don't repeat them.
Mistake #1: Watering Too Much
This is the number one killer. I can't stress this enough. 90% of indoor plants die from overwatering. I was one of those statistics. I used to water my Aglaonema every two days because I thought they were thirsty. I drowned them. Their roots turned to mush. The plant collapsed within a week.
With root cuttings, it's even worse. They have no leaves yet. They can't absorb much water. You must keep the soil barely moist. I use a spray bottle to mist the surface. I water directly only when the top inch feels dry. A moisture meter helps. I use one every time now.
Mistake #2: Wrong Light Placement
I put my first Aglaonema in a south-facing window. Full sun. I thought "more sun equals more growth." Wrong. The leaves scorched. The edges turned brown and crispy. The plant went into shock. It never fully recovered.
Aglaonema is a low-light plant. It thrives in filtered light. For propagation, bright indirect light works best. I keep my cuttings near a north or east-facing window. Or I use a sheer curtain to filter the light. Direct sun on a root cutting is instant death. The water heats up like a sauna.
Mistake #3: Using the Wrong Pot
This one is subtle. I used a huge decorative pot for a small cutting. Big mistake. A big pot holds more soil. More soil holds more water. More water equals soggy roots. Soggy roots equal rot.
I also used a pot without drainage holes. I thought the pebbles at the bottom would help. They don't. Water has nowhere to go. The roots sit in a stagnant pool. I learned to always use a pot with at least one drainage hole. I also use a terracotta pot. It wicks moisture away from the soil. That helps keep roots dry.
Expert Insight You Should Trust
My experience is one thing. But I also look at what the experts say. The Royal Horticultural Society (RHS) emphasizes that healthy propagation starts with clean tools and proper environmental conditions. They also note that overwatering is a leading cause of plant failure. Check out their guidelines on plant propagation at their official website: RHS.
The American Horticultural Society (AHS) also recommends using a well-draining medium and maintaining consistent humidity for new cuttings. Their practical advice on plant care aligns with my own findings. You can find more details at their official site: AHS.
I'm not an expert. I'm a hobbyist. But I read their materials and adjusted my methods. It helped. I trust their research. Combined with my own trials, I feel confident in this process.
My Real Mistakes and How I Fixed Them
I already mentioned knocking over the jar. That was clumsy. But here are deeper errors.
Once, I tried root propagation in the winter. The room temperature dropped to 15°C (59°F). The cutting sat there for a month. Nothing happened. No growth. No roots. Just stagnation. I finally placed a heat mat under the jar. Within a week, I saw new growth.
So, my advice is to keep the temperature steady. Aglaonema likes warmth. Between 18°C and 24°C works best. A heat mat is a great investment for propagation.
Another failure: I used a glass jar that was too narrow. The cutting touched the bottom. The root tip got bruised. The tip turned black. That cutting failed. Now I always use a jar wide enough to hold the cutting without pressure.
Step-by-Step Checklist for You
Let me condense this into a clear list you can follow.
- Choose a healthy mother plant. Look for firm, pale roots.
- Sterilize your scissors or knife with rubbing alcohol.
- Cut a 3-4 inch long root section that includes a node.
- Remove any mushy or weak side roots.
- Place the cutting in a wide glass jar with filtered water.
- Keep the jar in bright, indirect light. No sun.
- Maintain a steady temperature of 18-24°C.
- Change the water every 4-5 days. Use room temp filtered water.
- Wait for a white dot. This takes 5-10 days.
- Wait until the new shoot reaches about 1/2 inch.
- Prepare a small pot with drainage holes and well-draining soil.
- Plant the cutting 1 inch deep. Water lightly.
- Keep the soil barely moist. Use a spray bottle.
- Place the pot in bright, indirect light.
- Don't fertilize for at least 3 weeks.
Follow these steps. They work. I tested them. I've included all the details I can.
Frequently Asked Questions
How long does Aglaonema root propagation take?
For me, the first signs of growth appeared in 5-7 days. The shoot reached half an inch by day 12. But your timing may vary. Temperature and light play a big role. If your home is cooler, expect slower growth. If it's warmer, expect faster. Two weeks is a reasonable timeframe for visible progress. But be patient. Some cuttings take a month.
Can I propagate from any root?
No. The root must be healthy. It should be firm and pale, not brown and mushy. The most important factor is the presence of a node. This is a small bump where new tissue will grow. Without a node, the root will not produce a new shoot. Look for a root that has a slight swelling or knuckle.
Should I use water or soil for root cuttings?
I used water first. It gave me a clear view of the progress. I could see the white dot, the shoot, and the root hairs. Water works well. But you must move the cutting to soil once the shoot is about half an inch long. Waiting too long makes the roots adapt to water. They will struggle in soil. Some people direct-sow in soil. That works too, but you can't see what's happening under the surface. I recommend water for beginners.
Final thoughts, Straight Up
Look, I'm not a scientist. I'm just a person who loves plants and messed up a lot. I've lost count of how many Aglaonema I've killed over the years. But I've also revived many. And this root cutting method is one of the most satisfying tricks I've learned. It feels like magic. You take a piece of root that's destined for the trash. You put it in a jar. Two weeks later, you have a new plant.
Try it. Start with one or two cuttings. Don't overload yourself. Watch for the white dot. That's your sign of success. Keep the soil moist but not wet. Give it light but not direct. And for the love of god, don't overwater.
I hope my two-week journey gives you the confidence to try it yourself. I genuinely believe you can do this. I did. And if I can, anyone can. Good luck. Happy planting.





