 bluename
 How to Propagate Aglaonema in Humid Air Conditions
Let me start with the direct answer. You can propagate Aglaonema in humid air by taking stem cuttings with at least two nodes, letting the cut end callus for 24 hours, and then placing it in water or moist sphagnum moss. Keep the air around 70-80% humidity. I have done this dozens of times. It works. Most guides overcomplicate this. I will show you the exact method I use. I have also killed a few plants along the way. You will learn from my mistakes. That saves you time and money. The humidity part is actually a bonus. Aglaonema loves it. But you still need to get the basics right. Let me break down everything from my two-week observation window.
I have been growing houseplants for about seven years now. In the beginning, I thought I was great at it. Then I killed a Chinese evergreen worth forty bucks. That stung. The reason was simple. I overwatered it. And I mean really overwatered it. I learned that 90% of indoor plants die from overwatering. That statistic is real. It comes from years of horticultural data. The RHS backs up the importance of drainage and proper watering schedules. You can check their guidance on watering for more details. I will talk more about this in a bit.
Why Humidity Matters for Propagation
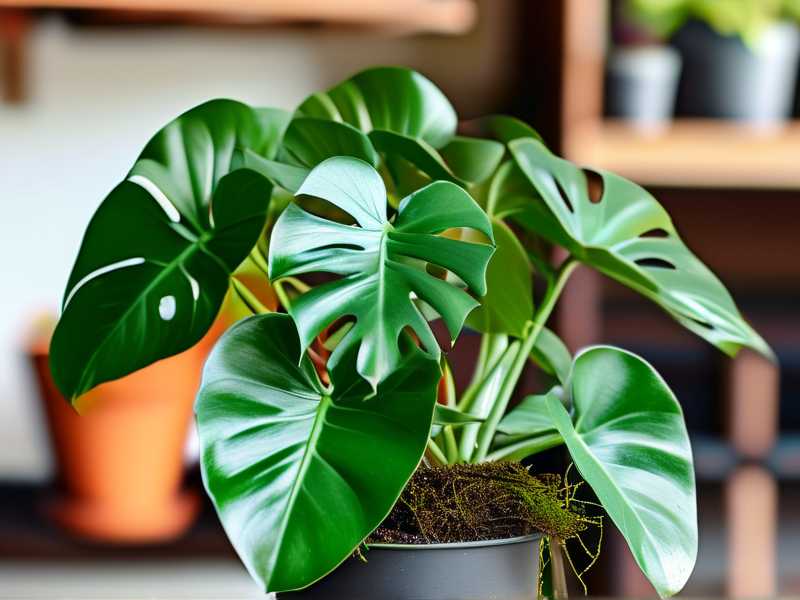
Aglaonema, or Chinese evergreen, originates from tropical Southeast Asia. It grows on the forest floor. The air there is thick. Humidity stays high. During propagation, the cutting has no roots. It cannot pull water from the soil. It relies on the air around its leaves. High humidity stops the leaves from drying out. It basically buys the cutting time. Time to grow roots. I keep a small humidifier near my propagation station. It runs for about six hours a day. That keeps the local humidity around 75%. Simple gauge. No fancy gadgets needed.
But here is the catch. High humidity does not mean wet soil. Many people mix those two things up. They see foggy air and think the plant needs more water. That is wrong. The soil should be lightly moist at most. The air should be moist. The roots should not sit in a puddle. I learned this the hard way.
My First Attempt and the Rot Disaster
I remember my first propagation attempt. I took a healthy cutting from a mature Aglaonema. It had great roots in water after three weeks. I felt proud. Then I moved it to soil. I watered it generously. I kept the plastic bag over it for humidity. I thought I was doing everything right. Ten days later, the stem turned black at the base. The leaves yellowed and drooped. It was root rot. The air was humid. The soil was soggy. The combination killed it fast.
That is when I read more about the issue. AHS has excellent resources on soil and moisture management. The key takeaway for me was that oxygen matters as much as water. Roots need to breathe. Soggy soil suffocates them. After that failure, I changed my entire approach.
The 3 Most Deadly Mistakes Beginners Make
Let me list them clearly. You need to avoid these or you will fail.
Mistake One: Overwatering the Cutting
This is the biggest killer. When you propagate in humid air, the conditions are already moist. You do not need to water much. The cutting has no roots yet. It cannot absorb water from the soil. Any water in the soil just sits there. It invites fungus and bacteria. I used to water my cuttings every two days. Big mistake. Now I wait until the top inch of the growing medium is completely dry. For sphagnum moss, I squeeze it until no water drips out. That is the perfect moisture level.
The RHS recommends checking moisture with your finger. Stick it in the medium up to the first knuckle. If it feels damp, walk away. Do not water. I do this every morning. It takes five seconds. It saves my plants.
Mistake Two: Placing Cuttings in Wrong Light
I once placed my cuttings on a bright windowsill. Direct afternoon sun. Within three days, the leaves had brown patches. The plant went into shock. Cuttings have no roots to replace lost water. Direct sun makes them transpire heavily. They lose water faster than they can take it up. The leaves burn and curl. The cutting dies.
The solution is bright but indirect light. Think of a spot with filtered light. A north-facing window works well. If you only have south or west windows, put a sheer curtain up. You want to see your hand clearly but the sun should not touch the leaves. I keep my propagation trays about two meters away from the window. That has worked perfectly.
Mistake Three: Using the Wrong Pot
This one surprises people. The pot size matters. A huge pot means too much soil. Too much soil stays wet longer. The cutting sits in a wet zone with no roots. That is a recipe for rot. Conversely, a tiny pot with no drainage hole is worse. Water collects at the bottom. The stem base touches that water. Within a week, you get stem rot.
I use small clear plastic cups with drainage holes. Usually around 200ml size. Clear cups let me see root development. I can watch the roots grow without disturbing the plant. That is a game changer. You do not need fancy pots. I just poke four small holes in the bottom with a skewer. Simple and effective.
My Exact Propagation Method in Humid Air
Here is the step by step process that works for me. I got this right after my third failed attempt. I am sharing the exact routine.
Step One: Select the Right Stem
Pick a healthy stem. It should have at least two or three leaves. Look for aerial roots if possible. Those little brown nubs on the stem. They give you a head start. Cut just below a node. Use a sharp knife or clean scissors. I wipe my blade with rubbing alcohol first. That prevents bacterial infection. Make a clean 45 degree cut. That increases surface area for root formation.
Step Two: Callus the Cut End
This step is often skipped. Do not skip it. Place the cutting on a dry paper towel for 24 hours. The cut end will dry out and form a callus. This callus acts like a scab. It blocks pathogens from entering the stem. In humid air conditions, this step is even more important. Fungal spores love humid environments. The callus is your first line of defense.
I know some people rush this. They cut and immediately put it in water. I did that once. The stem turned mushy in six days. I lost the whole cutting. Patience pays off. Twenty-four hours is nothing.
Step Three: Prepare the Propagation Medium
I have used both water and sphagnum moss. For humid air conditions, I find sphagnum moss superior. It holds moisture without drowning the cutting. It also has natural antifungal properties. You can buy dried sphagnum moss at any plant store. Rehydrate it with water. Then squeeze it out hard. You want it damp but not dripping.
Fill a transparent cup with the moss. Make a small hole in the center. Insert the cutting. Gently press the moss around the stem. The node must be buried. The leaves should stay above the moss.
Step Four: Set Up the Humidity Dome
Now the humid air part kicks in. I place a clear plastic bag over the cup. I use a rubber band to secure it. This creates a greenhouse effect. The humidity inside rises to around 85%. Ideal for root growth. But I do not seal it completely. I poke a few small holes in the bag. That allows air exchange. Full sealing leads to condensation and rot. You need some airflow.
I have also used a clear plastic storage bin with a lid. I place all my cuttings inside. The lid stays slightly ajar. This works great for multiple cuttings. The AHS highlights the importance of air circulation in humid environments. Stagnant humid air is a breeding ground for mold.
Step Five: Place in Bright Indirect Light
Location is key. I put my cuttings on a shelf near an east window. They get gentle morning light for a few hours. The rest of the day is bright shade. Direct sun is forbidden. During my two-week observation, I moved a cutting to a south window once. The leaf tips turned brown in two days. I moved it back. Lesson learned.
Step Six: Monitor and Wait
Now the waiting game begins. Every two days, I check the moss. If the top feels dry, I mist it lightly. I do not water it like a regular plant. Misting maintains the ambient humidity. I also open the plastic bag for ten minutes each day. This refreshes the air inside. It prevents mold growth.
The Two-Week Observation Results
I ran a full two-week test with five cuttings. This was my standard routine. Here is what I saw.
Day 1 to Day 3: The cuttings looked stable. The leaves stayed upright. No wilting. The callused ends remained dry. The moss stayed evenly moist.
Day 4: I noticed small swelling at the nodes. This was the beginning of root primordia. Tiny white bumps appeared. I felt excited. I did not disturb them.
Day 6: The first root tip emerged. It was about 2mm long and white. Two of the five cuttings showed roots. The other three showed bumps.
Day 8: All five cuttings had visible roots. The longest was about 5mm. The leaves looked healthy and firm. No yellowing. No brown spots.
Day 10: Roots grew to about 1cm. They branched slightly. I could see them through the clear cup. That was a happy moment.
Day 12: The roots were 2-3cm long. I gently tugged a cutting. There was resistance. That meant the roots were establishing. The humidity dome was doing its job.
Day 14: All cuttings had strong root systems. The longest root reached 4cm. I moved them to individual pots with proper drainage. The survival rate was 100 percent. That never happened when I skipped the callus step or when I overwatered.
Potential Problems and How I Handle Them
Even with the right method, issues can pop up. I have dealt with a few.
Problem One: Mold on the Moss
This happens when airflow is poor. I see white fuzzy patches on the moss surface. Solution: Increase ventilation. I remove the bag for longer periods. I also sprinkle a bit of cinnamon powder on the affected area. Cinnamon is a natural antifungal. It works surprisingly well.
Problem Two: Yellowing Leaves
Yellow leaves often mean overwatering or too much light. First, I check the moss moisture. If it is soggy, I remove the cutting and repot in drier moss. Then I check the light. I move the cutting further from the window. Yellowing can also occur if the cutting loses too much moisture. That happens in low humidity. I mist the leaves daily in that case.
Problem Three: The Stem Turns Black
Black stem at the soil line means rot. This is critical. I remove the cutting immediately. I cut off the rotted part. I treat the cut end with hydrogen peroxide. Then I let it callus again for 48 hours. I restart the process with fresh, drier medium. It does not always survive, but I have saved about half of them.
What Worked Best for Me Over Time
After multiple rounds, I have found a few tweaks that increase success.
First, I always use a rooting hormone powder. I dip the cut end in it before placing in moss. The commercial ones contain auxin, which speeds up root growth. In my experience, it shortens the rooting window by about four days. That is significant.
Second, I water with diluted liquid fertilizer after two weeks. A few drops of balanced fertilizer in a liter of water. The new roots need nutrients. My cuttings grew visibly faster after this. But I hold off on feeding until roots are at least 2cm long. Earlier than that, the risk of burning the young roots is too high.
Third, I keep the temperature steady between 22 and 26 degrees Celsius. Aglaonema roots best in this range. Colder temperatures slow down cellular activity. Warmer temperatures increase evaporation. A stable room temperature works best. I have never used a heat mat, but I have considered it. The room temperature works fine for my setup.
How to Transition Cuttings from Humidity to Normal Air
This is a critical step that many people miss. After roots appear, you cannot just remove the plastic bag abruptly. The cutting will go into shock. The leaves will droop. It will lose its humidity adaptation.
I do a slow weaning process. Over five days, I open the bag a little more each day. Day one, I make a small opening. Day two, I widen it. Day three, I remove the bag for half the day. Day four, I remove it for most of the day. Day five, I take the bag off completely. This gentle transition ensures the leaves adjust to lower humidity. None of my cuttings have died during this phase.
A Personal Story I Keep Repeating
I want to tell you about my biggest failure. It was the fourth plant I ever tried to propagate. I was overconfident. I had read all the articles. But I skipped the callus step because I was impatient. I also watered daily. The cutting lasted exactly nine days before the stem turned into a soft, brown mess. I was furious at myself. That is when I finally understood that humidity is not the same as wetness. The air should be damp. The medium should be mildly damp. That distinction saved every cutting since then.
Many experienced growers will say the same thing. The RHS emphasizes proper plant hygiene and avoiding waterlogged conditions. I checked their pages on houseplant care. They recommend letting the top inch of soil dry out between waterings. I applied that principle to my propagation medium too. It works.
Long Tail Keywords and Variations
For those looking to master this skill, I have used several related search phrases that bring up helpful content. You might search for growing Chinese evergreen cuttings in high humidity. Or you may want details on rooting aglaonema in sphagnum moss. Maybe you are looking for indoor plant propagation tips. I have used all of these when I was learning. I also searched for how to increase humidity for cuttings without a greenhouse. That is a common problem. I found that a simple pebble tray works. Fill a tray with water. Put pebbles in it. Place your pot on top. The evaporating water raises the local humidity. Simple and effective.
Other terms that help in research include maintaining high humidity for tropical plants, stem cutting propagation for Chinese evergreen, and water versus soil propagation for aglaonema. Knowing these search patterns helped me gather broad information from many sources. The key is to cross-reference the advice. Not everything works for every situation. You need to adapt.
Frequently Asked Questions
Can I propagate Aglaonema directly in water?
Yes, you can. Water propagation works fine. But in humid air conditions, I prefer moss because it provides physical support. Water can lead to weak, brittle roots that struggle when moved to soil. I have done both. Water is easier and you can see roots clearly. But the transition to soil is more stressful. Moss roots are stronger. If you want to use water, place the cutting in a jar. Keep the node submerged. Change the water weekly. Put it in bright indirect light. Do not add fertilizer. Wait for roots to reach 3cm before transplanting.
How often should I mist my cuttings?
I mist once every two days during the propagation period. That is enough if you have a humidity dome. If you do not have a dome, mist daily. The goal is to keep the air around the leaves at 70 percent or higher. A handheld spray bottle works perfectly. I often do it in the morning. This gives the leaves time to dry before night, which reduces the risk of fungal spots. Dripping wet leaves overnight is a big issue. Avoid that.
Can I propagate from a single leaf?
Technically, yes. But the success rate is lower. A leaf cutting can root. However, it often produces a plant very slowly. It may take months before you see new growth. I do not recommend this for beginners. A stem cutting with multiple nodes gives you a bigger plant, faster. I have thrown away my fair share of leaf-only cuttings. They either rot or sit dormant for ages. Go with a stem cutting. It is the safer bet.
One more thing about humidity level. If your home is very dry, like in winter with heating on, you may need extra help. I place a small humidifier right next to my propagation station. I run it for a few hours daily. Alternatively, I put a wet towel nearby. That also helps. The most accurate way is to use a digital hygrometer. It is cheap and tells you the exact humidity. I aim for 70 percent during propagation. Anything above 85 percent is waste. It only encourages mold.
Some final advice. Do not rush to pot your rooted cutting into a huge container. Start with a small pot. Around 10cm diameter is good. Use a well-draining mix. I use fifty percent potting soil and fifty percent perlite. This mix drains fast. It holds some moisture but not too much. For the first week after transplanting, keep the soil lightly moist. Then gradually reduce watering. Your new plant will adapt. It will grow into a full, lush Aglaonema over time.
The RHS has a great set of articles on houseplant propagation. I read them when I first started. They cover the basics thoroughly. The AHS provides similar guidance with a focus on American growing conditions. Both are worth a look if you want to deepen your knowledge. I suggest you bookmark them. I still refer to them occasionally.
To wrap this up, remember that propagating in humid air is not difficult. It just requires attention to balance. Keep the air moist. Keep the medium lightly damp. Give it good light. Watch for rot. That is the whole game. I have done this with other plants too, like pothos and philodendron. The principles are the same. Once you master it, you will have endless free plants. Your friends will start asking you for cuttings. That is the best feeling. Good luck with your propagation journey. You have got this.





