 bluename
 How to Bring Aglaonema Indoors for Winter: A Plant Lover’s Step-by-Step Survival Guide
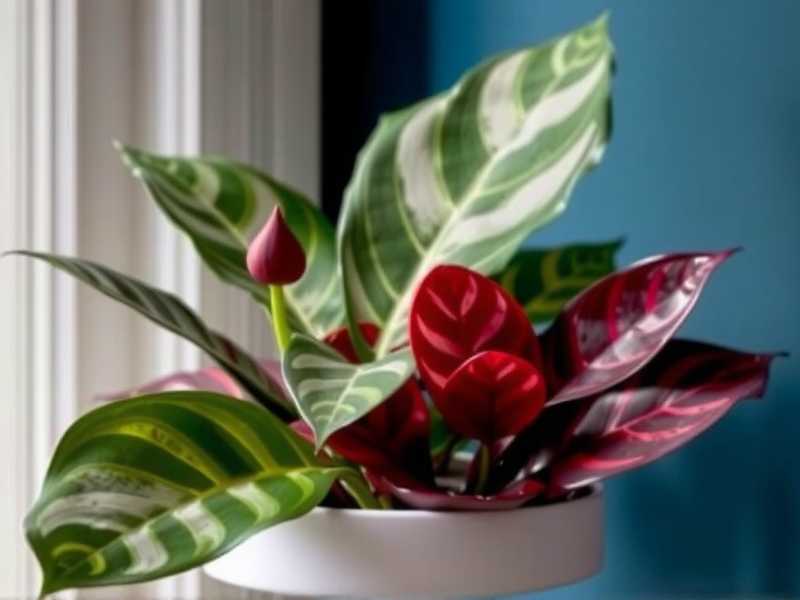
I’ve lost count of how many times I’ve watched a thriving Aglaonema, or Chinese Evergreen, suffer a slow, mysterious decline after being brought inside for the colder months. The leaves yellow, droop, or develop unsightly spots, turning a once-vibrant centerpiece into a source of frustration. If you’re worrying about how to bring your Aglaonema indoors for winter without triggering this heartbreaking transition, you’re not alone. The shift from a breezy patio to a dry, static indoor environment is a massive shock to these tropical plants. After several seasons of trial, error, and close observation, I’ve refined a process that doesn’t just move the plant but actively prepares it for indoor success. This guide is the culmination of my personal experience, including a detailed two-week adjustment period log, the pitfalls I encountered, and the solutions that saved my plants.
Understanding the “Why” Before the “How”

Moving your Aglaonema isn’t just about carrying a pot inside. It’s about managing a drastic change in its entire ecosystem. According to the Royal Horticultural Society (RHS), the primary challenges for plants transitioning indoors are reduced light intensity, lower humidity, and increased risk of pest infestation. Aglaonemas, while tolerant of low light, are still sensitive to sudden light drops. The American Horticultural Society (AHA) emphasizes that acclimating houseplants for winter is crucial to prevent leaf drop and stress. My goal was to address these exact issues proactively.
My Two-Week Aglaonema Indoor Transition Plan
I selected a mature ‘Silver Bay’ Aglaonema that had spent the summer on my shaded north-facing porch. The process began well before the first frost forecast.
Week 1: The Preparation Phase (Days 1-7)
The work starts outdoors. Bringing a plant straight from the garden into your living room is asking for trouble.
- Inspection and Pruning: My first step was a thorough examination under the leaves and along stems. I found the beginnings of a spider mite colony—a common hitchhiking pest on indoor plants. Instead of panicking, I used a strong jet of water from the hose to dislodge them, followed by wiping the leaves with a damp cloth. I pruned away two yellowing lower leaves and any foliage that looked leggy or damaged. This reduces the plant’s energy demands and improves air circulation.
- The Gradual Light Acclimation: Over the course of this week, I began shifting the pot to a slightly shadier spot on the porch each day. The aim was to slowly reduce the light it received, mimicking the lower light conditions of its future indoor spot near an east-facing window. This gradual shift helps prevent the shock that causes massive leaf drop.
- Initial Watering Adjustment: I allowed the soil to dry out a bit more than usual before its final deep watering. Overwatering is the fastest killer during the low-light, low-evaporation winter months.
The Transition Day: Moving Indoors
After a week of preparation, the plant was ready. I chose its permanent winter home: a spot about 5 feet back from an east-facing window, away from heating vents and cold drafts. I placed the pot on a pebble tray filled with water to boost humidity for houseplants—a critical step countering our dry indoor heat. This was Day 1 of my close observation period.
Week 2: The Critical Observation & Adjustment Period (Days 1-14 Indoors)
Here’s where most guides stop, but this is where the real work began. I monitored my Aglaonema daily.
- Days 1-3: The plant looked unchanged, which I took as a good sign. I resisted the urge to water. The soil was still moist from the pre-move soak.
- Days 4-7: I noticed the very tips of two leaves turning slightly brown. Panic moment number one. I initially thought it was under-watering. However, upon checking the soil, it was still damp an inch down. I realized this was a classic sign of humidity shock. The pebble tray wasn’t enough. My solution was to group it with two other humidity-loving plants (a peace lily and a fern), creating a beneficial microclimate. I also started misting the surrounding air lightly every morning, avoiding direct leaf soaking to prevent fungal issues.
- Days 8-10: The browning stopped progressing. However, I saw a single, tiny flying insect. Panic moment number two: fungus gnats. They thrive in moist soil in low light. This confirmed my suspicion that the soil wasn’t drying adequately. I placed yellow sticky traps in the pot to catch adults. Most importantly, I disciplined myself to water only when the top 2-3 inches of soil were completely dry, which now took nearly three weeks.
- Days 11-14: The plant stabilized. No new pests, no new browning. It even showed a subtle, new unfurling leaf—the ultimate sign of acceptance. It had successfully acclimated to the indoor environment.
Key Lessons from the Pitfalls I Faced
My mistakes were my best teachers. Assuming one humidity solution (the pebble tray) would be sufficient was my first error. Plant grouping is far more effective. My second error was almost misdiagnosing the leaf tip browning as a water issue rather than a humidity issue. Learning to read the specific symptom—localized tip burn versus widespread yellowing—is crucial. Finally, I learned that winter care for Chinese Evergreens is less about active nurturing and more about disciplined neglect: less water, no fertilizer, and vigilant observation.
Optimizing Long-Term Winter Care
Once acclimated, Aglaonema care is simple. Water sparingly, perhaps only once a month. Cease all fertilization until spring. Dust the leaves regularly to maximize the limited light they receive. Rotate the pot a quarter turn weekly to ensure even growth. This routine ensures your plant doesn’t just survive but remains healthy.
Addressing Your Top Concerns
What if I see more leaves yellowing after the move? Some leaf loss is normal as the plant adjusts to lower light. Focus on the new growth. If yellowing is widespread and moist, you’re likely overwatering. Let the soil dry out deeply.
Can I put my Aglaonema in a windowless bathroom? While Aglaonemas tolerate low light, a windowless room is too extreme. They need some ambient natural light to photosynthesize. A bathroom with a bright window is excellent due to the humidity, but without any light, the plant will slowly decline.
How do I know if pests are coming from the plant or my home? Inspection during the outdoor preparation phase is key. Quarantining a new plant or one coming indoors for 7-10 days away from other houseplants is a smart practice. This isolates any potential problems.
Bringing your Aglaonema indoors for winter is a test of patience and observation, not just a physical task. By starting early, acclimating gradually, and tuning into your plant’s signals over those first critical weeks, you transform a stressful event into a smooth seasonal transition. The reward is a lush, vibrant companion that graces your home all winter long, ready to thrive outdoors again when the warm weather returns.





