 bluename
 How to Transition Aglaonema From LECA to Soil: What I Learned After Killing Three Plants
If you're reading this, chances are you've got an Aglaonema sitting in LECA right now. Maybe it's been thriving. Maybe it's been sulking. Either way, you're wondering whether moving it into soil is a good idea, and if so, how to do it without sending the plant into shock.
I've been there. I killed three Aglaonemas before I figured out the right way to transition one from LECA to soil. Two rotted within ten days. One just... gave up. No yellowing, no warning. Just collapsed.
So let me give you the short answer upfront. The safe way to transition an Aglaonema from LECA to soil is to do it gradually over two weeks, keep the root ball slightly moist but never soggy, use a chunky airy mix, and resist the urge to water on a schedule. Patience matters more than technique here. If you rush it, you'll lose the plant.
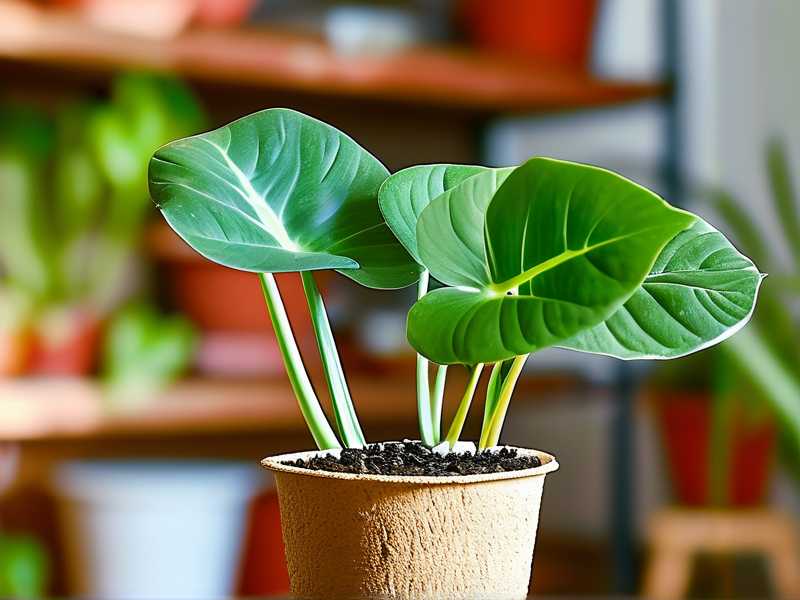
Here's exactly how I did it the fourth time, step by step, including what I observed over those two weeks and the mistakes I kept making along the way.
Why Aglaonema Grows Well in LECA in the First Place
LECA, or lightweight expanded clay aggregate, gives roots constant access to oxygen while holding moisture in its pores. It's basically a middle ground between water culture and soil.
Aglaonemas love that balance. Their roots are thick and fleshy, and they hate sitting in dense, wet media. In LECA, they get moisture without suffocation. That's why so many people move their Aglaonemas to LECA and never look back.
But LECA has downsides. It dries out fast in dry indoor air. It offers zero nutrients unless you're feeding regularly. And honestly, some people just get tired of the whole hydroponic routine. I did. I wanted to go back to soil because it felt simpler for my lifestyle, even though plenty of people would argue the opposite.
So the transition isn't about LECA being bad. It's about matching your plant to your routine.
The Real Reason Most Transitions Fail
I need to say this clearly, because it's the single biggest reason Aglaonemas die during this process.
90% of indoor plants die from overwatering. Not underwatering. Not bad light. Overwatering.
During a LECA-to-soil transition, the roots are already stressed. They've been adapted to a high-oxygen environment. Suddenly burying them in moist soil creates a shock. If that soil stays wet for days, the roots rot before they can adapt.
I learned this the hard way. My first attempt, I watered the soil thoroughly after potting, just like you'd do with a fresh nursery plant. The Aglaonema was dead in eight days. Mushy stem, foul smell, the whole nightmare.
The fix is simple but feels wrong: water lightly at first, almost like you're underwatering. More on that below.
What You'll Need Before You Start
Gather these before you touch the plant. Trust me, you don't want to be scrambling mid-transition.
- A chunky soil mix. I use roughly 50% potting soil, 30% perlite, and 20% orchid bark. The RHS recommends free-draining mixes for Aglaonema, and that advice saved my fourth plant.
- A pot with drainage holes. Terracotta or a breathable plastic pot works well.
- Clean scissors or shears.
- A bowl of room-temperature water for rinsing roots.
- Gloves if you don't like getting your hands dirty, though I never bother.
One more thing: pick a pot that's only slightly larger than the root ball. Too big means too much wet soil around the roots. That's a recipe for rot.
Step-by-Step: My Two-Week Transition Method
Days 1–2: Remove the LECA and Inspect the Roots
Gently pull the plant out of its LECA container. You'll probably see roots wrapped around clay pebbles. Don't yank. Soak the root ball in room-temperature water for about 20 minutes. The LECA will loosen on its own.
Once the pebbles come off, rinse the roots under a gentle stream. Look for any brown, mushy, or smelly roots. Those are dead. Cut them off with clean scissors. Healthy roots should be firm and pale.
This is also when you'll notice if your plant already had root damage from LECA. I've seen this happen when people let the LECA dry out too long between waterings. If half the roots are gone, expect a longer recovery.
Days 3–4: Let the Roots Rest
Here's the part almost everyone skips. After rinsing, I let my Aglaonema sit bare-root in a shaded spot for about 48 hours.
Why? Because the roots need to dry slightly and adjust to not having constant moisture around them. This also lets any cuts callous over, which reduces the chance of rot once they hit soil.
During this time, keep the plant out of direct sun. A spot near a north-facing window works fine. The leaves might droop a little. That's normal. Don't panic and don't water it.
Day 5: Pot It Up
Now for the actual potting. Fill the bottom third of your pot with the chunky mix. Place the plant so the crown, where the stems meet the roots, sits just above the soil line. Burying the crown is a common mistake and leads to stem rot.
Backfill around the roots gently. Don't press the soil down hard. You want air pockets in there. A light tap on the pot is enough to settle things.
Here's the counterintuitive part: do not water it thoroughly. I mist the top layer of soil just enough to settle the dust. That's it. The roots are still adapting. They don't need a soaking.
Days 6–10: The Critical Waiting Period
This is where most people mess up. The soil looks dry on top. Your instinct screams "water it." Don't. Not yet.
For the first five days after potting, I keep the soil barely moist. I check with a wooden skewer. If it comes out clean, the soil is dry enough. If it's damp, I wait.
Around day 7, I give the plant its first light watering. Just enough to moisten the soil, not drench it. I pour slowly around the edges of the pot, not directly at the base of the stems.
During this window, my Aglaonema's leaves softened slightly. A couple of lower leaves yellowed and dropped. That's normal transplant stress. The plant is shedding what it can't support while it rebuilds its root system.
Days 11–14: Watching for New Growth
By day 12, I noticed something encouraging. A new leaf was starting to unfurl at the center of the plant. Tiny, pale green, but definitely new.
That's the signal that the roots have started to work in soil. Once you see new growth, you can shift to a more normal watering routine. Still let the top two inches of soil dry out between waterings. Aglaonemas are forgiving of drought, not of wet feet.
By the end of week two, my plant was stable. No more leaf drop. The remaining leaves perked back up. The transition worked.
The Three Newbie Mistakes That Kill Aglaonemas During This Transition
Mistake 1: Overwatering
I already touched on this, but it deserves repeating. The number one killer is overwatering. People see a drooping plant and think "it needs water." During a transition, drooping usually means shock, not thirst.
Water lightly for the first ten days. Let the soil dry more than you think is safe. According to the AHS, Aglaonemas are far more tolerant of dry soil than soggy soil. That matches everything I've experienced.
Mistake 2: Bad Lighting
Aglaonemas are not low-light plants in the way people assume. They survive in low light, but they don't thrive. During a transition, they need bright, indirect light to fuel root recovery.
I made this mistake with my second plant. I put it in a dark corner because I thought it needed to "rest." It didn't grow for three weeks, then died. Bright indirect light near an east or north window is ideal. No direct sun, which will scorch the leaves.
Mistake 3: Using the Wrong Pot
A pot that's too large holds too much soil, which holds too much moisture. That's a death sentence during a transition.
I once potted a small Aglaonema into a six-inch pot because I thought it would "grow into it." It rotted in twelve days. Now I use a pot that's barely an inch wider than the root ball. It looks almost too small. That's correct.
Also, always use a pot with drainage holes. Always. No exceptions.
What the Two-Week Observation Actually Looked Like
Let me be specific about what I saw, because "watch for signs" is vague advice.
Days 1–3: Normal. The plant looked fine after rinsing. Maybe slightly wilted by day 3.
Days 4–7: Mild yellowing on two lower leaves. One dropped. The remaining leaves felt a bit soft. No new growth. I resisted watering.
Days 8–10: The yellowing stopped. Leaves firmed back up slightly. The soil was drying slowly. I gave one light watering on day 8.
Days 11–14: New leaf bud visible on day 12. The plant looked stable. I started a normal watering routine: water when the top two inches of soil are dry.
That's it. No dramatic recovery. No instant success. Just slow, steady adjustment. That's how Aglaonemas work.
A Few Things I Wish I'd Known Sooner
LECA roots and soil roots are different. When you transition, the plant has to grow new soil-adapted roots. That takes time. Don't expect instant results.
Don't fertilize during the transition. Wait at least a month. The roots are too fragile for fertilizer salts.
Humidity helps. I run a small humidifier nearby during the transition weeks. Aglaonemas appreciate 50–60% humidity, and it reduces stress on the leaves.
If the plant drops more than three leaves, something's wrong. Check the roots. If they're mushy, cut them back, repot in fresh dry mix, and start over.
Frequently Asked Questions
Can I transition my Aglaonema from LECA to soil without killing it?
Yes, if you go slowly. The two-week method I described works. The key is to keep the plant slightly dry, give it bright indirect light, and use a chunky, well-draining soil mix. Rushing the process is what kills plants.
How often should I water after the transition?
Wait until the top two inches of soil are dry. Stick your finger in or use a wooden skewer. In a typical home, that's every 7–10 days. In winter, it's less often. Overwatering is still the biggest risk even after the transition is complete.
What if my Aglaonema keeps dropping leaves after moving to soil?
Some leaf drop is normal. More than three leaves in two weeks is a warning sign. Check the roots for rot. If they're brown and mushy, trim them, repot in fresh dry mix, and hold off on watering for at least five days.
Final Thoughts
Moving an Aglaonema from LECA to soil isn't complicated, but it's not instant either. The plant needs time to grow new roots, and you need patience to resist watering it too much.
I've killed three Aglaonemas learning this. The fourth one is now six months into soil and pushing out new leaves every few weeks. If I can do it, so can you.
Just remember the core rules: chunky mix, small pot, bright indirect light, and barely any water for the first ten days. Get those right, and your Aglaonema will make the switch without much drama.





