 bluename
 How to Care for Aglaonema Clusters: A Complete Guide to Division Preparation
I’ve been there. You bring home a lush, beautiful Aglaonema, and for a while, it’s the pride of your indoor jungle. But over time, that single, perfect plant transforms. It becomes a crowded, dense cluster spilling out of its pot. The growth seems to stall, the vibrant leaves might look a bit tired, and a nagging worry sets in: is my plant okay? How do I manage this tangle of stems and roots without causing harm? If this sounds familiar, you’ve come to the right place. The solution isn’t just a simple repotting; it’s the careful, rewarding process of division. And proper preparation is everything. In this guide, I’ll walk you through exactly how to care for Aglaonema clusters with a focus on division prep, sharing my own hands-on steps, a two-week observation log, and the mistakes I made so you can avoid them.
Understanding Your Aglaonema’s Clustering Nature
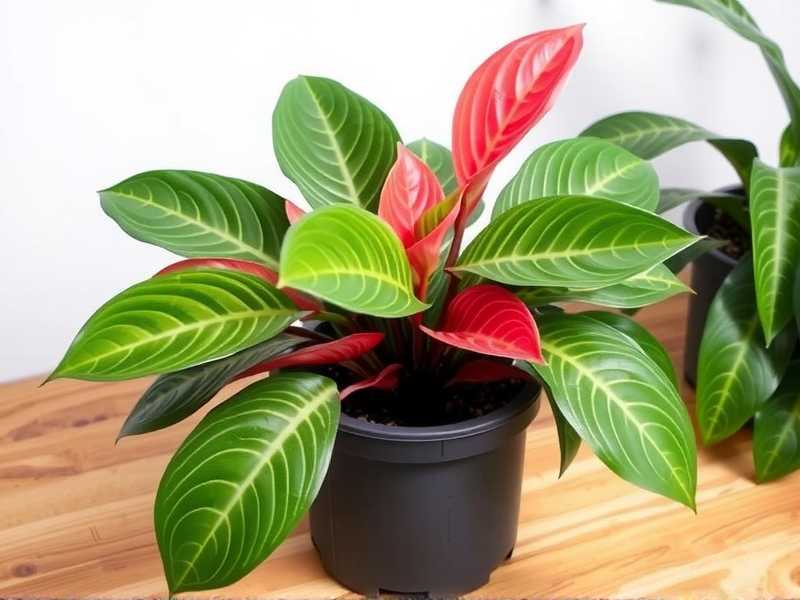
First, let’s understand why division is often the best care you can give. Aglaonemas, also known as Chinese Evergreens, are naturally clumping plants. They grow from a central root system called a rhizome, producing new shoots or “pups” around the mother plant. This is how they form those beautiful, full clusters. According to the Royal Horticultural Society (RHS), division is a primary and highly effective method for propagating these rhizomatous plants, helping to rejuvenate overgrown specimens and encourage fresh, vigorous growth.
An overcrowded cluster faces stiff competition for water, nutrients, and root space. This can lead to stunted growth, yellowing lower leaves, and increased susceptibility to pests. Division solves this by giving each new section its own resources to thrive. But rushing into it without the right preparation is the fastest way to stress—or even lose—your beloved plant.
The Essential Pre-Division Checklist: Getting It Right From the Start
My first attempt at division was a disaster. I saw the crowded pot, got excited, and yanked the plant out immediately. The result? A torn root ball and several shocked, struggling divisions. I learned the hard way that success happens long before the knife touches the roots. Here is the foolproof checklist I now swear by.
Timing is Non-Negotiable The absolute best time for division is during the active growing season: late spring through early summer. The warmer temperatures, longer daylight hours, and the plant’s natural growth surge mean it can recover from the stress of division much faster. I made my second attempt in mid-spring, and the difference in recovery speed was night and day.
Gather Your Tools and Supplies Having everything within arm’s reach is crucial. You’ll need:
- Fresh, well-draining potting mix: I use a premium aroid mix or make my own with equal parts peat/coco coir, perlite, and orchid bark. The American Horticultural Society (AHA) emphasizes the importance of a loose, airy medium for healthy root development in tropical plants like Aglaonema.
- Clean, sharp tools: A sterile knife, pruning shears, or even a handsaw for very tough clusters. I disinfect with rubbing alcohol to prevent disease transmission.
- New pots with drainage holes: Have these ready, sized appropriately for your new divisions (typically 1-2 inches larger in diameter than the root ball of the division).
- Supportive extras: A tarp or newspaper for the messy work, gloves, and stakes for support if needed.
The Critical Watering Step This was my “aha!” moment. One to two days before the planned division, give your Aglaonema a thorough, deep watering. The goal is to have the plant fully hydrated but the soil not sopping wet on division day. Moist soil holds together better, making it easier to work with the root ball and causing less root damage during separation. Dry soil crumbles and can desiccate fine roots instantly.
My Hands-On Division Preparation and Process
Here is the exact step-by-step process I followed, which led to a successful outcome.
Step 1: Gentle Extraction and Assessment I carefully tipped the pot on its side and, instead of pulling the stems, gently squeezed the pot and coaxed the entire root ball out. I placed it on my work tarp. The first look told me everything: a thick mat of roots circling the bottom and multiple distinct crowns of leaves pushing against each other. This confirmed division was the right call.
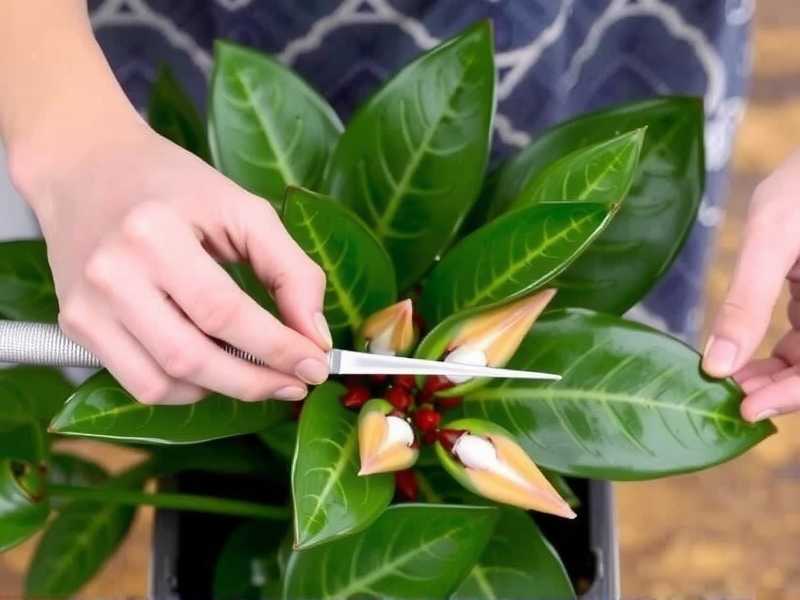
Step 2: The Delicate Separation I started by gently massaging away the outer soil to expose the root and rhizome structure. I looked for natural points of separation—areas where the stems fanned out from distinct rhizome sections. Using my fingers, I first tried to tease them apart. For stubborn, interconnected rhizomes, I used my sterilized knife to make a clean cut, ensuring each division had a healthy cluster of leaves, its own rhizome section, and a substantial amount of roots. I aimed for divisions with at least 3-5 stems each.
Step 3: Root Inspection and Pruning This is a vital care step often skipped. I inspected the root mass of each division. Using clean shears, I trimmed away any black, mushy, or excessively long, circling roots. This encourages the plant to produce new, healthy roots adapted to its new pot. I also trimmed away any yellowing or damaged leaves from the foliage to reduce stress on the plant.
Step 4: Potting and Initial Care I placed a layer of fresh potting mix in the bottom of each new pot. Holding a division in the center at the same depth it was previously growing, I filled in around the roots with more mix, gently tapping the pot to settle it without compacting. I watered each division thoroughly until water ran freely from the drainage holes. This “settling in” water helps eliminate air pockets around the roots.
The 2-Week Recovery Observation: What Really Happens
Patience is key after division. I placed my new Aglaonema divisions in a warm spot with bright, indirect light—no direct sun, which can scorch stressed plants. I kept the soil consistently moist but not waterlogged. Here’s my day-by-day log:
- Days 1-3: The plants looked a bit droopy and sad. This is normal transplant shock. I maintained humidity by grouping them together and resisted the urge to fertilize.
- Days 4-7: The drooping stabilized. No further wilting, but no new growth yet. I continued careful watering.
- Days 8-14: By the end of the second week, I noticed the first signs of success! The leaves perked up significantly, feeling firm to the touch. Most importantly, on the smallest division, I spotted a tiny, tightly rolled new leaf emerging from the center—a sure sign the plant had recovered from shock and was actively growing again. This was the confirmation that my preparation and technique had worked.
Common Pitfalls and How I Solved Them
- Pitfall 1: Dividing Too Small. My first failed attempt included a division with just one stem and a scant root system. It couldn’t sustain itself and died. Solution: Always ensure each division is robust enough—multiple stems and a healthy root mass are essential for survival.
- Pitfall 2: Overwatering After Division. In my anxiety, I kept the soil soggy, fearing underwatering. This led to the onset of root rot in one pot. Solution: I repotted that division into fresh, dry mix and adjusted my watering to only when the top inch of soil felt dry. It recovered.
- Pitfall 3: Wrong Light Conditions. I initially put a recovering division in a dim corner, thinking it needed “rest.” Growth completely stalled. Solution: I moved it to a spot with plenty of bright, filtered light, and within days, it resumed growing. They need energy to recover!
How long will my Aglaonema look sad after dividing? Expect some drooping or wilting (transplant shock) for the first 5-7 days. If the plant continues to decline past two weeks, reassess your watering and light conditions. Proper prep minimizes this period significantly.
Can I divide a small or young Aglaonema? It’s not recommended. Division is best for mature, healthy clusters that have outgrown their pots. A young plant likely won’t have multiple distinct rhizome sections to separate without causing severe damage.
Do I need to use rooting hormone on the divisions? For Aglaonema, it’s unnecessary and I don’t use it. These plants root readily from rhizome sections. Your focus should be on providing stable moisture, warmth, and indirect light, which are far more critical for success.
Caring for your Aglaonema cluster through division is one of the most satisfying aspects of plant parenthood. It transforms a single, crowded plant into multiple thriving specimens. The journey from a dense pot to several vibrant, independent plants underscores the importance of meticulous preparation—from timing and tool sterilization to the crucial pre-watering. By understanding the plant’s needs, following a clear, gentle process, and providing attentive aftercare, you not only solve the problem of overcrowding but also gain deeper insight into the resilient nature of these beautiful houseplants. The reward is a collection of healthy Aglaonemas, each with the space and resources to reach its full, lush potential.





