 bluename
 How to Care for Aglaonema in LECA: Full Guide
I remember the feeling all too well. You bring home a stunning Aglaonema, its lush, patterned leaves promising to brighten your space. For a while, it thrives. Then, the yellow leaves appear. The dreaded root rot sets in from overwatering, or maybe the soil becomes a compacted, lifeless brick. You’re left guessing—is it thirsty or drowning? If this cycle of hope and heartbreak sounds familiar, you’re not alone. I’ve been there, mourning more than one Chinese Evergreen to soggy soil. That’s why I made the switch to LECA, and it transformed how I care for my Aglaonema collection. This guide is my hands-on, two-week experiment journal, complete with mistakes, fixes, and the clear results that convinced me this is a superior method.
For those new to the concept, LECA (Lightweight Expanded Clay Aggregate) are those small, baked clay balls you might have seen. They don’t decompose or compact, creating a stable, airy structure for roots. The American Horticultural Society (AHS) notes that good aeration is critical for preventing root diseases, which are a leading cause of houseplant failure. LECA provides this perfectly. This method moves us from traditional soil to semi-hydroponics, where plants get water and nutrients from a reservoir. For moisture-loving but rot-prone plants like Aglaonema, it’s a game-changer.
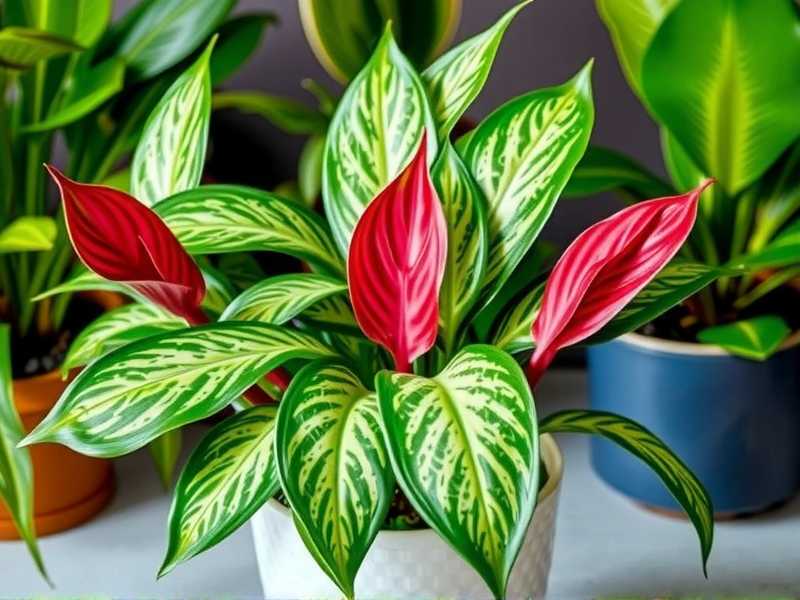
Why Aglaonema and LECA Are a Perfect Match
Aglaonema, or the Chinese Evergreen, is often touted as a low-light, easy-care plant. And it is—until water issues arise. Its roots appreciate consistent moisture but abhor sitting in water. This is the fundamental矛盾 that LECA solves.
In soil, achieving that balance is tricky. Water too little, and the roots dry; water too much, and they suffocate and rot. LECA creates a capillary system. The balls wick moisture upward to the roots, which then grow down toward the consistent water reservoir below. The roots in the LECA itself get plenty of oxygen, virtually eliminating the risk of overwatering rot. After my first successful transition, I saw my Aglaonema push out larger, more vibrant leaves at an accelerated rate. The plant was finally able to focus its energy on growth, not survival.
What You'll Need to Get Started
Gathering the right materials before you start is crucial for a smooth transition. Here’s my exact shopping list:
- LECA: I prefer medium-sized balls (about 8-12mm). Rinse them thoroughly in a colander until the water runs clear. This removes clay dust that can cloud your water.
- An Aglaonema Plant: Choose a healthy one. Transitioning a stressed plant adds unnecessary risk.
- Two Pots: One inner net pot (with plenty of drainage holes) and one outer cache pot without drainage holes. The net pot holds the plant and LECA, while the outer pot holds the water reservoir. Ensure there’s a 1-2 inch gap between the bottom of the net pot and the base of the cache pot.
- Nutrient Solution: This is non-negotiable. LECA is inert. I use a balanced, hydroponic nutrient formula designed for semi-hydroponics, as recommended by many resources from the Royal Horticultural Society (RHS) on soilless cultivation.
- pH Test Kit & pH Down Solution: Plants absorb nutrients best within a specific pH range (5.5-6.5 for most, including Aglaonema). Tap water is often too alkaline. I learned this the hard way.
- Watering Can & Measuring Tools: For mixing your nutrient solution accurately.
- Scissors & Chopstick: For root work and gently positioning the plant in the LECA.
My Step-by-Step Transition Process: A 2-Week Diary
This isn’t just theory. I documented every step with a beautiful Aglaonema ‘Silver Bay’ over a full two weeks.
Day 1: The Preparation and Bare-Rooting First, I soaked my rinsed LECA in plain water overnight. Meanwhile, I gently removed my Aglaonema from its nursery pot. Here came the most critical, nerve-wracking part: washing ALL the soil off the roots. I did this under a gentle stream of lukewarm water, patiently teasing the soil away. It felt brutal, but it’s essential to prevent soil-borne pathogens from contaminating the new system. I trimmed any mushy or excessively long roots with sterilized scissors. I then soaked the bare roots in a mild nutrient solution for about 30 minutes to give them a head start.
Day 1: Planting in LECA I placed a layer of pre-soaked LECA in the net pot, about one-third full. I set the plant’s roots over this layer, using a chopstick to spread them out gently. Then, I carefully poured more LECA around the roots, tapping the pot to settle the balls without compacting them. I added my pH-adjusted nutrient solution to the outer pot until the water level was about one-third the height of the inner pot. I placed the net pot inside. The key is that the water should not touch the root ball directly at first; the LECA will wick moisture up.
Days 2-4: The First Crisis – pH Shock My plant looked okay, but I noticed the very tips of a few leaves browning. I checked my reservoir and realized I had only pH-adjusted the initial mix but not tested my tap water’s starting point. It was at 8.0! The high pH was likely locking out nutrients, causing tip burn. This was my first major “坑” (pitfall). I immediately flushed the system with fresh, properly pH-adjusted water (5.8) and refilled with a fresh, mild nutrient solution. I marked my calendar to check pH every time I refilled.
Days 5-7: Signs of Adjustment The browning stopped. The existing leaves perked up and looked glossier. No signs of wilting or drooping, which was a huge relief. This meant the roots were starting to access the water wicked up by the LECA.
Days 8-10: The First New Growth A moment of truth! I spotted a tiny, tightly rolled spear of a new leaf emerging from the center of my ‘Silver Bay’. This was the clearest signal that the plant had not just survived the shock but was actively thriving. The roots had successfully adapted to their new aquatic-friendly environment.
Days 11-14: Establishing the Routine By the end of the second week, the new leaf was unfurling. I performed my first reservoir refresh, discarding the old solution (to prevent salt buildup), rinsing the outer pot, and adding a fresh batch of pH-balanced nutrients. The plant structure was firm, and the colors were vibrant. The transition was a clear success.
Maintaining Your Aglaonema in LECA Long-Term
The hard work of transition is over, but long-term care is what makes this method sustainable.
1. Watering and Nutrient Refresh: Unlike soil, you don’t water on a schedule. You monitor the reservoir. I let the water level drop to near-empty over 1-2 weeks, then I flush the system. I pour fresh water through the top of the LECA to rinse out any accumulated salts, let it drain into the reservoir, and then discard all of that water. I then add a fresh batch of nutrient solution to the one-third level. This cycle provides nutrients and prevents toxic buildup.
2. Fertilizing Schedule: I use a weak nutrient solution with every reservoir refill. This is called the “constant feed” approach in hydroponics and provides a steady, gentle supply of food. Every 3-4 months, I use plain, pH-adjusted water for one cycle to give the roots a slight flush.
3. Light and Environment: Your Aglaonema’s light needs don’t change. Mine sits in bright, indirect light. LECA doesn’t insulate roots like soil, so avoid cold drafts. The consistent moisture from the reservoir can slightly increase local humidity, which Aglaonemas love.
Troubleshooting Common Issues
Even with the best setup, you might encounter hurdles. Here’s what I faced and how I fixed it.
- Yellowing Leaves: Initially, I panicked. In soil, this means overwatering. In LECA, during transition, it can mean the old soil roots are dying back as the plant grows new “water roots.” This is normal. Remove only the fully yellow leaves. If it happens later, check your nutrient strength—it might be too strong or too weak.
- Mineral/Salt Buildup: White crusty deposits on the LECA or pot rim. This is from minerals in your water and nutrients. This is why flushing is so important. I scrub the deposits off during my monthly deep-clean.
- Algae Growth: If light hits your reservoir, algae will grow. It’s mostly an aesthetic issue but can compete for nutrients. Use an opaque outer pot. I swapped my clear glass one for a ceramic cache pot, and the problem vanished.
- Slow Growth or Pale Leaves: This almost always points to a nutrient or pH issue. Double-check that you’re using hydroponic nutrients (not soil fertilizers) and that your pH is in the optimal 5.5-6.5 range. Correcting my pH was the single biggest factor in my plant’s growth spurt.
Will all the soil roots die during the transition? Yes, and that’s expected. The plant will shed its old soil-adapted roots and grow new, thicker “water roots” designed to absorb nutrients directly from the solution. Don’t be alarmed by some leaf loss or a pause in growth; it’s redirecting energy underground.
How often do I really need to check the pH? In the beginning, check it every time you refresh the reservoir until you understand your water’s behavior. Now, I check it every 2-3 refills. It takes 30 seconds and prevents 90% of potential problems. It’s the most important maintenance task.
Can I use this method for other houseplants? Absolutely. I’ve successfully transitioned Monstera, Philodendron, and even some succulents to LECA. The principle is the same: research if the plant tolerates consistent moisture, and always transition a healthy specimen. Aglaonema is one of the most forgiving and rewarding to start with.
Switching my Aglaonema to LECA felt like unlocking a cheat code for plant care. The constant guesswork was replaced by a simple, observable system. While the initial setup requires attention to detail—especially with pH—the long-term payoff is immense: faster growth, no more root rot, and a truly low-maintenance routine. Seeing that new leaf unfurl after just two weeks was all the proof I needed. If you’re ready to break free from the watering cycle and give your Chinese Evergreen the most stable foundation possible, LECA is a journey worth taking.





