 bluename
 How to Care for Aglaonema in Rockwool: A Grower’s 2-Week Trial and Guide
I love my Chinese Evergreens, or Aglaonema. They’re tough, beautiful, and thrive on my sometimes-forgetful care. But as a plant enthusiast always tinkering with different growing methods, I kept hearing about how to care for Aglaonema in rockwool. Hydroponic and semi-hydroponic setups were popping up everywhere, and rockwool, that fibrous, soil-less medium, seemed to be at the center of it. I was intrigued but skeptical. Could my low-maintenance, soil-loving Aglaonema really adapt to this inert, water-focused environment? The idea of clearer root health monitoring and potentially faster growth was tempting, but the horror stories of overwatering and nutrient burn in rockwool held me back. That’s the core dilemma, isn’t it? We want to try new, efficient methods, but we’re terrified of killing our favorite plants in the process.
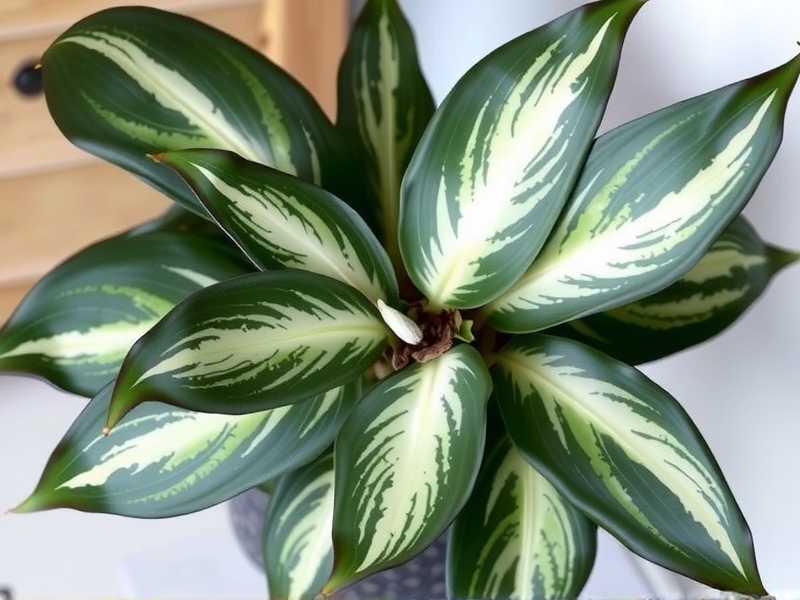
So, I decided to turn my kitchen into a mini lab. I took a healthy, established Aglaonema ‘Silver Bay’ from its comfortable potting mix and transitioned it into a rockwool cube system. For two weeks, I documented every step, every change, every mistake, and every small victory. This guide is the result of that hands-on experiment. I’ll walk you through the exact process, what to watch for, and how to avoid the pitfalls I stumbled into, so you can confidently explore Aglaonema rockwool cultivation for yourself.
Why Consider Rockwool for Your Aglaonema?
First, let’s talk about why you’d even bother. Soil is perfectly fine, after all. Rockwool, made from spun basalt rock fibers, offers a unique set of advantages that can be a game-changer for certain growers.
Its primary benefit is unparalleled control. Rockwool itself is inert. It contains no nutrients, which means you become the sole provider. This eliminates guesswork about soil quality and allows for precise nutrient management tailored to your plant’s specific growth stage. According to principles often cited by advanced hydroponic associations, this precision can lead to optimized uptake and potentially more vigorous growth.
Furthermore, its structure is a dream for root health. It holds an ideal balance of air and water—about 80% air space when saturated—preventing the roots from ever sitting in stagnant, oxygen-deprived conditions. This addresses the number one killer of houseplants: root rot from overwatering. For Aglaonema, which enjoys consistent moisture but despises “wet feet,” this can be a significant advantage. You’re essentially creating a perfectly aerated, custom environment for the roots.
My Step-by-Step Transition Process
This isn’t a “just plop it in” operation. A careful transition is critical for success. Here’s exactly what I did.
Preparing the Plant and the Medium
I started with a robust Aglaonema ‘Silver Bay’ that had been in a well-draining aroid mix for over a year. Health is non-negotiable; a stressed plant won’t handle the transition well. My rockwool of choice was a 4-inch starter cube. Before anything, you must prepare the rockwool. Straight from the package, it’s too alkaline for plants.
My process was simple but vital: I soaked the cube in pH-adjusted water for 24 hours. I aimed for a pH of 5.5 to 6.0, which is the sweet spot for nutrient availability in soilless systems. I used a digital pH meter (a cheap one works) and a few drops of pH Down solution. This pre-soak balances the pH and ensures the cube is fully, evenly saturated.
The Transplant: Gentle is the Key
After its long soak, I gently squeezed the rockwool cube to remove excess water. We want it moist, not dripping wet. Then came the delicate part: removing my Aglaonema from its pot. I washed the root ball thoroughly under lukewarm water until every speck of soil was gone. This is messy but essential. Any leftover soil can introduce pathogens or clog the porous rockwool.
With clean, bare roots, I carefully spread them over the pre-made hole in the rockwool cube and gently nestled the plant in place. I didn’t pack it tightly; the fibers should just support the stem. I then placed the cube into a net pot, which itself sat in an outer reservoir pot. This setup allows for bottom watering and crucial air flow to the root zone.
Initial Setup and First Feed
For the first watering, I used a very mild nutrient solution. Experts from resources like the Hydroponic Society of America often recommend starting transplants at 1/4 to 1/2 strength to avoid shocking the roots. I mixed a balanced, all-purpose hydroponic nutrient to an Electrical Conductivity (EC) of about 0.8 mS/cm and pH 5.8. I poured this into the outer reservoir, letting the rockwool wick it up from the bottom, ensuring the roots would seek out the moisture and nutrients.
The Crucial First 2 Weeks: Observation and Adjustment
This is where the real learning happened. I monitored my plant daily, and here’s the timeline of what I saw and did.
Week 1: The Adjustment Period
The first 3-4 days were nerve-wracking. The plant looked… fine. A little droopy, perhaps, but no dramatic wilting. This is normal. The roots are acclimating to their new, watery world. I kept the reservoir filled with the mild nutrient solution, ensuring the bottom inch of the rockwool cube was in contact with it. The top of the cube began to dry out slightly between refills, which is exactly what you want—it encourages root growth downward and prevents algae growth on the surface.
By day 5, I noticed the very tips of two older leaves yellowing slightly. Panic set in. Was this nutrient burn? Rot? After some research and checking the roots (gently lifting the cube), I diagnosed it as minor transplant shock and possibly a calcium uptake issue. Rockwool requires consistent pH management. My pH had drifted up to 6.5! I corrected it back to 5.8 with fresh solution. The yellowing stabilized and didn’t spread.
Week 2: Signs of Success and a Nutrient Lesson
Entering the second week, the droopiness was gone. The stems felt firm. The real victory came on day 10 when I spotted a bright, white new root tip poking out of the bottom of the rockwool cube! This was the clear signal the plant had accepted its new home and was actively growing.
I also performed my first full nutrient change. Stagnant solution is a recipe for trouble. I emptied, cleaned the reservoir with hydrogen peroxide, and refilled it with a fresh solution at a slightly higher EC of 1.2 mS/cm, as the plant was now actively feeding. This is where maintaining Aglaonema in a hydroponic medium becomes an active practice, not a passive one. You’re not just watering; you’re managing a system.
Common Pitfalls I Encountered (And How to Fix Them)
I made mistakes so you don’t have to. Here are the big ones.
Pitfall 1: Ignoring pH Drift. My early leaf-tip issue was a pH problem. Rockwool doesn’t buffer pH like soil does. It can creep upward over time. Solution: Check and adjust the pH of your reservoir solution every 2-3 days. Keep it between 5.5 and 6.2 religiously.
Pitfall 2: Letting the Reservoir Go Stagnant. After a week, the old nutrient solution becomes depleted and can foster root pathogens. Solution: Adopt a weekly “flush and refresh” routine. Dump the old solution, rinse the reservoir, and add fresh, pH-balanced nutrients. Your plant will thank you.
Pitfall 3: Over-Saturation of the Cube. Initially, I was afraid the cube would dry out, so I kept the reservoir too full. The top of the cube stayed soggy. Solution: Practice the “partial dry-back.” Allow the reservoir to empty completely for 12-24 hours so the top half of the rockwool dries noticeably before refilling. This oxygenates the roots and strengthens the root system.
Long-Term Care Routine for Aglaonema in Rockwool
Once past the transition, care becomes a consistent rhythm.
Watering and Nutrient Management: Follow the “fill, deplete, dry briefly, refill” cycle. Use a balanced, complete hydroponic nutrient formula. During active growth (spring/summer), I maintain an EC of 1.2-1.8. In winter, I drop it to 0.8-1.0. Always, always pH the water.
Light and Environment: Aglaonema’s needs don’t change. Bright, indirect light is perfect. They still hate cold drafts and direct, scorching sun. The benefit of rockwool is that their root zone temperature will be more stable, which they appreciate.
Pruning and Maintenance: Remove any yellowing leaves as they appear. You can gently flush the cube with plain pH-adjusted water every month or so to prevent any minor salt buildup. Watch for roots filling the net pot; they might eventually need a larger cube or system.
Frequently Asked Questions
Can I propagate Aglaonema directly in rockwool? Absolutely, and it’s fantastic for that. Take a stem cutting, dip it in rooting hormone, and insert it into a pre-soaked 1-inch rockwool starter plug. Keep the plug consistently moist (not sitting in deep water) and in high humidity. I’ve had roots develop in under two weeks using this method.
How often do I really need to change the nutrient solution? For a stable system, a complete change once a week is the gold standard. In between, if the reservoir gets low, you can top it off with plain pH-adjusted water. But don’t skip the weekly refresh—it’s the most important maintenance task.
My plant’s leaves are losing variegation and becoming mostly green. What’s wrong? This is almost always a light issue, not a rockwool issue. Your Aglaonema isn’t getting enough bright, indirect light. Move it to a brighter location (without direct sun) to encourage those beautiful patterns to return. The rockwool system supports healthy growth, but it can’t compensate for insufficient light.
Seeing that first white root emerge from the cube was a moment of pure gardener’s joy. The transition to rockwool isn’t without its learning curve—it demands more attention to detail than simply watering a pot of soil. However, the payoff is a profound sense of connection and control over your plant’s health. You become an active participant in its nutrition. For the plant enthusiast who loves to observe, tweak, and optimize, growing Aglaonema in rockwool is an incredibly rewarding journey. It transforms care from a routine into a fascinating dialogue with your plant. Start with a healthy specimen, mind your pH and nutrients, learn from the dry-back cycle, and you might just find your Aglaonema thriving in ways you never expected.





