 bluename
 How to Care for Aglaonema Seedlings: A Complete Germination Guide for Lush, Healthy Plants
There’s a special kind of magic in growing a plant from its very beginning. For years, I’ve nurtured mature Aglaonemas, but the idea of starting from a tiny seed felt daunting. I’d heard stories of poor germination, moldy seeds, and seedlings that just wouldn’t thrive. If you’re like me, you want that satisfaction but worry about the complexity. The core challenge isn’t just getting a seed to sprout; it’s understanding the precise, tender care Aglaonema seedlings need in those first critical weeks to become the stunning, variegated beauties we adore. After multiple attempts, failures, and finally, success, I’ve documented my complete, step-by-step journey. This guide is the result of my hands-on experience, including the mistakes I made and the simple solutions that finally led to a tray of vibrant, healthy seedlings.
My Toolkit: Gathering the Right Supplies for Success
You can’t build a house without a foundation, and you can’t successfully germinate seeds without the right materials. My first attempt failed because I used generic, heavy potting soil. It retained too much water and doomed my seeds to rot before they even had a chance.
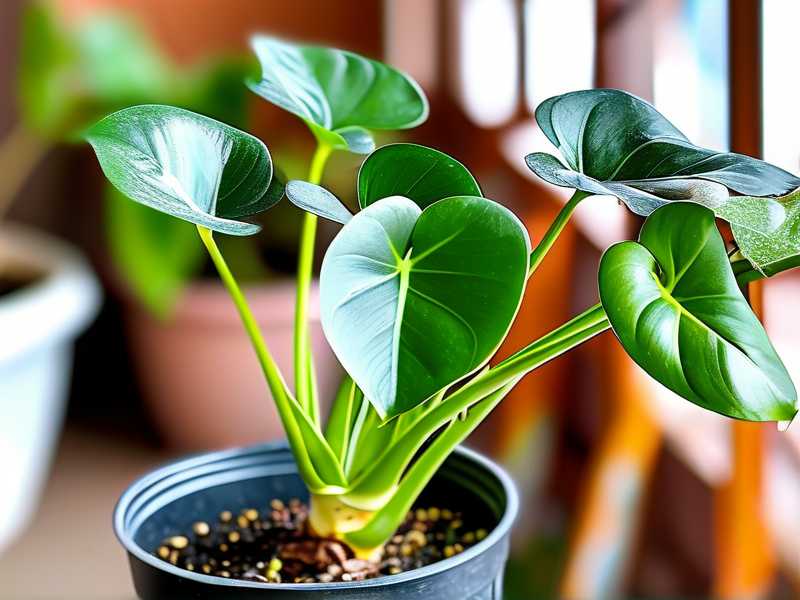
- Seeds: Source is everything. I used fresh seeds from a reputable online specialty retailer. Older or improperly stored seeds have drastically lower viability. According to the American Horticultural Society (AHS), seed freshness is the single greatest factor influencing germination rates for tropical plants.
- Growing Medium: This is critical. I switched to a sterile, soilless seed-starting mix. It’s light, fluffy, and provides perfect drainage and aeration. I also had great results with a 50/50 blend of peat moss and perlite.
- Containers: I used a clear plastic propagation tray with a humidity dome. The transparency allowed me to monitor moisture and root development without disturbing the seeds. Small cell packs or even clean yogurt cups with drainage holes work too.
- Environment Control: A seedling heat mat was my game-changer. Aglaonema germination requires consistent warmth. I also used a grow light to ensure consistent, gentle light once they sprouted.
The Step-by-Step Germination Process: My Two-Week Diary
Here is the exact process I followed, day by day, for starting Aglaonema from seeds.
Day 1: Preparation and Sowing I began by moistening my seed-starting mix until it felt like a wrung-out sponge—damp but not dripping. I filled the cells of my tray and gently pressed the mix to eliminate large air pockets. Aglaonema seeds aren’t tiny; they’re small berries. I pressed each seed about 1/4 inch deep into the mix, following advice from the Royal Horticultural Society (RHS) which recommends sowing at a depth roughly twice the seed’s diameter. I lightly covered them, misted the surface gently, and placed the clear dome on top. The tray went onto the heat mat, set to a constant 75-80°F (24-27°C), in a bright spot without direct sun.
Days 2-7: The Waiting Game and First Crisis My routine was simple: lift the dome daily for 10 minutes to allow fresh air circulation and prevent fungal growth. I only misted if the surface looked dry. On Day 5, I noticed my first mistake—a few cells showed faint white fuzz (mold). I had over-misted. Immediately, I removed the dome for a few hours to reduce humidity, carefully scraped off the affected surface layer with a spoon, and sprinkled a tiny amount of cinnamon (a natural fungicide) on those spots. I adjusted my misting to only every other day. This quick intervention saved the rest of the tray.
Days 8-14: Sprouts and Sighs of Relief The first green hook broke the surface on Day 10! It was a thrilling moment. Over the next four days, about 70% of the seeds followed. I removed the humidity dome permanently at this point to give the seedlings air and prevent “damping off,” a fatal fungal disease. The heat mat remained, but I now introduced my grow light, positioning it about 6 inches above the seedlings for 12-14 hours a day. The seedlings leaned slightly at first, but within a day they straightened up toward the light source.
Nurturing Your Newborn Seedlings: Light, Water, and Food
Once sprouted, caring for young Aglaonema becomes a delicate balance. They are incredibly vulnerable.
- Light: Bright, indirect light is non-negotiable. My grow light provided consistent intensity without the scorching risk of a windowsill. Direct sun will quickly burn their tender leaves.
- Watering: This was my hardest lesson. I killed my first batch by overwatering. Seedlings need consistent moisture but despise wet feet. I adopted the “bottom-watering” method: placing the tray in a shallow dish of water for 10-15 minutes, allowing the mix to wick moisture up from below. This kept the surface drier and prevented stem rot. I only did this when the mix felt dry to the touch an inch down.
- Feeding: No fertilizer yet! Their initial energy comes from the seed. The AHS notes that feeding seedlings too early can burn their developing roots. I waited until I saw the second set of “true” leaves (which look more like classic Aglaonema leaves, not the initial seed leaves) before applying a diluted, quarter-strength balanced liquid fertilizer.
Common Pitfalls and How I Solved Them
- Leggy Seedlings: If your seedlings grow tall, thin, and weak, they are desperate for more light. Mine did this briefly before I added the grow light. I lowered the light, and new growth became compact and sturdy.
- Yellowing Leaves: This signaled overwatering to me. I immediately stopped watering, allowed the mix to dry out more thoroughly between sessions, and ensured the tray had perfect drainage.
- Slow or No Growth: Consistent warmth is key. Before using the heat mat, growth was sporadic. The mat provided the steady tropical bottom heat Aglaonema seeds crave, synchronizing germination.
The Road Ahead: Potting and Long-Term Care
After about 8 weeks, when my seedlings had several true leaves and roots were visible at the drainage holes, I knew it was time to pot them on. I gently separated them, careful not to damage the delicate root systems, and potted each into a 3-inch pot with a well-draining aroid mix. I treated them like mature Aglaonemas from that point on, but with extra vigilance regarding moisture and light.
Will my variegated Aglaonema produce variegated seedlings? Not necessarily. Aglaonema varieties are often stable hybrids, but seeds can produce surprising results. My seeds came from a ‘Silver Bay’ plant, and the seedlings show a range of leaf patterns, from mostly green to nicely silver-speckled. It’s part of the fun of growing from seed!
How long until my seedlings look like a mature plant? Patience is essential. Aglaonemas are not fast growers. In ideal conditions, it will take 1-2 years for a seedling to develop into a small, bushy plant, and 3-4 years to resemble the full, lush specimens you see in stores.
Can I use seeds from my own plant? Absolutely, if your plant produces berries. Let the berries turn a bright red color on the plant, then harvest and clean the seed inside. Sow them immediately for the best chance of germination, as their viability decreases quickly once dried out.
Watching a life cycle begin on your windowsill is one of the most rewarding experiences in gardening. Germinating Aglaonema seeds taught me more about the plant’s needs than any care guide for a mature plant ever could. It requires attention to detail—warmth, sterile medium, careful watering—but none of it is overly complex. By providing consistent warmth, resisting the urge to over-love them with water, and giving them plenty of gentle light, you’ll be amazed at the resilient little plants that emerge. Start with a few seeds, learn from the process, and soon you’ll have a unique collection of Aglaonemas, each with its own story, grown by your own hand.





